
How to configure the map-based tracking assistant in BVMS 11.0?
BVMS is a data-driven video management system that supports predictive solutions by establishing a decision center delivering actionable insights to customers.
The latest version offers a map-based tracking assistant and improved geographical awareness with online maps. Read on to learn how to configure the map-based tracking assistant.
The map-based tracking assistant requires a license. Before beginning, check the license in Configuration Client by accessing the License Inspector, which is found under the Tools menu.
The value of the Online map and Map-based tracking assistant licenses must list "True" in the License Limit column.
Step-by-step guide
To enable the map-based tracking assistant feature:
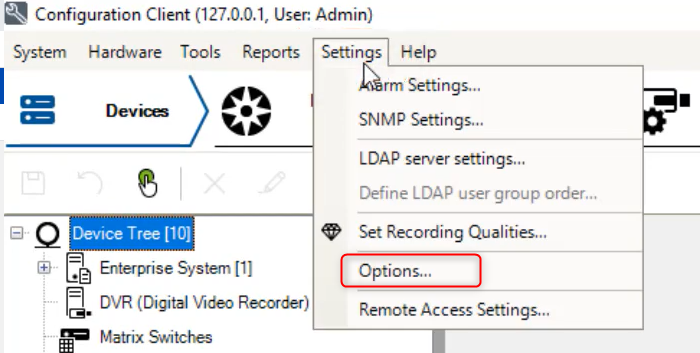
- Click Settings and select Options from the drop-down list.
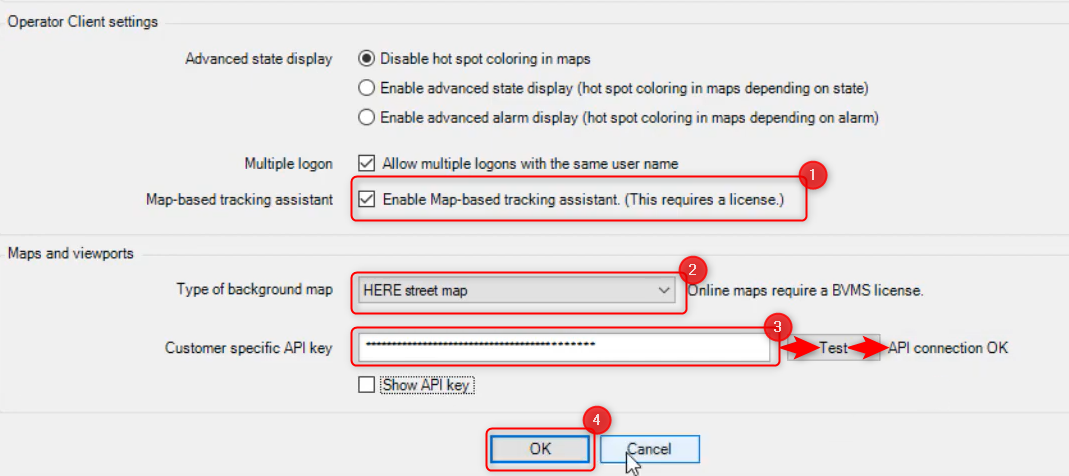
- Enable the map-based tracking assistant and select the map type from the drop down list.
- Enter the customer specific API received in the email with the license order and click the Test button. The API connection status should be OK.
Please be careful not to confuse the API key with the App ID that must be introduced within the "Customer specific API key" field in Configuration Client.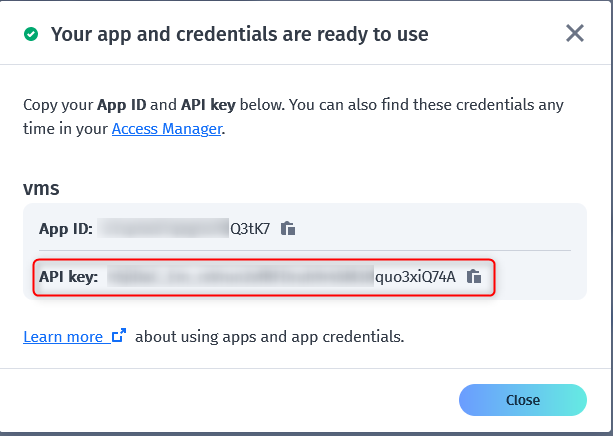
- Save and activate the settings.
Next, adjust the view area of PTZ cameras on the map:
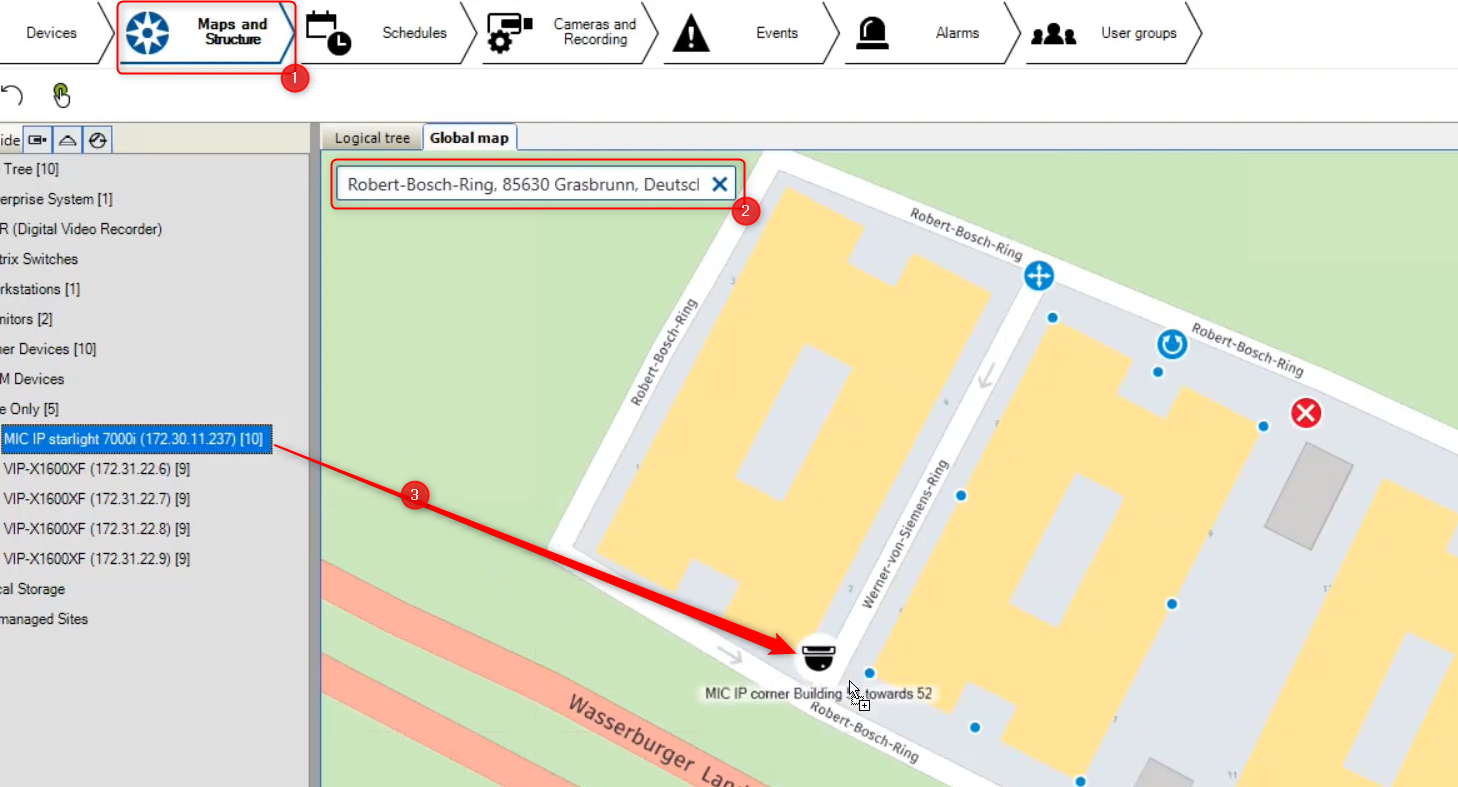
- Type in the location where the cameras are installed and adjust the map to fit the area surveilled by the cameras.
- Drag and drop PTZ cameras on the map where they are installed and adjust the reachable view by following the on-screen tips.
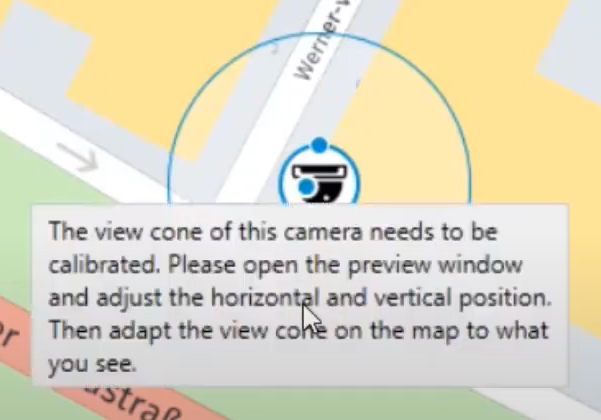
- Show a preview of the camera by clicking the eye button or right clicking the camera icon. The preview window shows the live camera image.
- Adjust the view cone on the map. The view cone should correspond to the direction the camera is looking (shown in the preview window).
- Next, drag and drop fixed cameras on the map and adjust the view cones based on the settings of the camera lens, including distance and horizontal field of view.

Then, create the map viewport in the logical tree.
- Click the Logical tree tab and select Add Map Viewport.
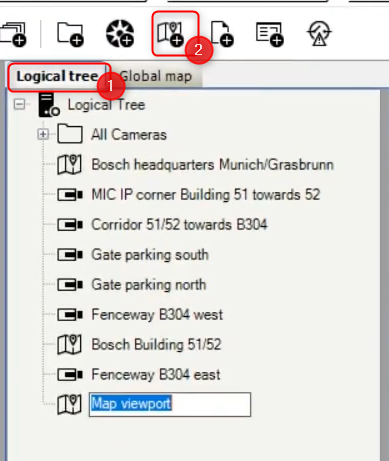
- Click the location indicated on the map and adjust the map to fit the area surveilled by the cameras.
- Right click on the Map viewport created and rename it.
- Save and activate the configuration.

A playlist on our YouTube channel provides tutorials on BVMS, including a video with step-by-step instructions on configuring and using the map-based tracking assistant.