
How to connect DIVAR IP to Remote Portal via System Manager?
🕒 This procedure takes in average ~ 3 min to complete
This article explains how can you connect a DIVAR IP to Remote Portal through DIVAR IP System Manager.
Step-by-step guide
If you converted your Remote Portal account to Single Key ID, see: How to convert the Remote Portal account to Single Sign-On ID (SSO: SingleKey ID)?
then, a technical password must be generated from your Remote Portal account.
Login into Windows on the DIVAR IP and open DIVAR IP System Manager from the DIVAR IP's Windows Desktop

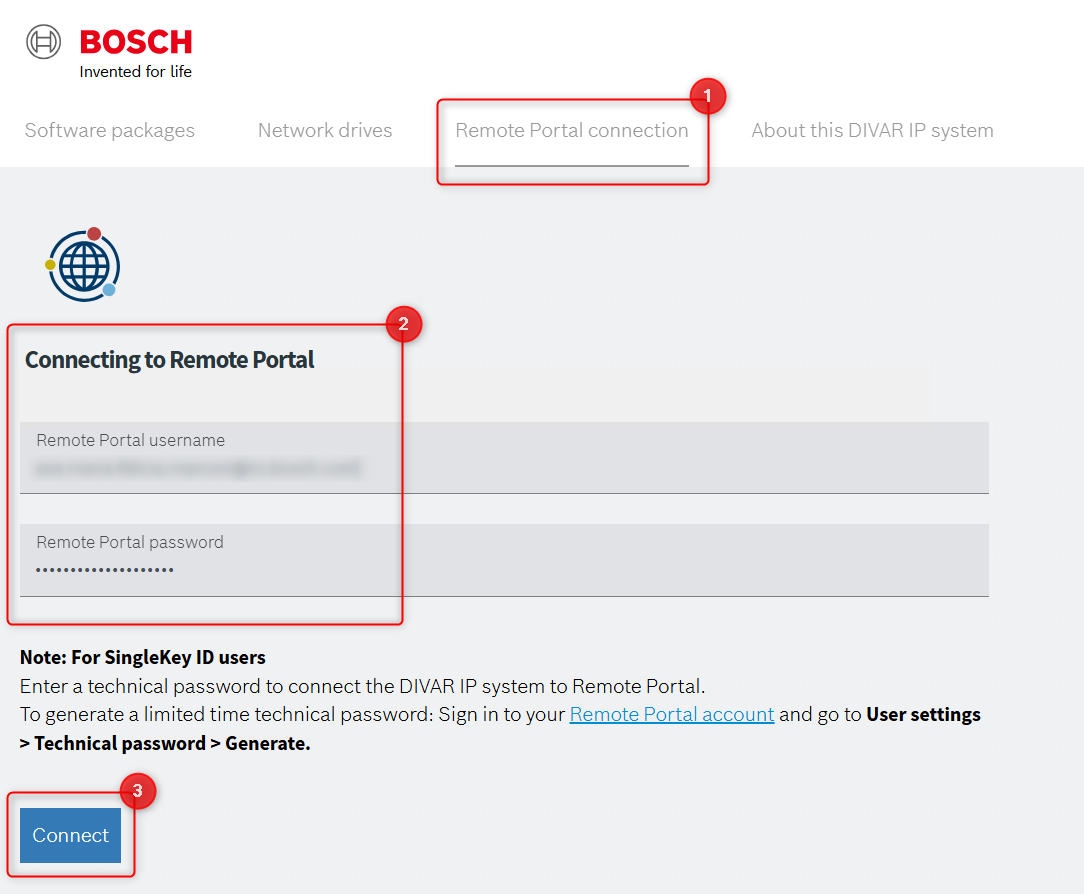
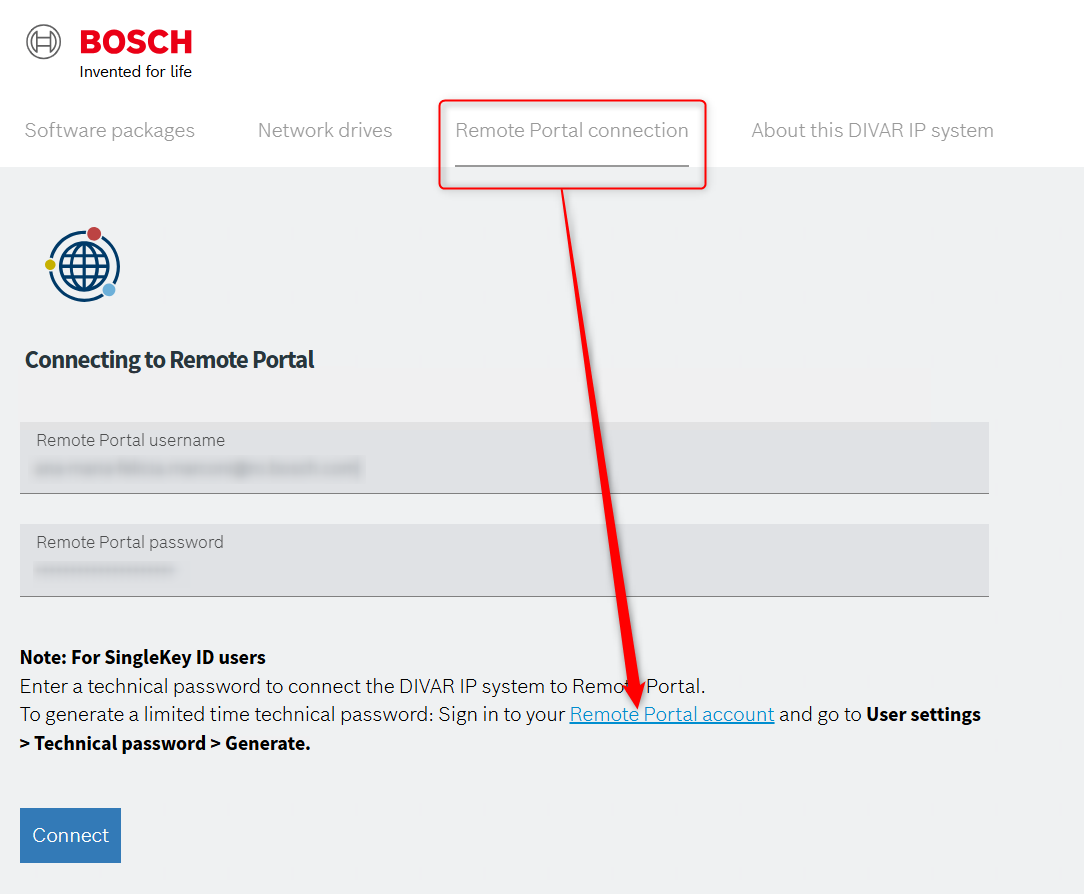
Select the Remote Portal connection tab > click on the Remote Portal account link displayed
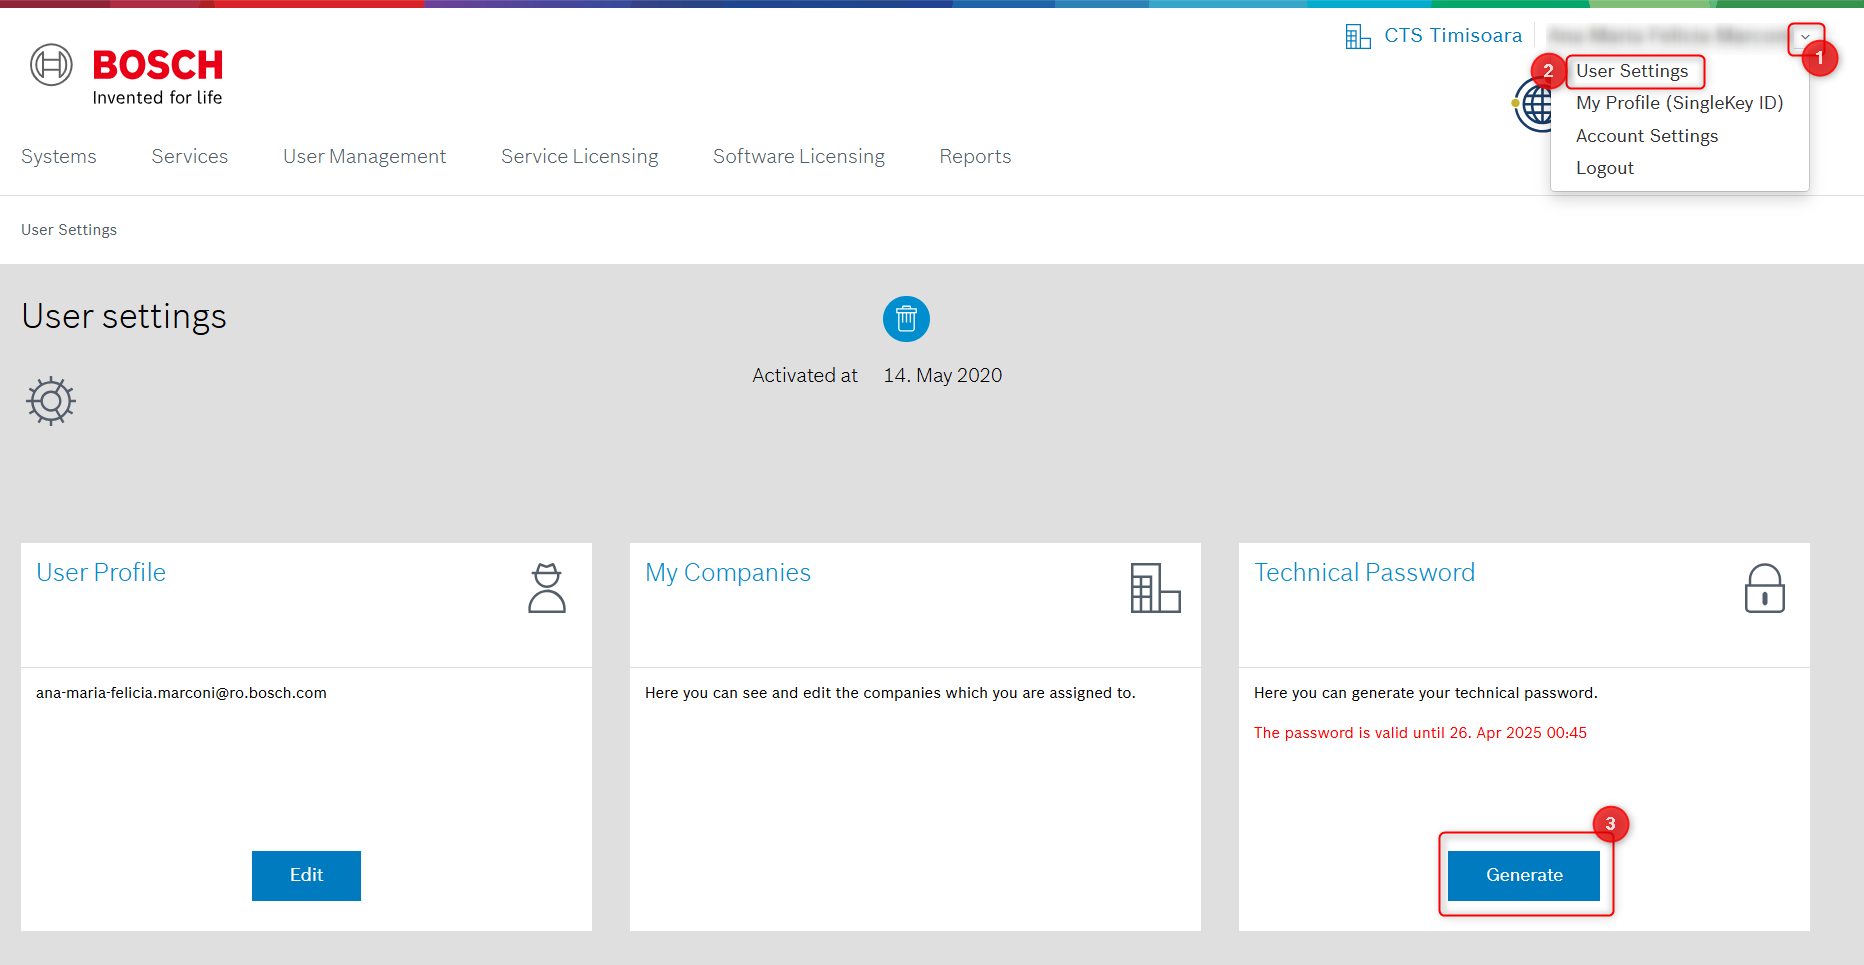
Sign in to your Remote Portal account
Go to User settings > click Generate in the Technical Password tile
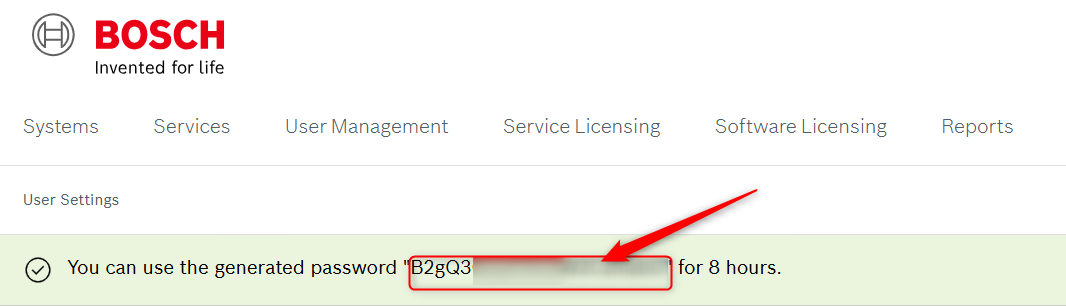
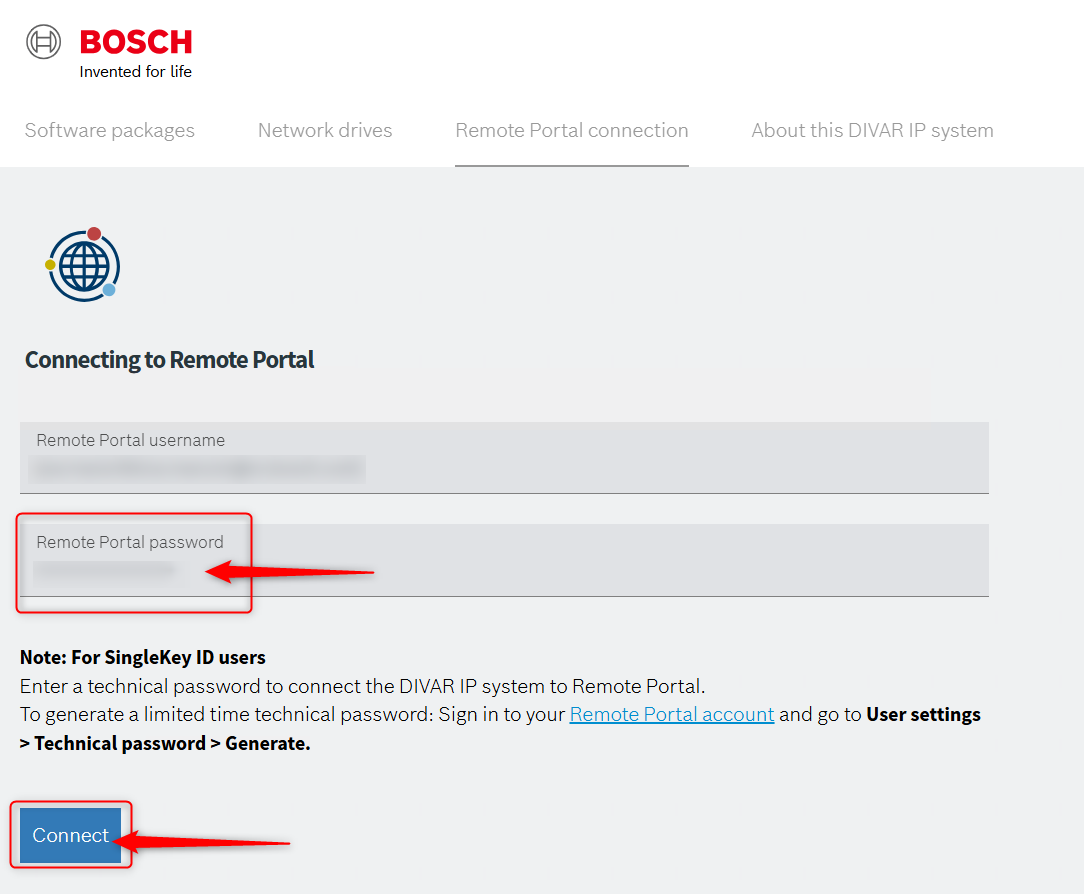
Copy this Technical Password and go back in DIVAR IP System Manager. Fill in the Remote Portal username and paste the password next to Remote Portal password > Click Connect
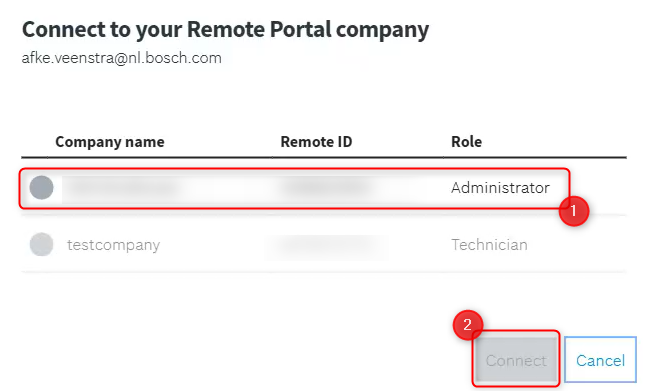
Select which Company Account to connect the DIVAR IP to. As you can see, a Technician user cannot make this connection, this option being greyed out.
Then click Connect
After clicking Connect, the connection will be made

It takes a short while for the status of the device to turn from Offline to Online
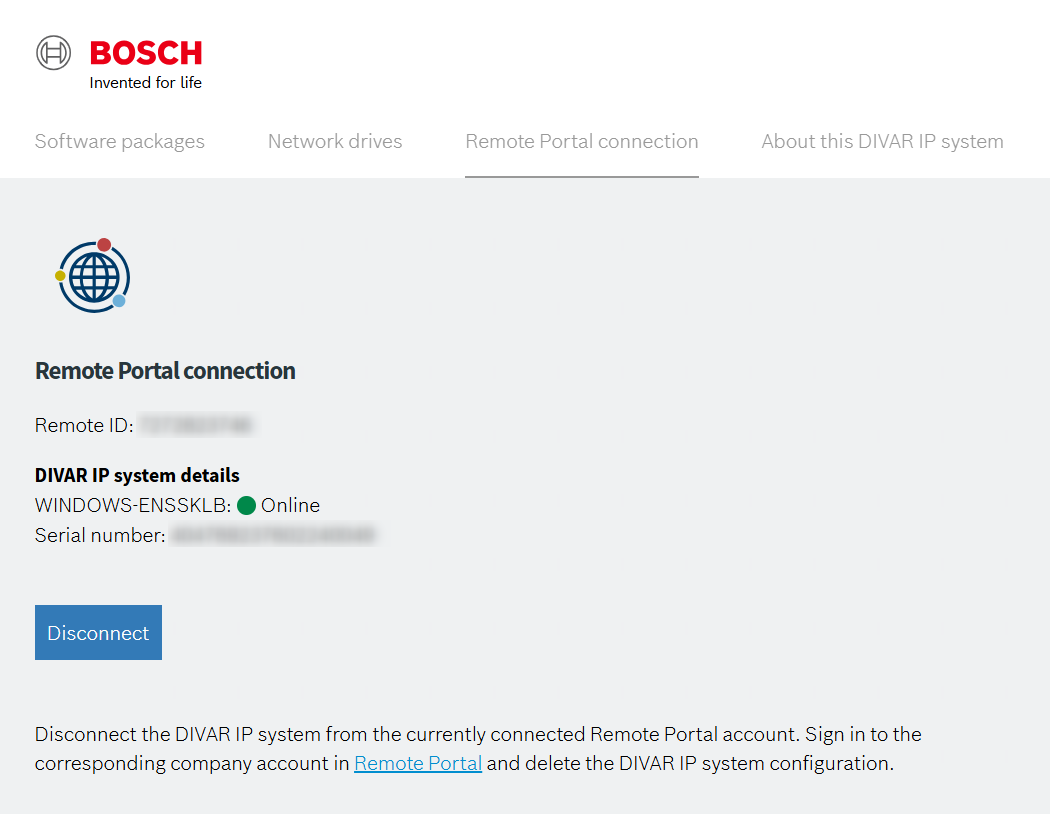
The DIVAR IP is now visible on the Remote Portal account and further features can be activated using the desired service licenses.

Nice to know: