
How to set the Global CHAP password for an existing fully operational BVMS 11.x system?
In order to increase system security in BVMS, it is recommended to set the Global CHAP password.
This article contains the configuration steps for an existing fully operational BVMS 11.x system with no CHAP password configured.
Step-by-step guide
1. Stop the recording on all cameras, Save and Activate your Configuration.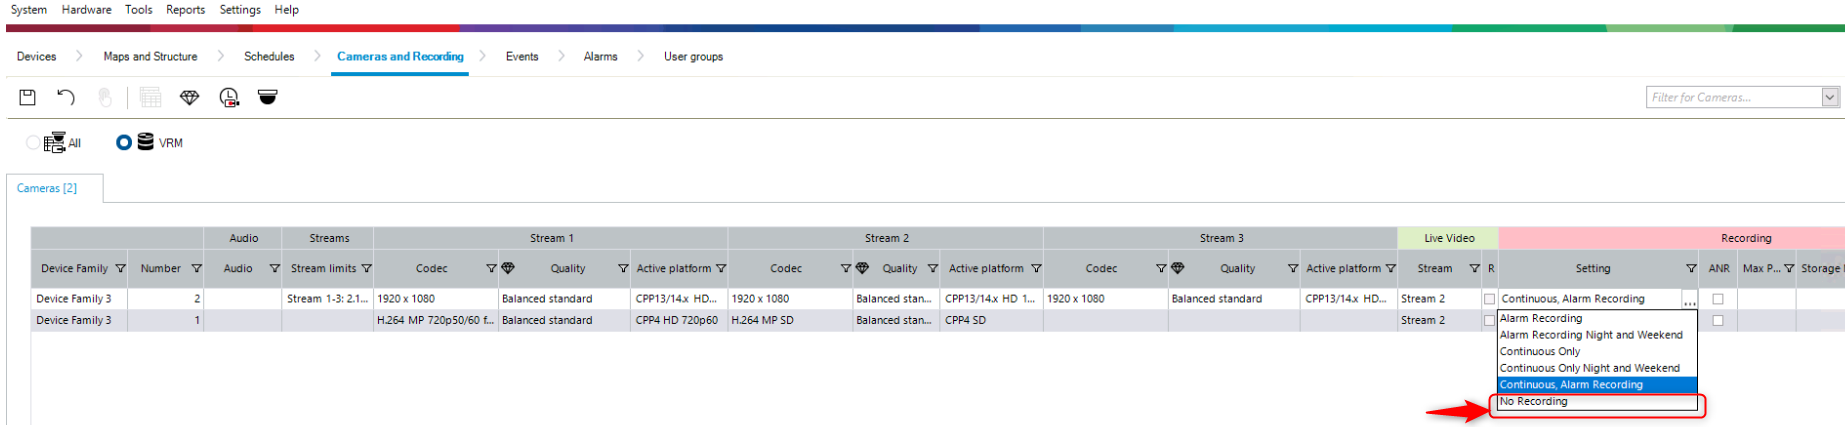
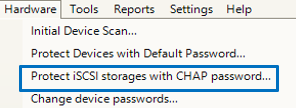
2. Open the Global CHAP password dialog in BVMS: Configuration Client: Hardware → Protect iSCSI storage with CHAP password.
Note: Do not press the Apply button for now!
3. Prepare and enter a global CHAP password and note it somewhere.
Check the complexity rules: 12-16 characters, etc.
Note: Do not press the Apply button yet!
4. Note the IP-addresses of all iSCSI storage devices which are indicated in the “comments” field: “The CHAP password needs to be set manually”. For example: All DIVAR IP xxxxx devices
IMPORTANT
For all iSCSI devices (For example DIVAR IP or NetApp) where the automatic setting of the Global CHAP password by BVMS is not supported, a message is shown that the password needs to be set manually.
The global CHAP password has to be set manually before adding them to BVMS. If this step is missing, the DIVAR IP/ NetApp (DSA) cannot be added to a BVMS system where the global CHAP password is activated already.

5. Login to all iSCSI storages from step 4 and execute the manual configuration of the CHAP credentials on Operating system level (User name=user, password= < take the global chap password given in step 3)
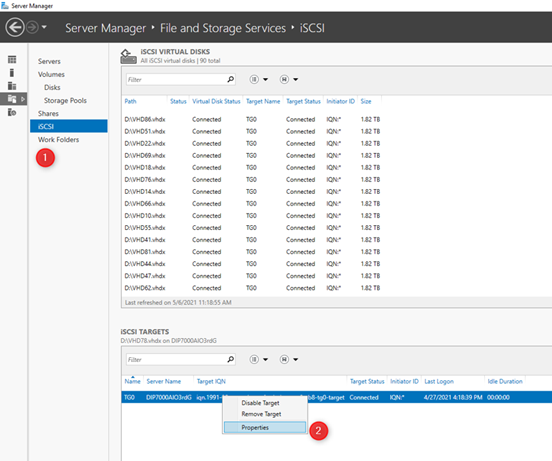
- Case 1: Configuring CHAP credentials manually on a DIVAR IP based on Microsoft Windows IoT 2019 for Storage Standard Operating System
- Open the Server Manager and navigate to File and Storage Services → iSCSI
- Right click on the iSCSI Target and select “Properties”
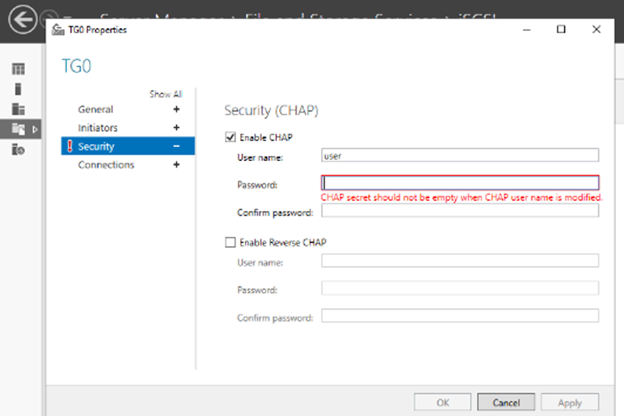
- Click on “Security” and enable the CHAP function.
User name: user
Password: take the Global system CHAP password, same as given in the BVMS Config. Client dialog: Hardware → Protect iSCSI storage with CHAP password - Click OK
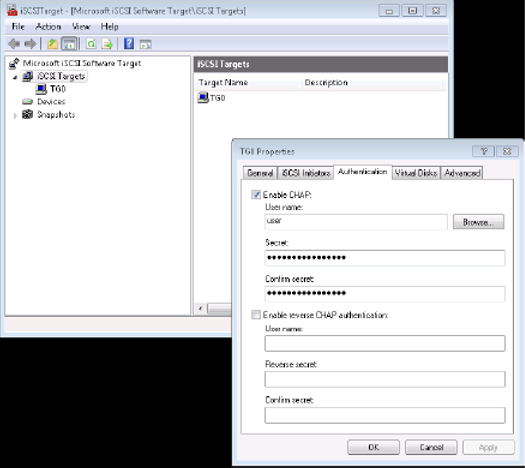
- Case 2: Set the CHAP credentials manual on a DIVAR IP, based on Microsoft Windows Storage Server 2008 R2 Operating System
- Log into the administrative account of your DIVAR IP system

- Start the application Microsoft iSCSI Software Target
- Right click the iSCSI target TG0 and select Properties
- In the Authentication tab select Enable CHAP
- Enter “user” as user name
- Take the Global system CHAP password, same as given in the BVMS Config. Client dialog: Hardware → àProtect iSCSI storage with CHAP password > Click OK
- Log into the administrative account of your DIVAR IP system
6. Go back to the Global CHAP password dialog in BVMS: Configuration Client: Hardware → Protect iSCSI storage with CHAP password and provide the global CHAP password and press the Apply button now.
7. Save and Activate your configuration
8. Start the recording again on all cameras
9. Save and Activate your configuration
Verify the recording and playback works fine in the Operator Client
NOTE:
Please note that the following fields/dialogs have been removed in BVMS >=11.0 to avoid inconsistent configuration related to CHAP passwords on multiple devices by the administrator:
- Device configuration page of the VRM: General → VRM Settings --> Access --> System-wide CHAP password
- Settings → Options → Security: Global iSCSI connection password