Introduction
This article provides a step-by-step guide on how to onboard a Bosch camera to Genetec Security Center SaaS using Direct-to-Cloud (D2C) connectivity.
With FW 9.80 the onboarding process in improved with less steps
Prerequisites
-
Camera:Camera of CPP-14 platform or newerFW 9.40 or newer
-
Ports for Bosch vendor cloud Port 42000 TCPPort 443 TCP (HTTPS)Port 80 TCP (HTTP) CRL: http://36.mcg.escrypt.com/crl
Onboarding to Genetec Security Center SaaS via Direct to cloud (D2C)
-
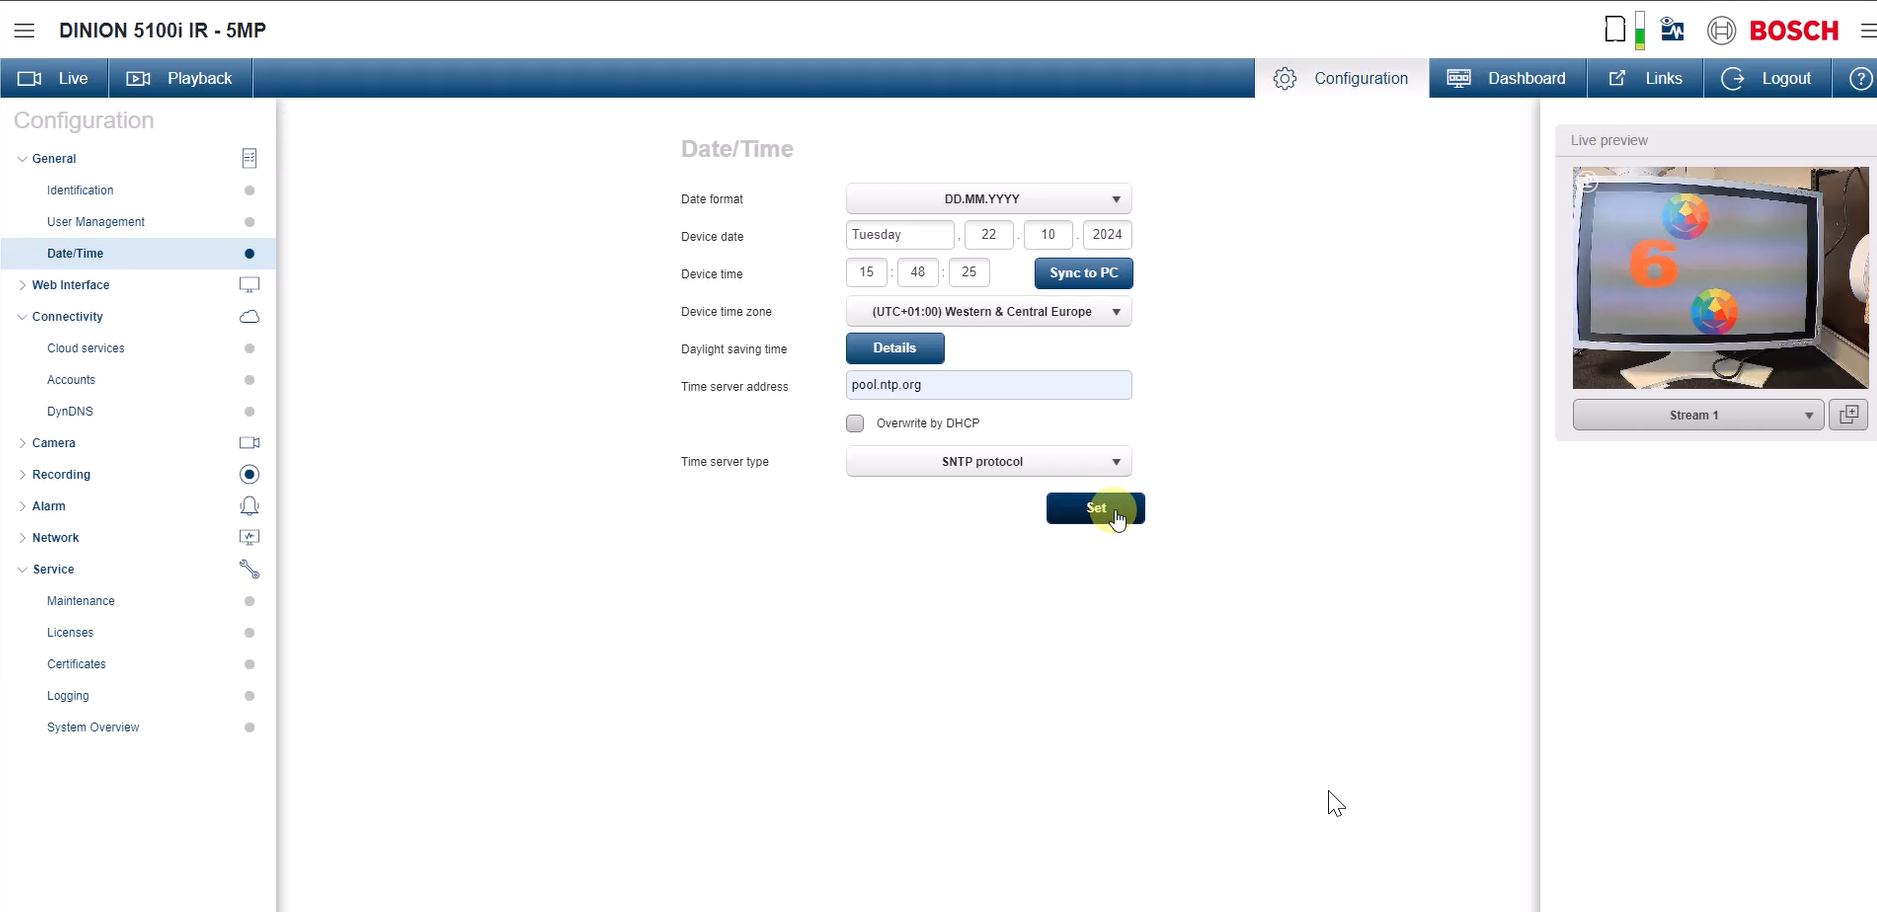
Configure time sever on camera
Go to Configuration → General → Date/Time.
Set up the desired time server settings.
-
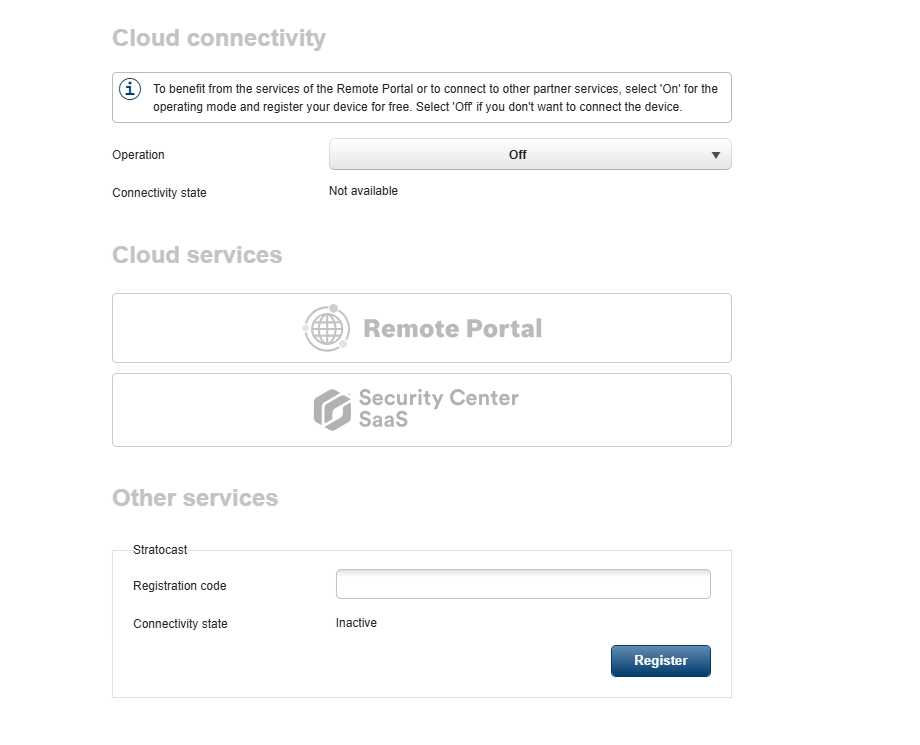
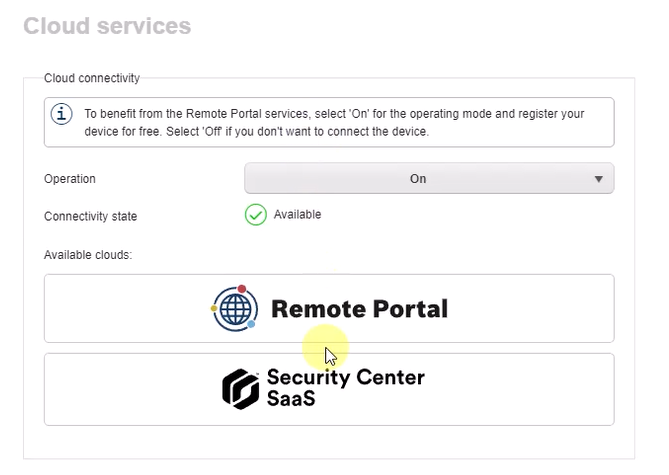
Enable Cloud services
Navigate to Configuration → Connectivity → Cloud Services.
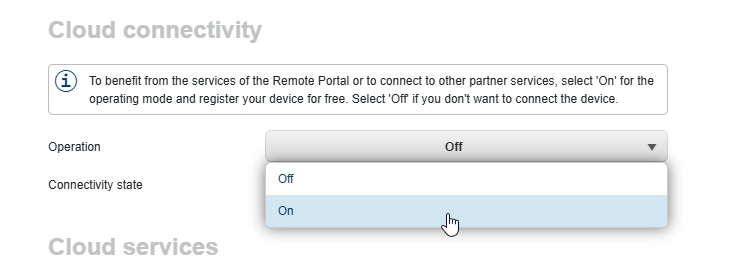
Set Operations to "ON."
Once successfully connected, the Connection State will update to "Available."
-
Connect camera to Bosch Vendor Cloud
Select "Security Center SaaS"
-
Region for Bosch Vendor Cloud
Select the region to onboard the camera to the Bosch Remote Portal.
Accept Bosch Terms and conditions
Once onboarding is successful, the connectivity state will change to "Registered."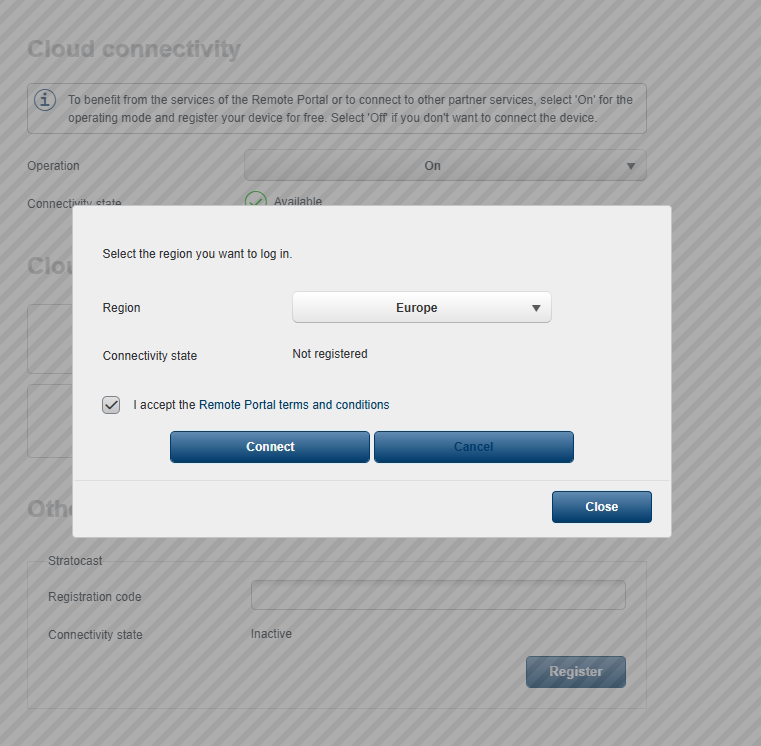
-
Onboard Camera to SC SaaS
The necessary details (Serial Number and Device Secret) will be displayed for connecting to SC SaaS.
Click the "Connect" button to initiate the connection from the camera.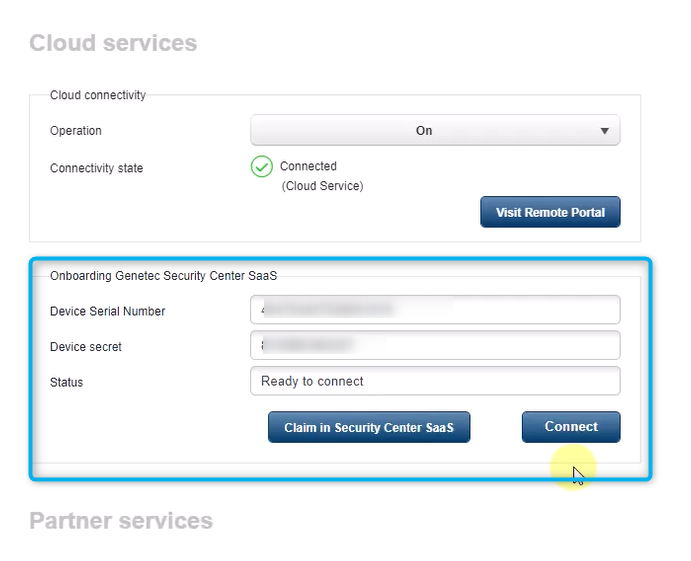
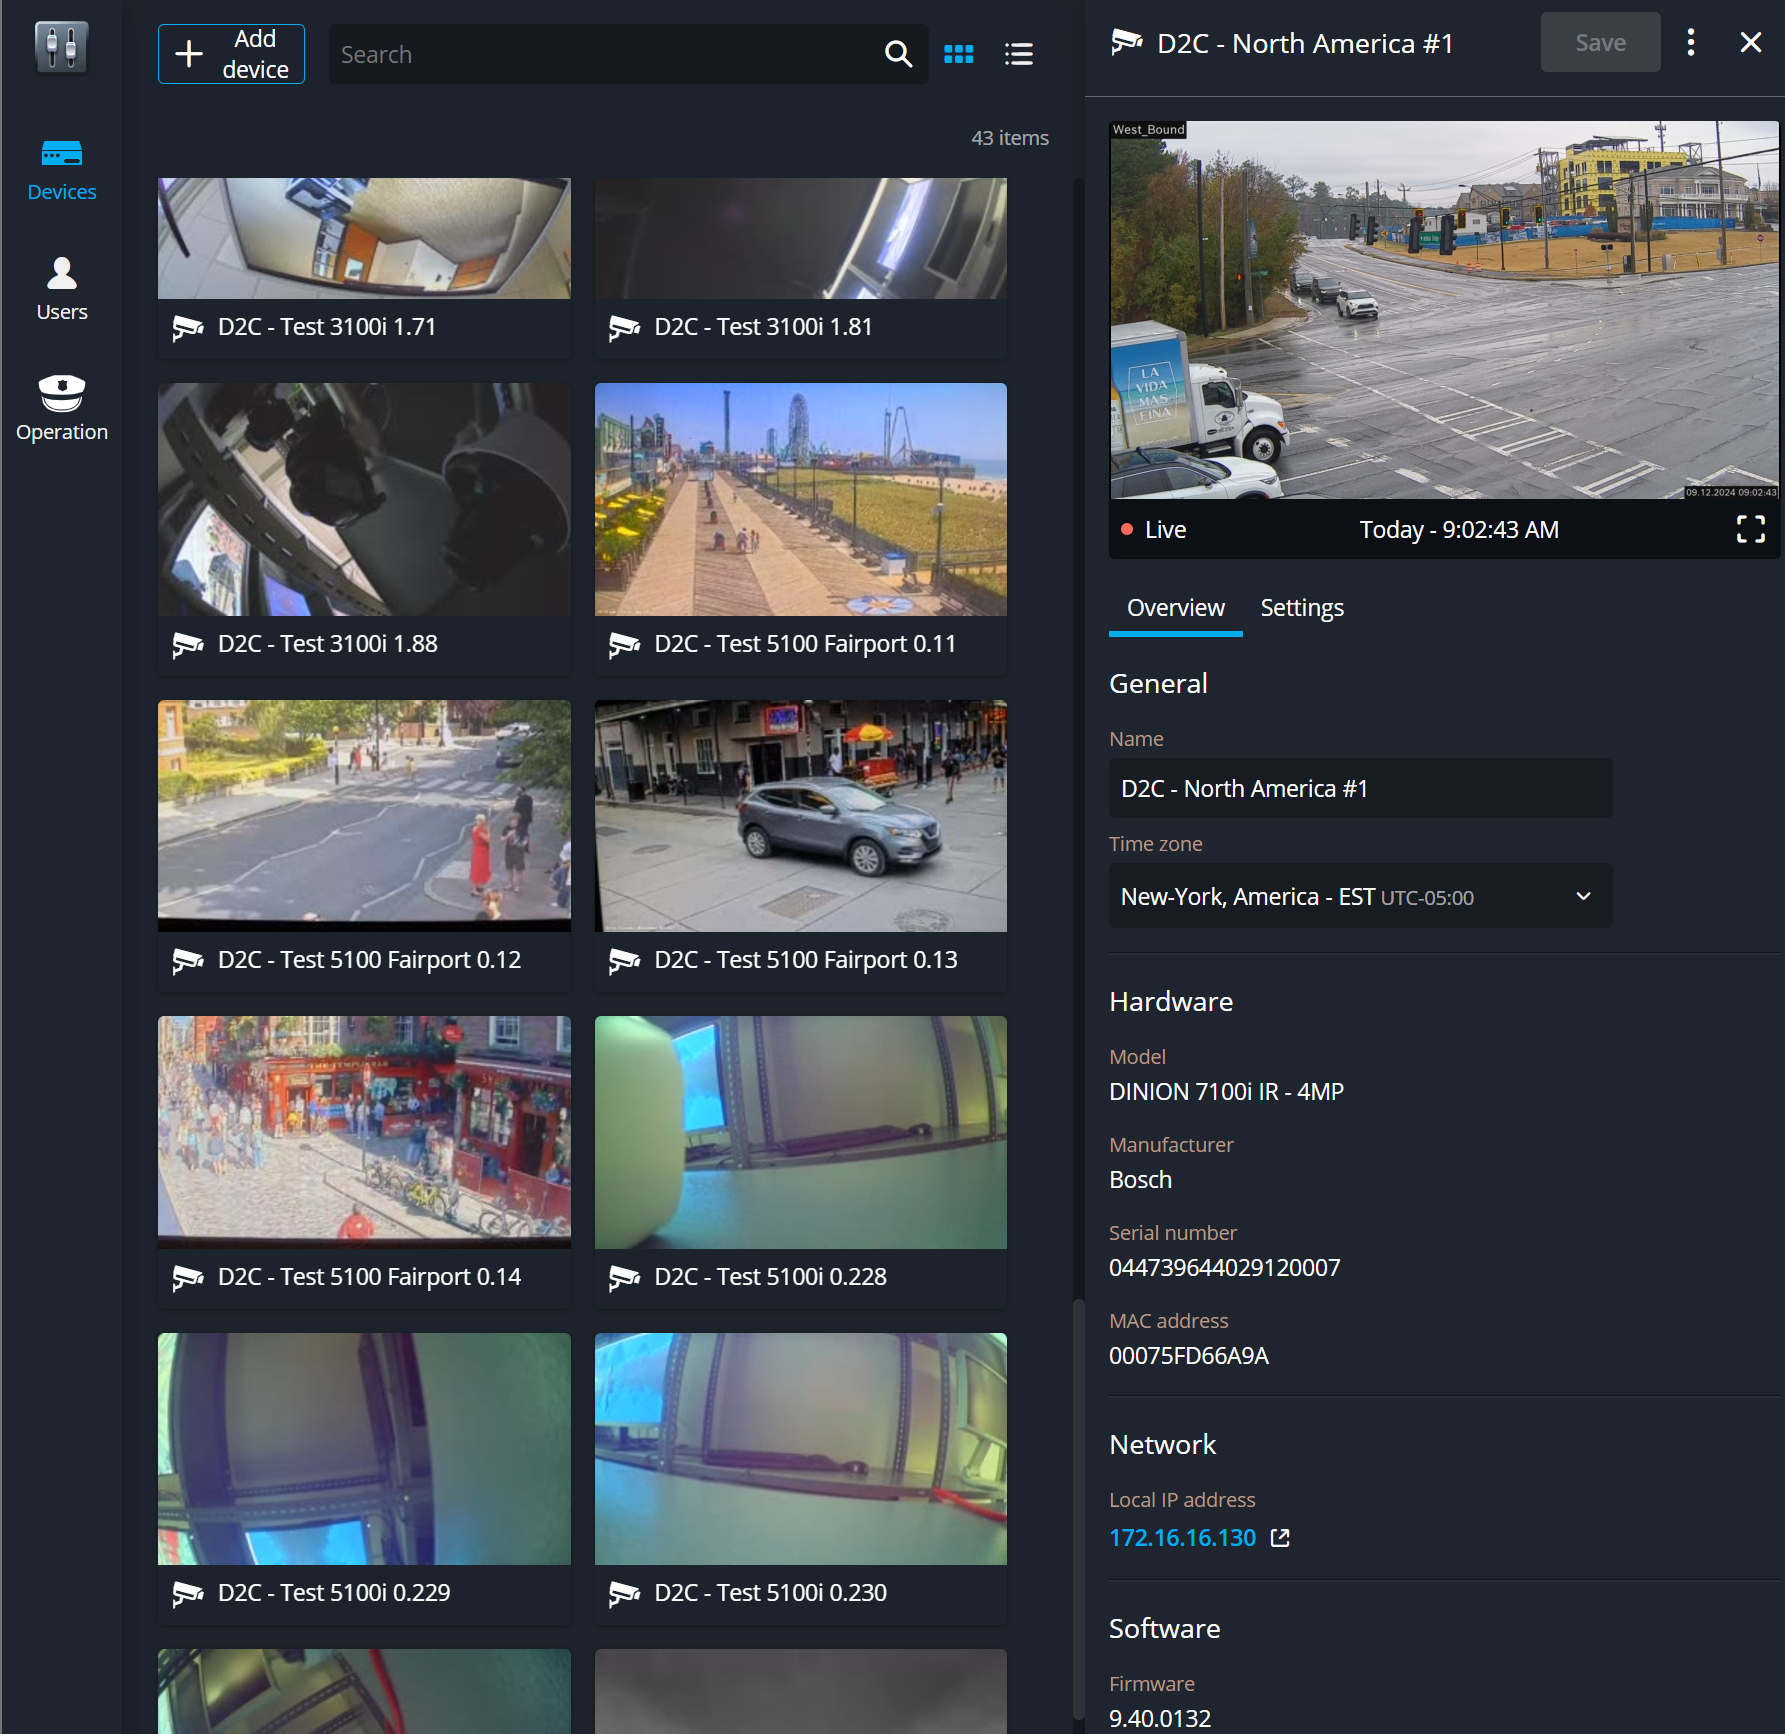
Add a Camera to SC SaaS
Log in to your Genetec SC SaaS system.
Navigate to Configuration → Add Device.
Select Camera
Select Direct-to-cloud
Select Bosch
Enter the Name, Serial Number, and Secret, which can be found on the camera's webpage.
Click "Add" to complete the process.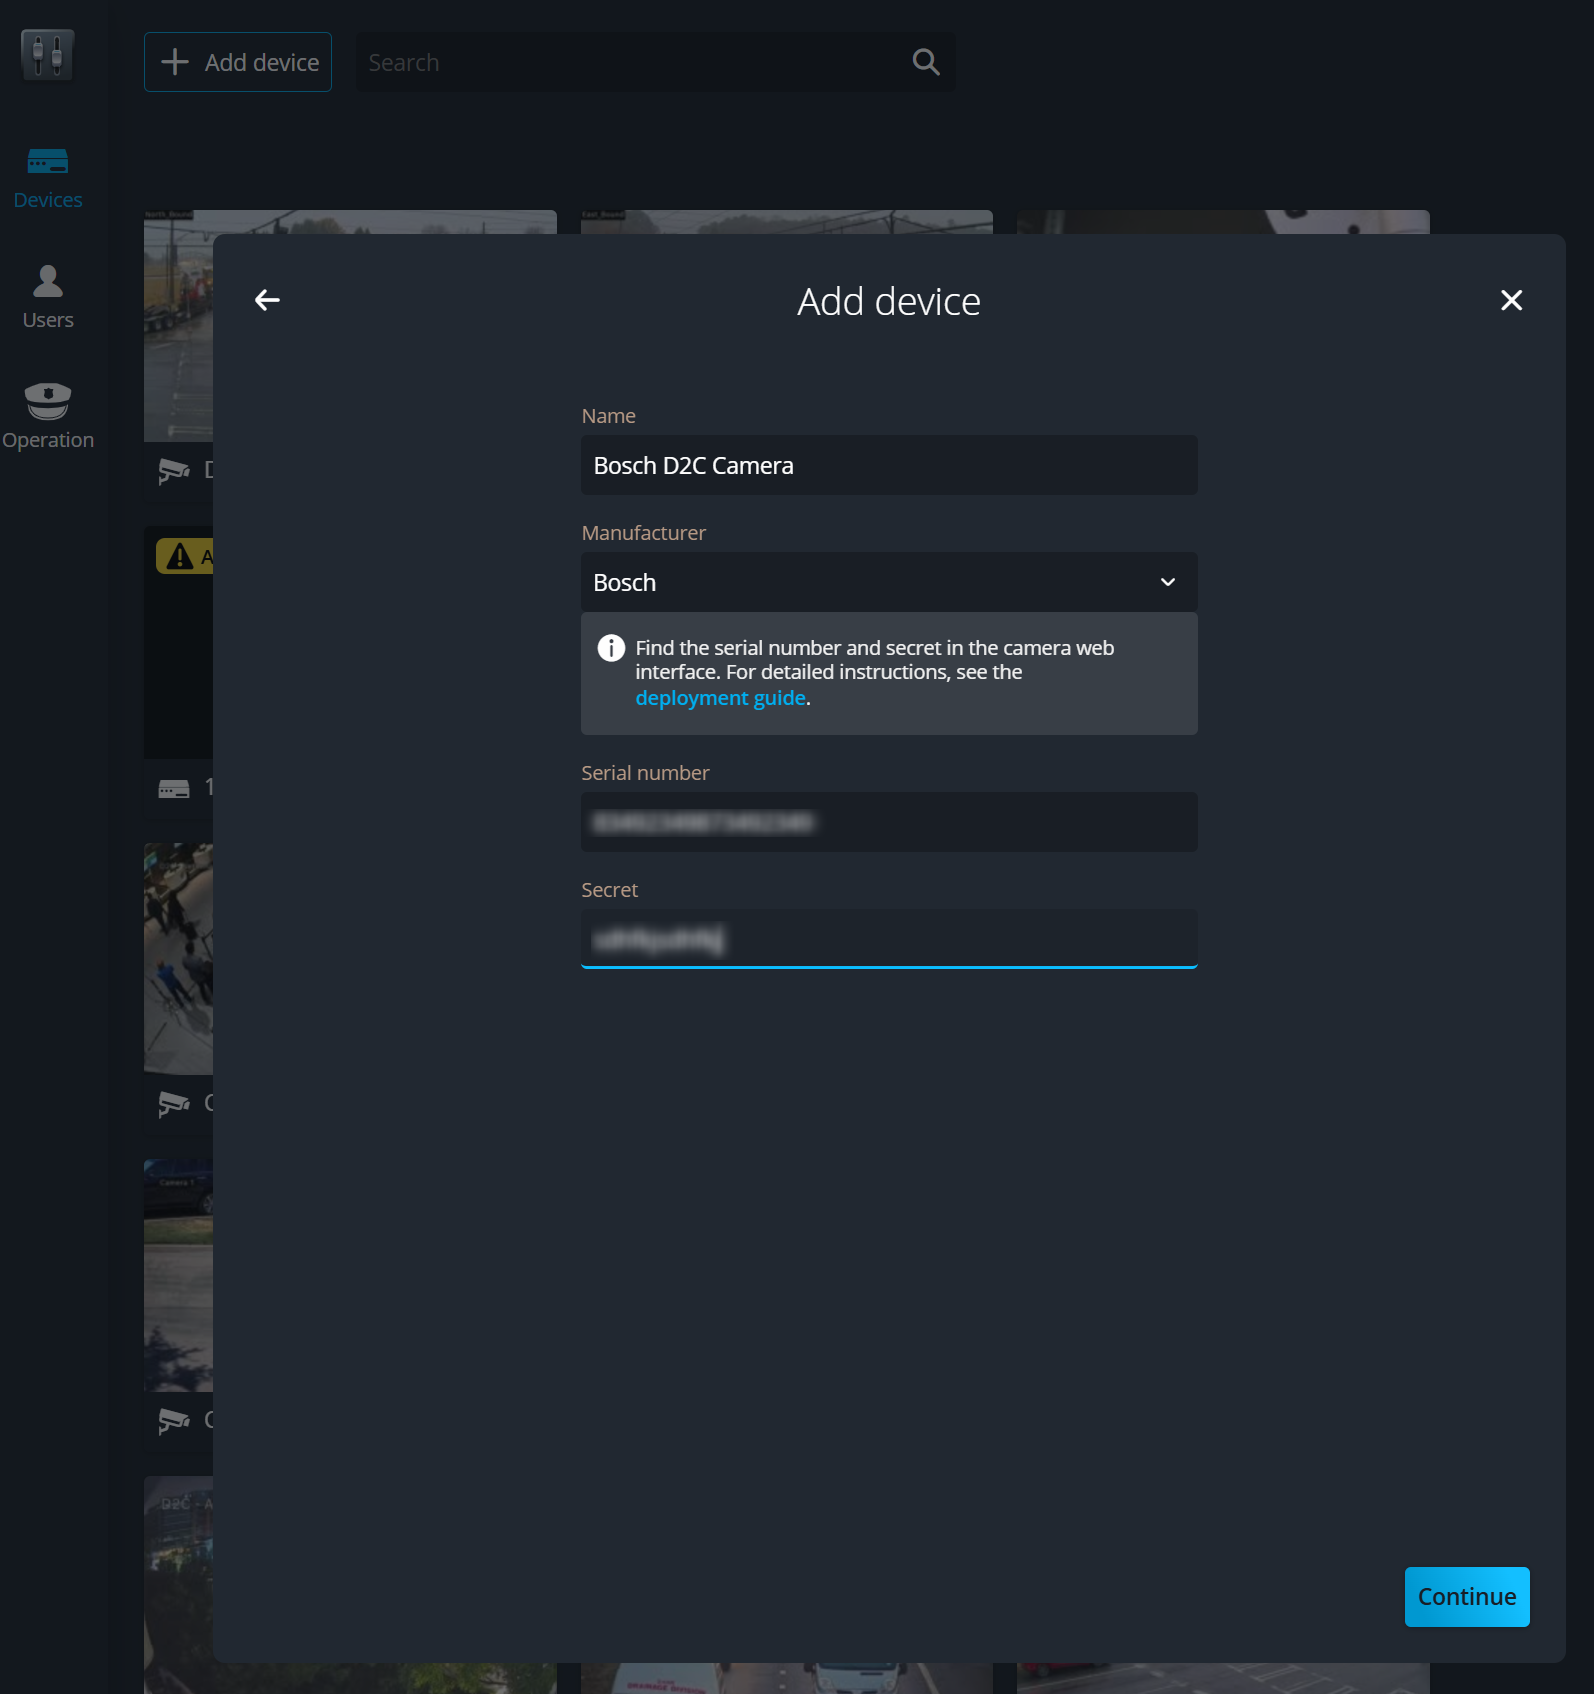
-
Configure and use your camera
The camera has been successfully added to your system. You can now configure its settings (e.g., resolution, FPS) and begin using it.