
🕒 This procedure takes in average ~ 5 min to complete
This article describes how to setup the Genetec ALPR plugin to be used as a data endpoint for Bosch LPR reads.
Step-by-step guide
Prepare the Genetec system
Install and activate the ALPR Plugin
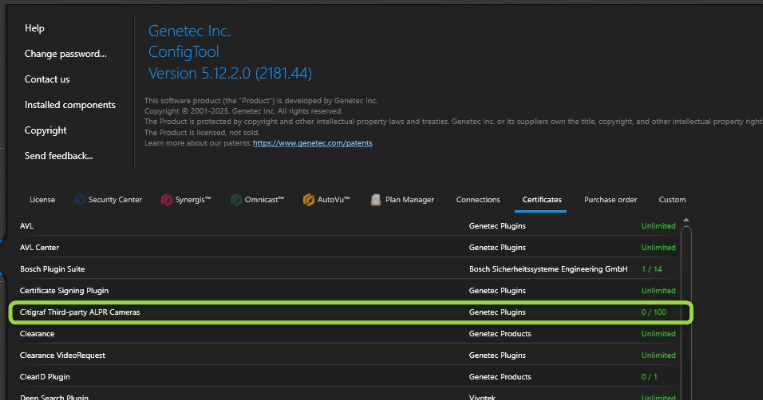
Install Genetec’s ALPR plugin and acquire the necessary licenses (GSC-JPS-CG-LPR-1CAM: Genetec Third Party ALPR Camera Connection).

Role setup
Add the LPR plugin to the Genetec System in the Config Tool
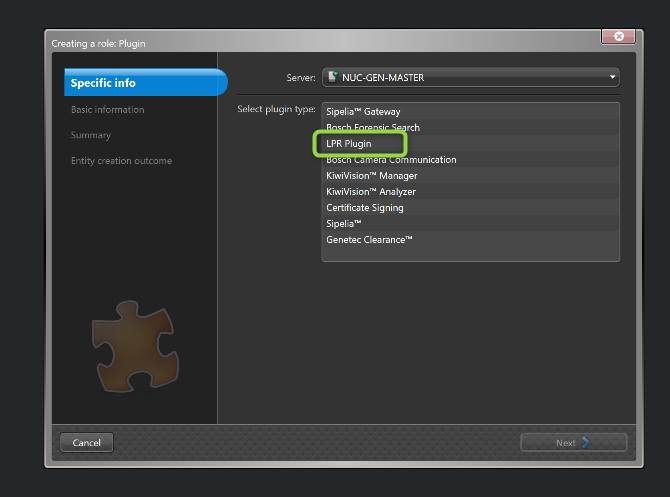
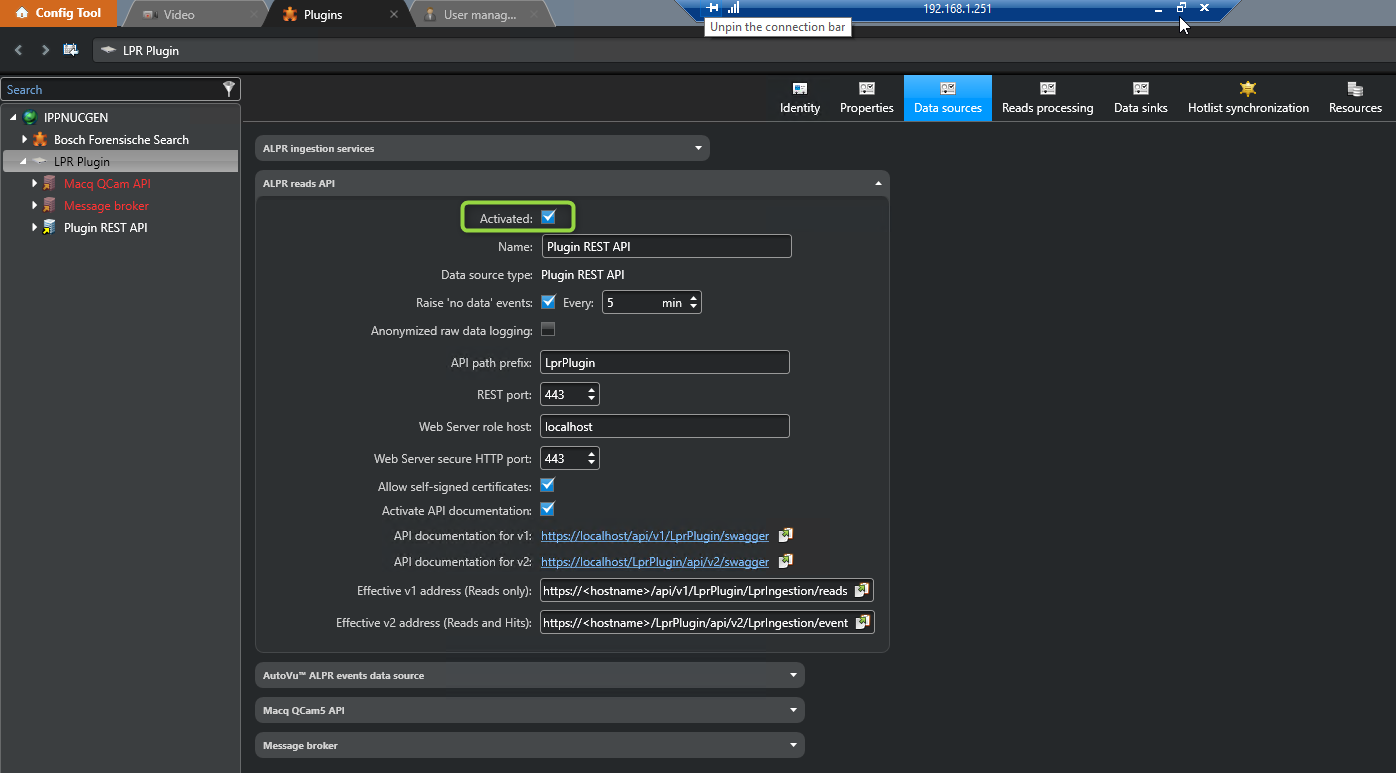
and enable the REST API as a data source
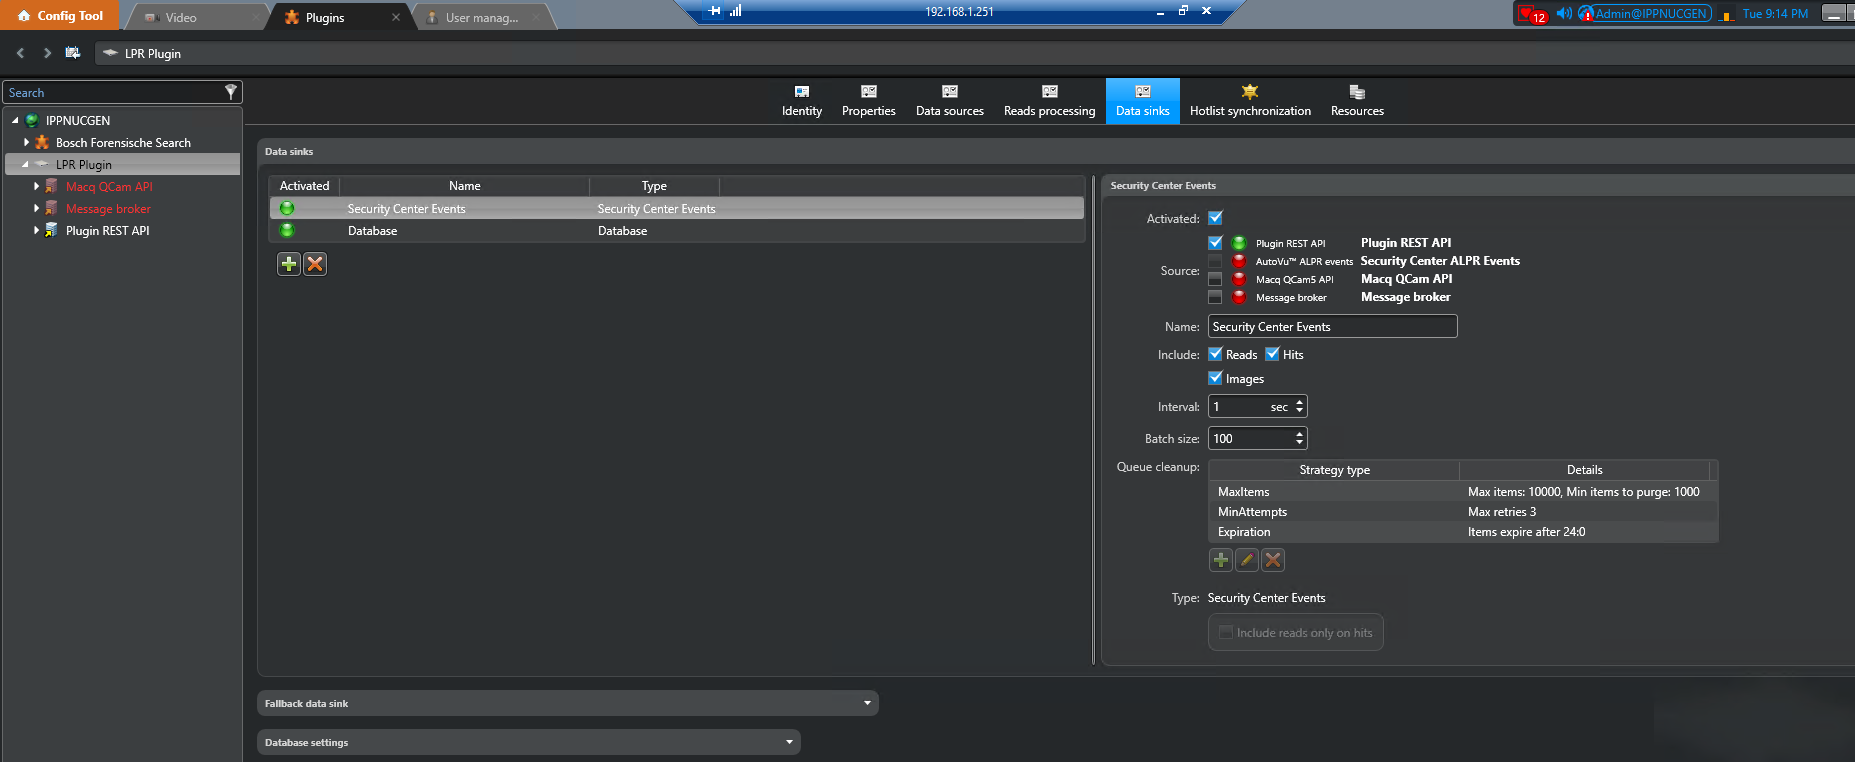
as well as the ‘Database’ and the ‘Security Center Events’ as Data sinks
User setup
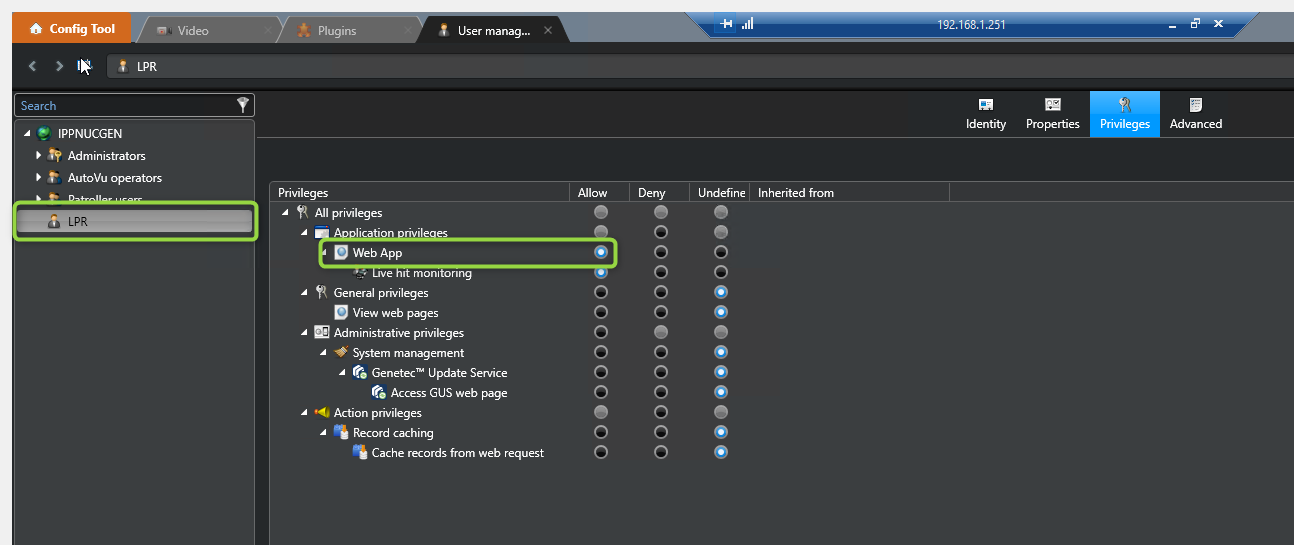
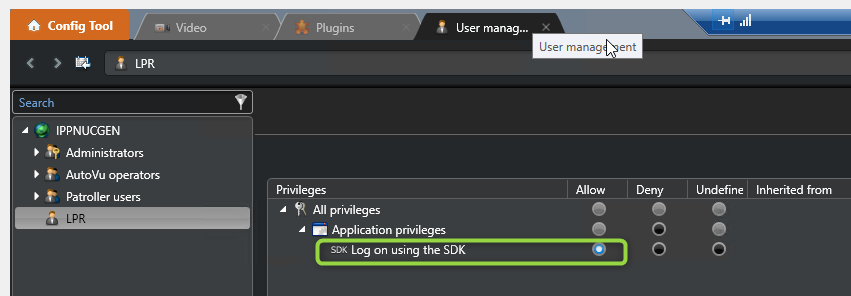
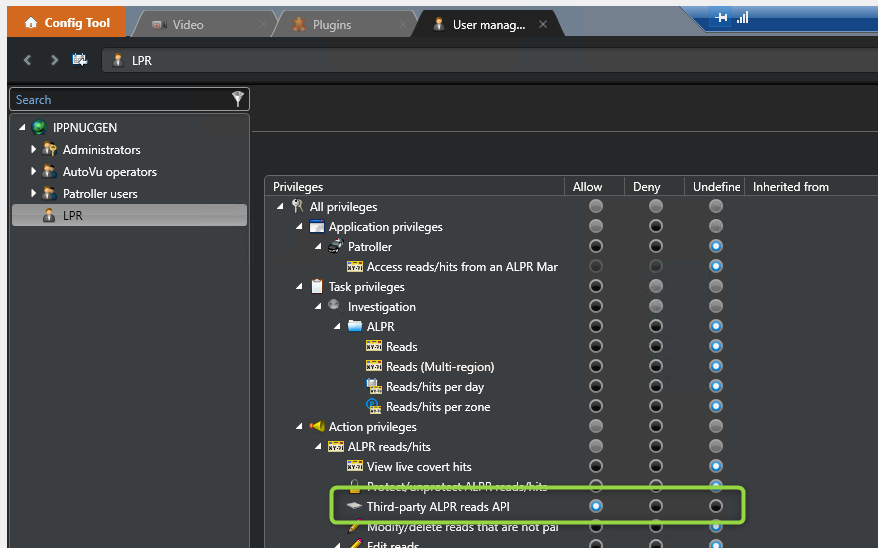
Create a Genetec user with a username (e.g. LPR) and password with the following privileges:
Enable and configure the LPR ingestion
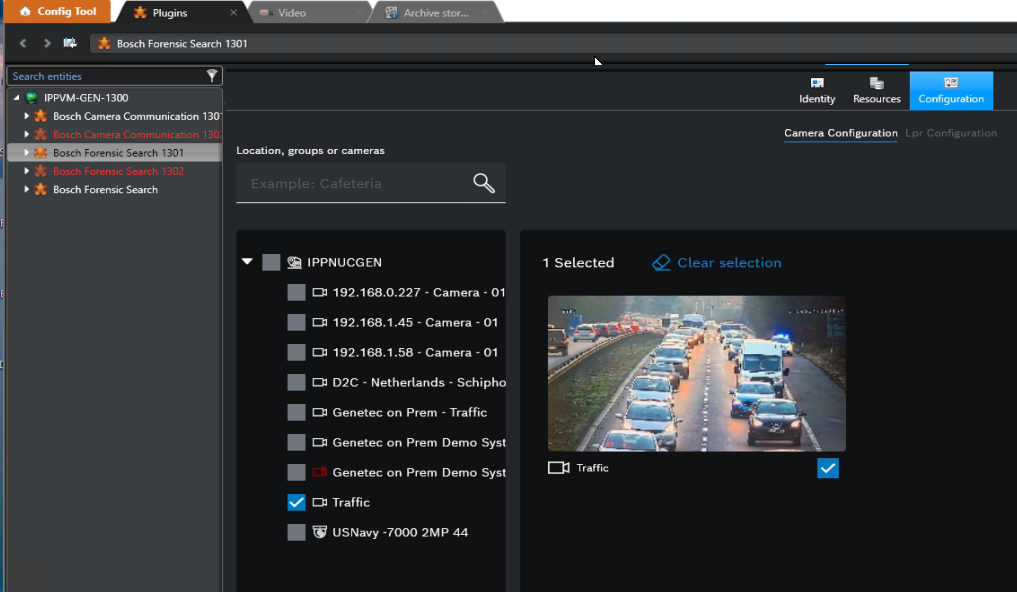
Camera selection
The LPR ingestion is a part of the background process that is connected to the Forensic Search and thus the configuration also happens in the Forensic Search Plugin role setup.
License plates are only extracted from cameras that are analyzed by the background process.
Make sure that the LPR cameras are selected in the plug-in configuration.
Enable the LPR backend
Switch to the LPR Configuration tab and enable the LPR Ingestion background service.
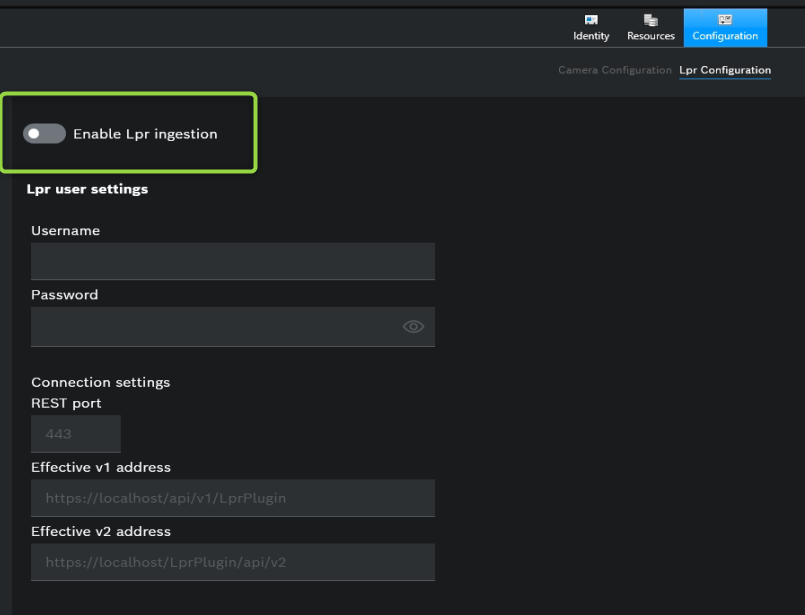
Enter the credentials of the ‘LPR’ user that has been created at the beginning of this how to page in the User setup section.
The port and the effective endpoint addresses also need to be entered or modified to match the settings from the Role setup section in this document.
The endpoint addresses can be copied from the LPR role configuration and need to be modified in a way that the <hostname> is replaced by the real hostname of the server that is running the ALPR plugin and the endpoint addresses need to be truncated in a way like shown in the image below.
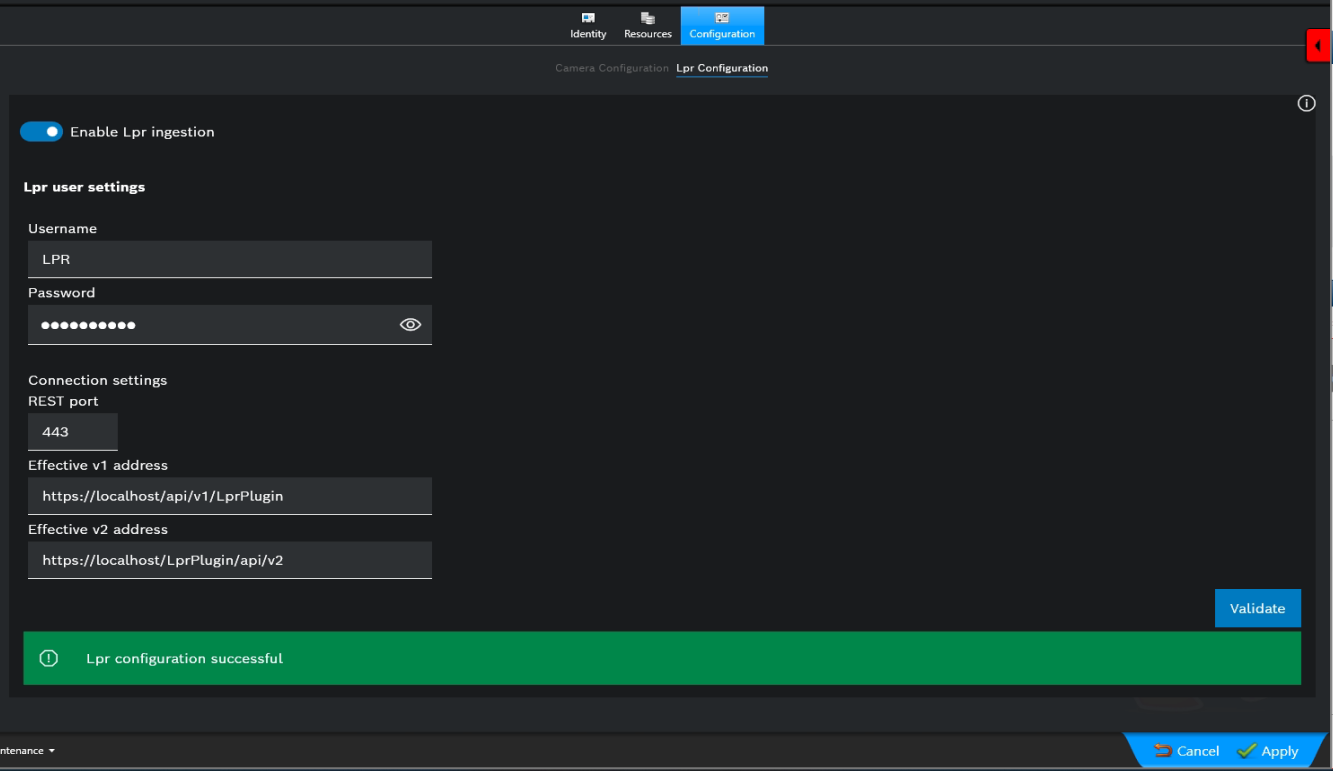
After entering the data, the connection can be verified by clicking the Validate button and after a successful verification the settings can be saved by clicking the Apply button.