How to use CM7.76.46 or higher for (mass) Certificate creation/renewal.
https://downloadstore.keenfinity-group.com/FILES/ConfigurationManager_7.76.0046.zip
Recommendation before start:
This chapter describes the renewal of certificates. The initial creation of certificate requires an own description.
-
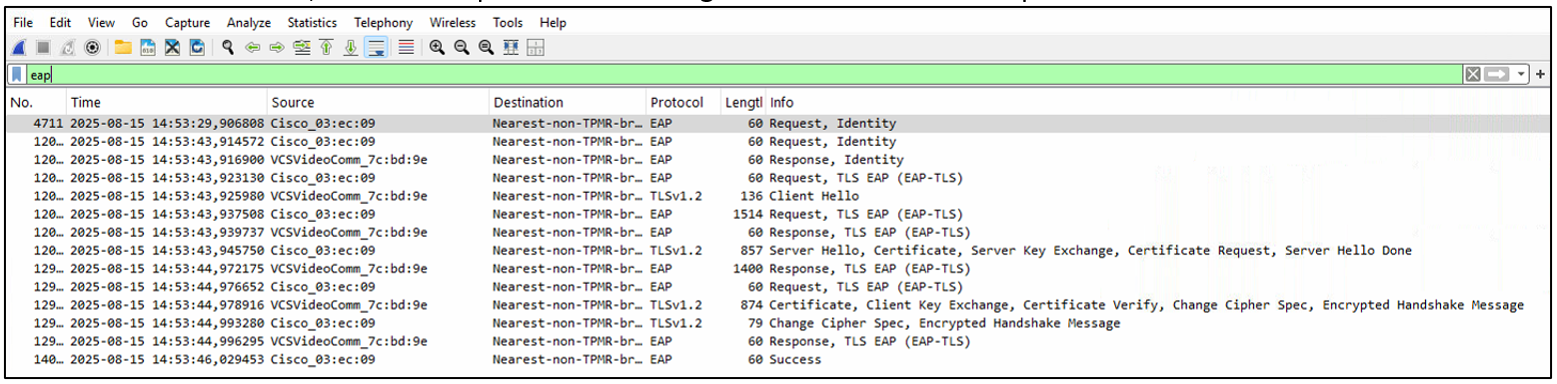
Mirror the camera port on the switch and start Wireshark.
-
Restart the camera and verify the authentication process; it should look like the example below. If everything is correct, proceed with the certificate renewal process.
-
After creating the new certificate, start a new capture and check the authentication process again.
-
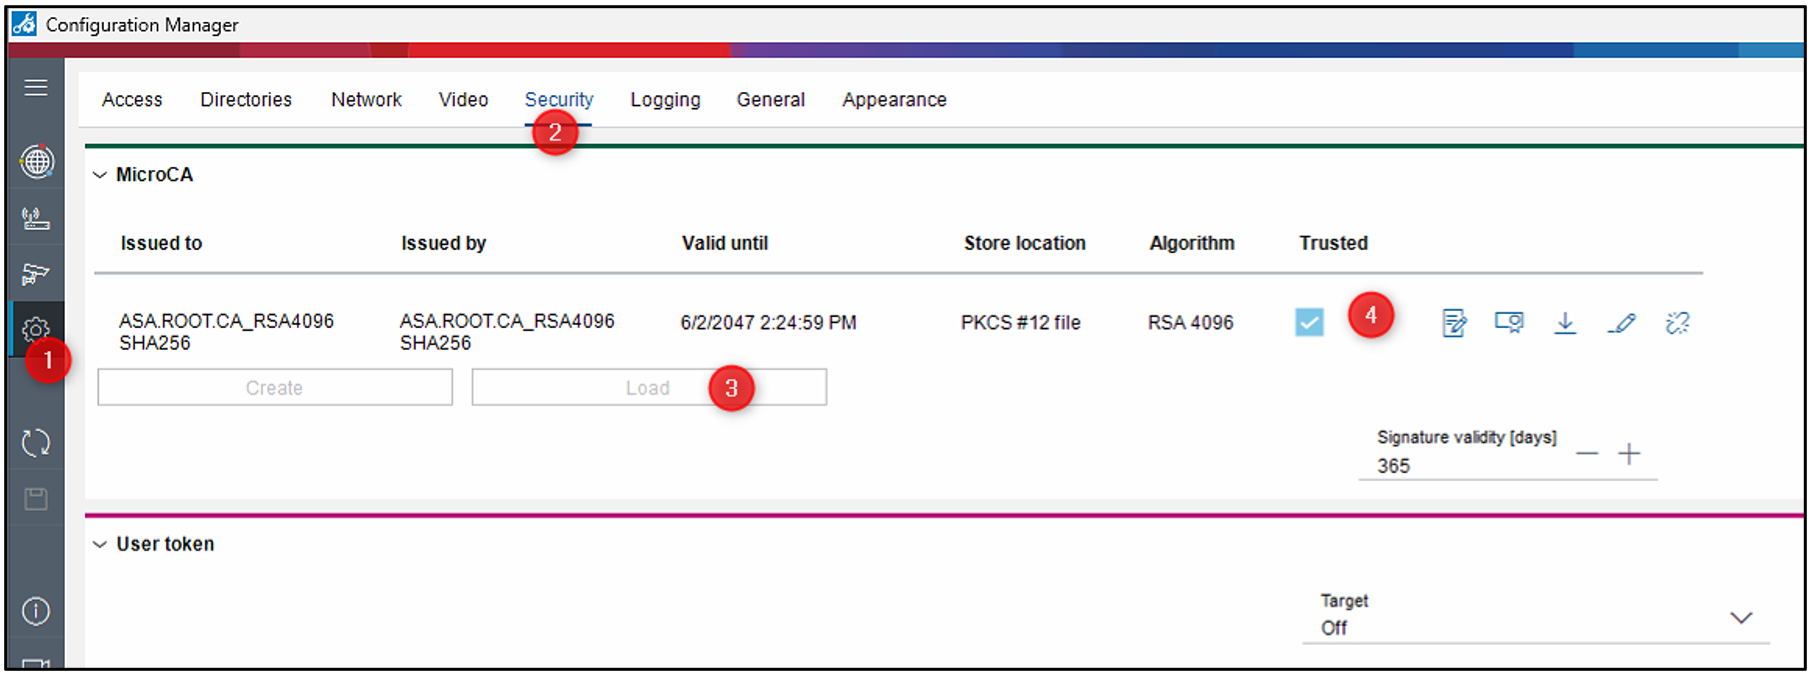
Load the Root-CA into CM as a trusted certificate.
Tip: After creating new certificates, consider removing the CA certificate from the CM system to minimize exposure.
-
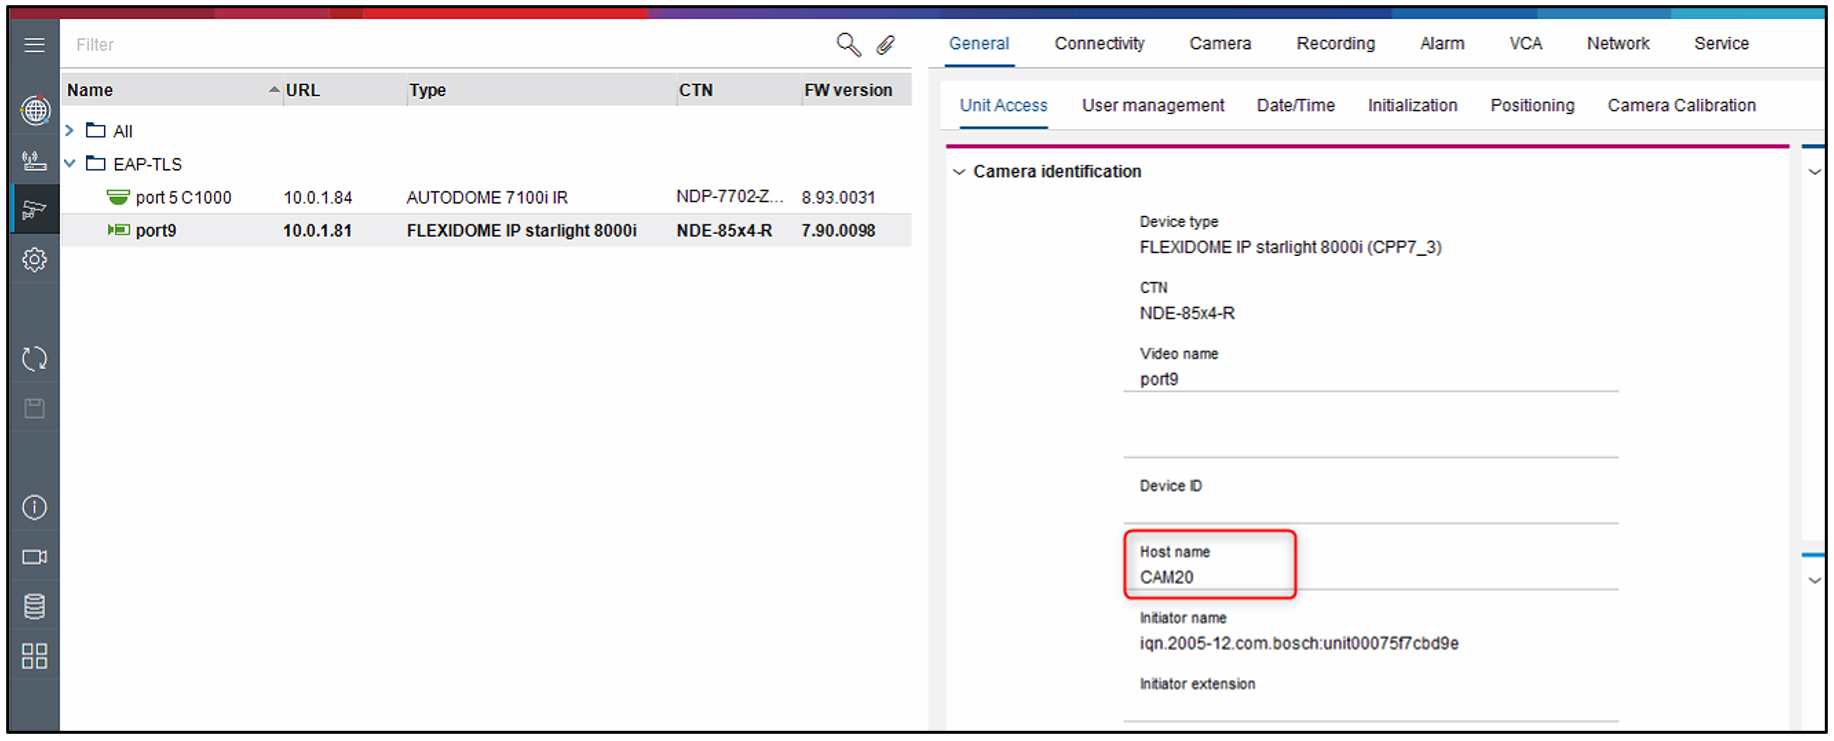
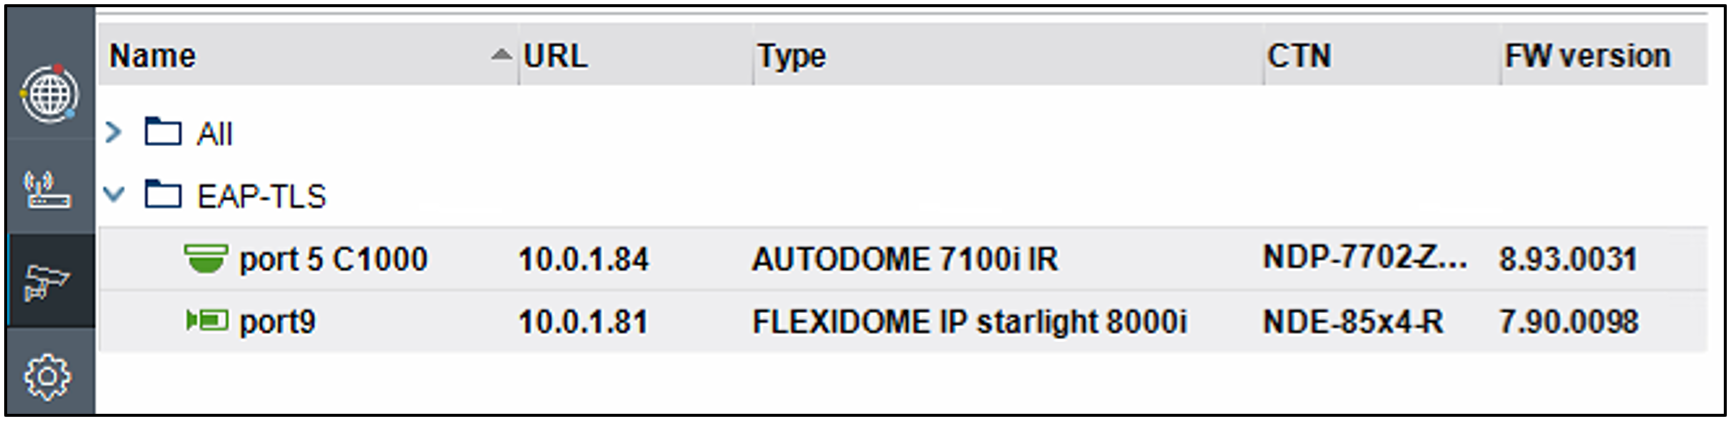
Configure the “Host name” field of each camera
As this will be used as “Common Name” (CN) it MUST be at minimum 5 characters long and unique for each camera.
-
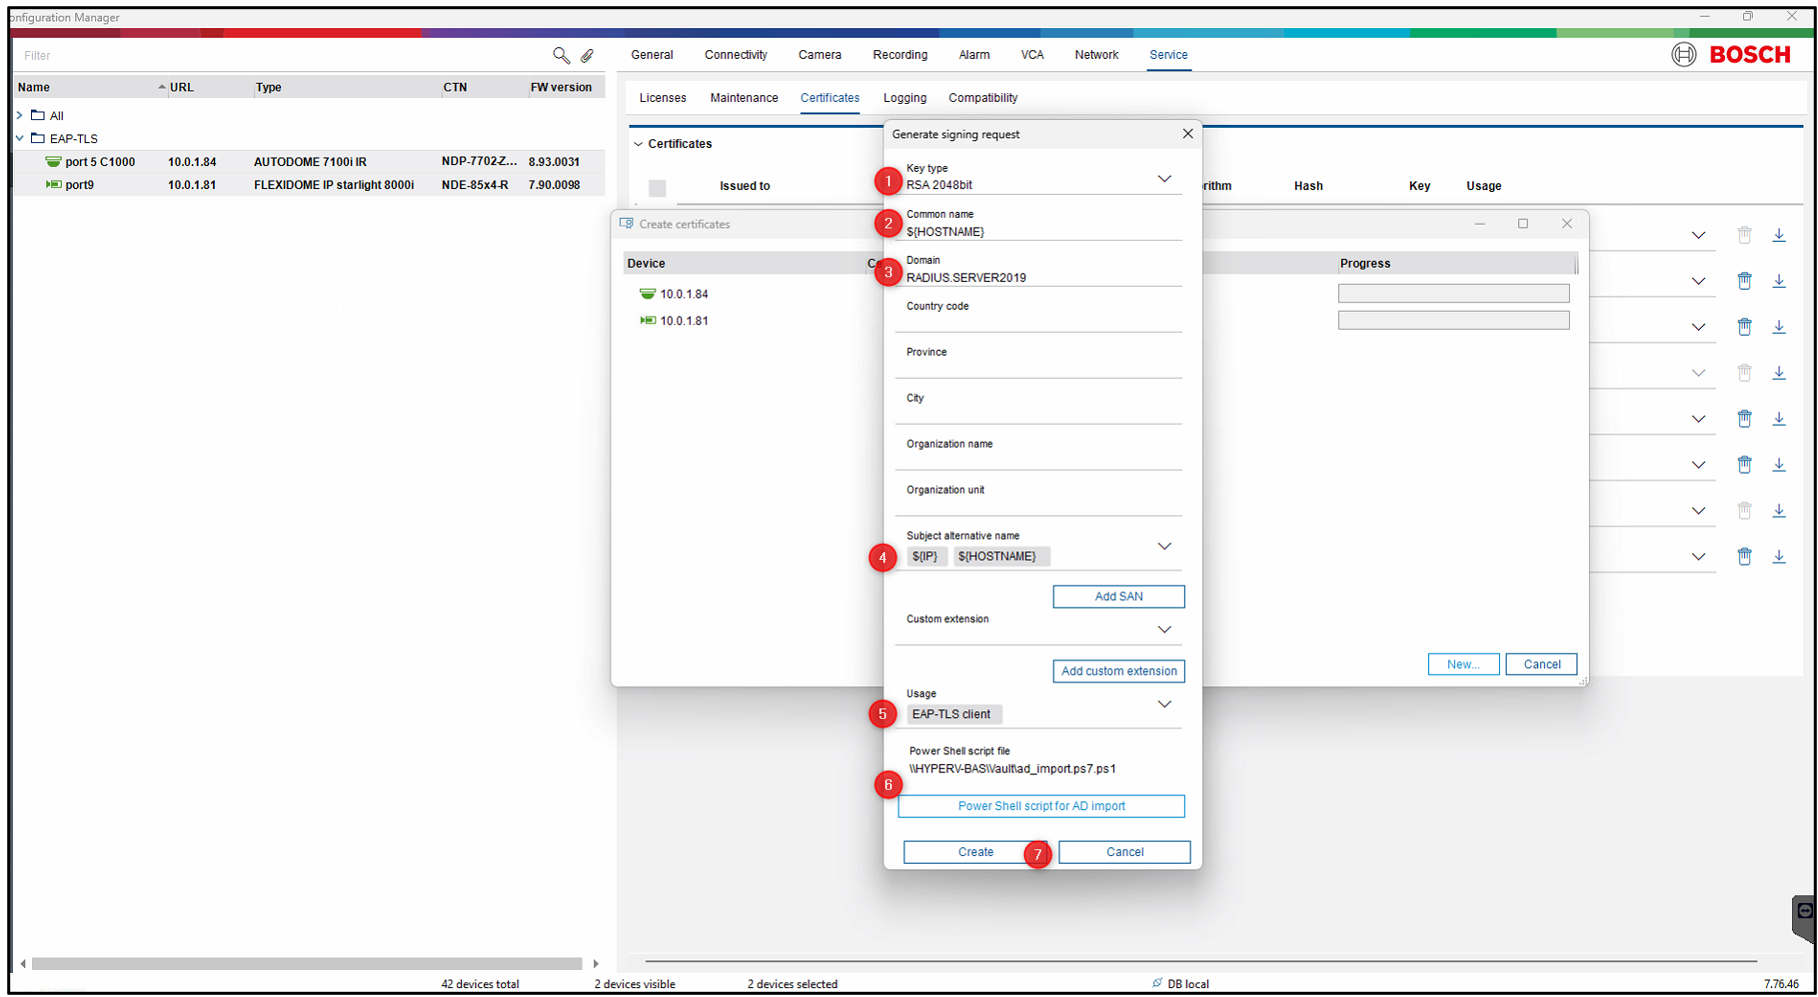
Now navigate to certificates and open “Certificate Wizard”
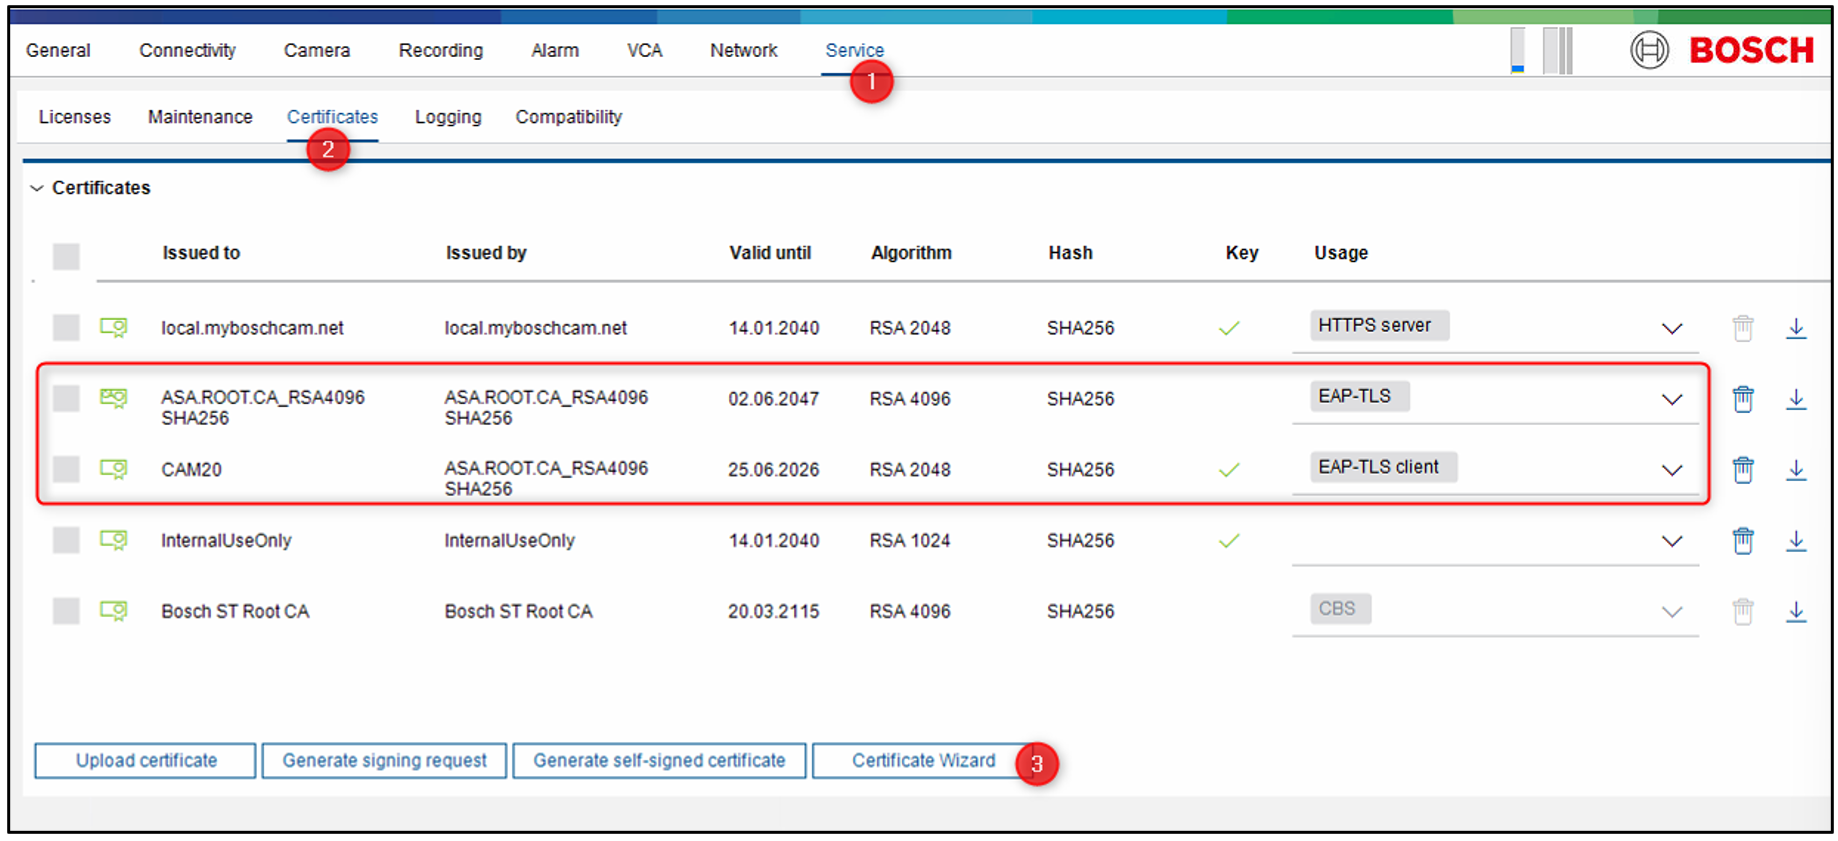
Note: press and hold the Shift or Control button to MASS select multiple cameras at ones.
-
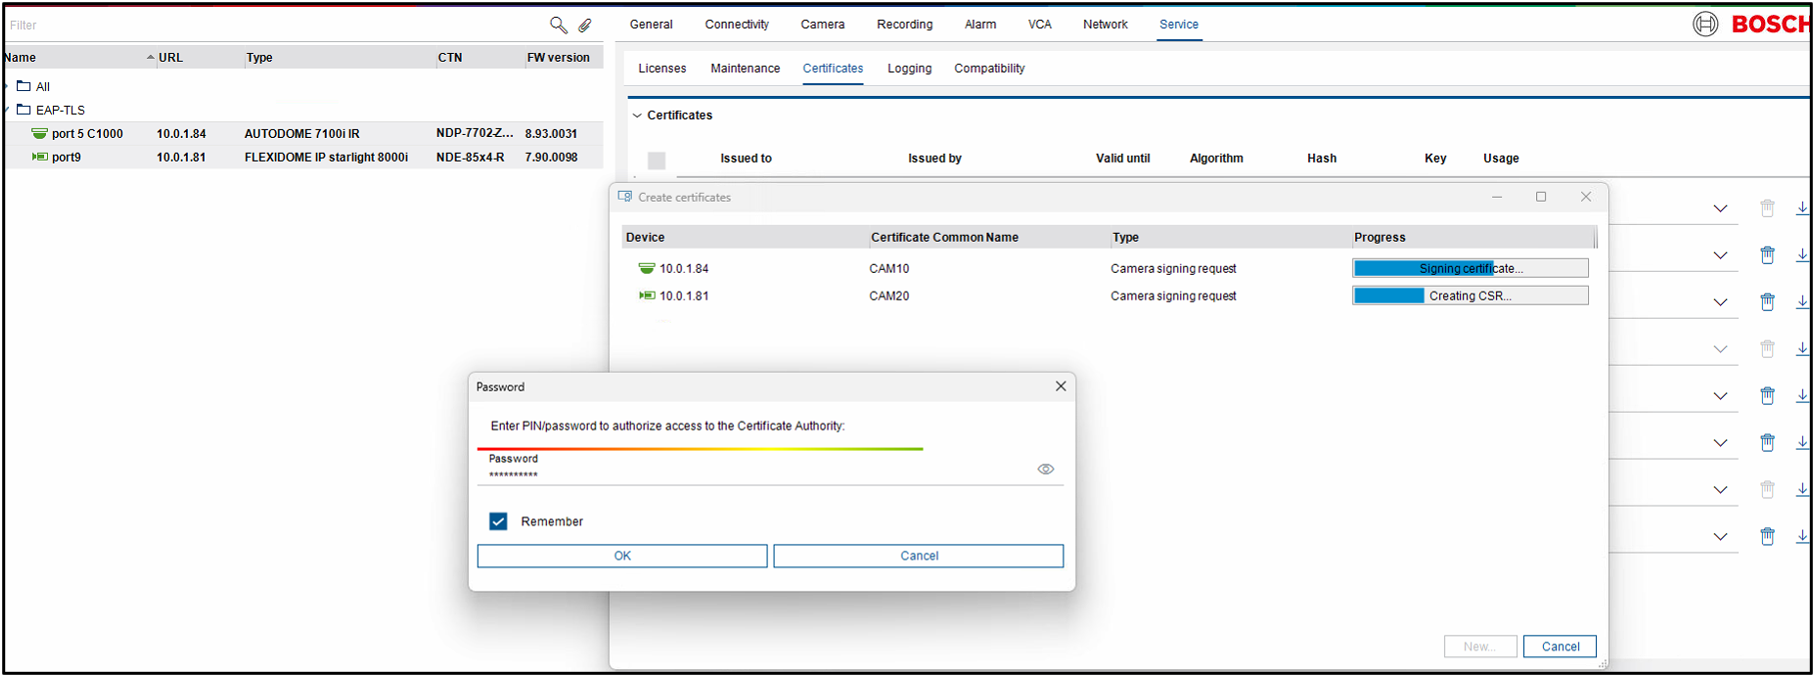
In this example, I renew the “EAP-TLS Client” certificate on two cameras simultaneously.
Step 1 > Choose a key type (preferably) that is supported by all selected cameras.
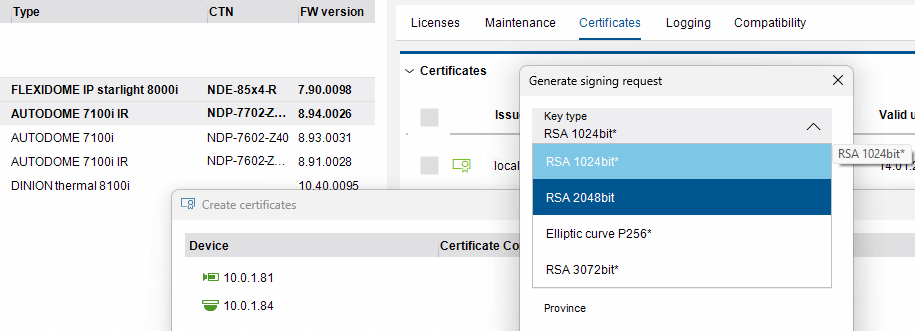
All ciphers without a * are commonly supported by all selected cameras.
If you select a cipher with a *, one or more selected cameras will not support it. In that case, the camera will automatically use the highest supported cipher.
For example, consider the following::
-
CPP4: Support up to RSA2048/SHA256.
-
CPP6, CPP7,CPP7.3 : Support up to RSA2048/SHA384 and Elliptic Curve
-
CPP13: SE8 Support up to RSA4096/SHA384 | SE7 up to RSA3072 | Both NO Elliptic Curve
-
CPP14: Support up to RSA4096/SHA512 and Elliptic Curve
And following is possible
-
A stronger ROOT-CA can sign a weaker CSR so RSA4096 can sign RSA2048
-
A stronger ROOT-CA can sign another cipher CSR so RSA4096 can sign an Elliptic Curve - CSR
Step 2 > Fill in the Common Name.
To automatically populate this field with data from the Hostname field (see step 2 above), enter ${HOSTNAME} here.
Step 3 > Fill in the “Domain”, you can see on your current certificate what this should be.
in my case this is RADIUS.SERVER2019
Step 4 > Fill in the “Subject Alternative Name” (SAN). when you do Mass creation you can make use of the following place holders.
${IP}
${MAC}
${SERIALNUMBER}
${HOSTNAME}
It is advised to configure at minimum the ${HOSTNAME} in the SAN settings. In case enough data is provided by the user (hostname and domain name) the CM will automatically create SANs for EAP-TLS usage.
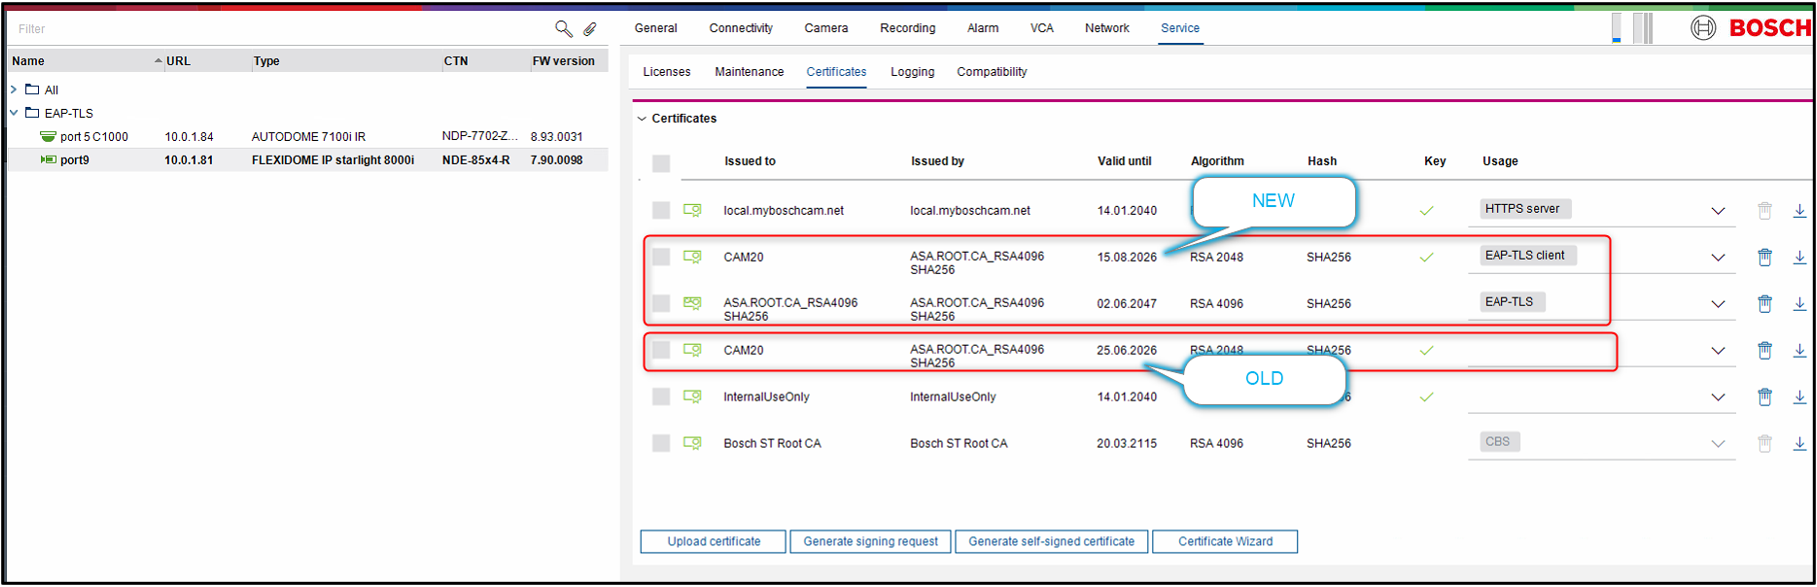
Step 5 > Select the ‘EAP-TLS client’ usage - in this case, we are creating new EAP-TLS client certificates. After creation, the usage will automatically be removed from the old certificate, and the new certificate will become active.
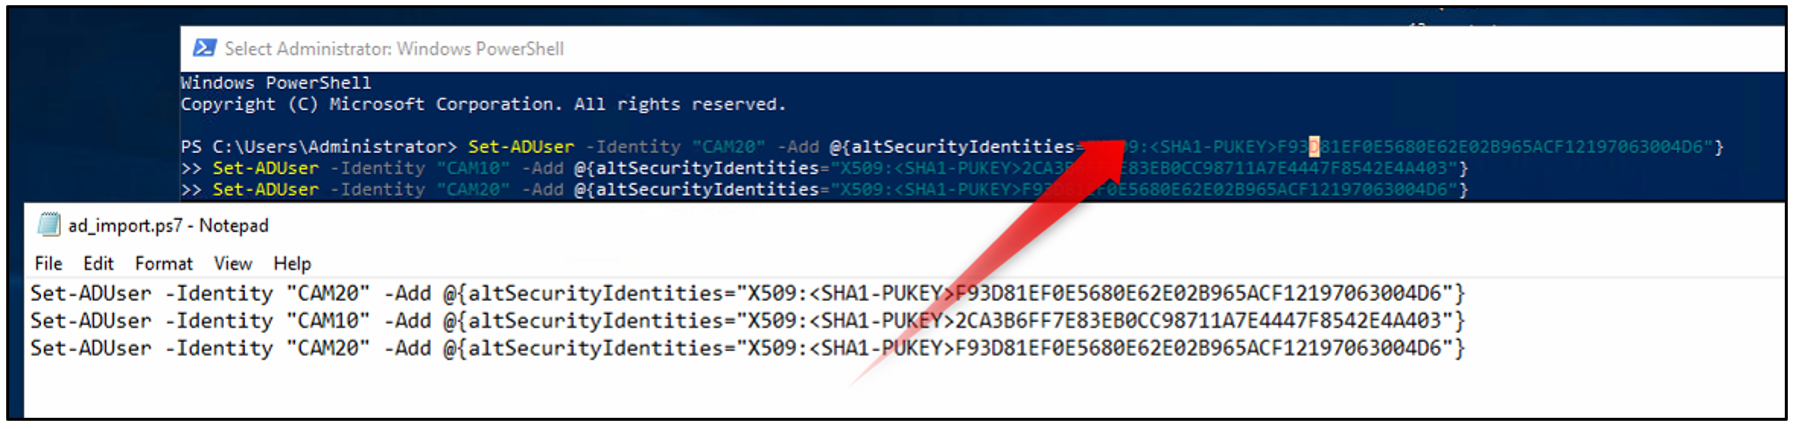
Step 6 > If you are using Windows Server 2022, generate and run this PowerShell script on your domain controller server to create the necessary bindings. This step is not required for Windows Server 2019.
Click the button and select a location to save the script; the script itself is created by CM - no user action required.
Step 7 > Now press “create” to create the certificates, you might get prompted to fill in the Password to access the ROOT-CA
After creating the new certificate, the “EAP-TLS client” usage will be removed from the old certificate and activated for the new one.
-
Deploy the script generated during the CSR setup on your Domain Controller Server.
Note: This step is necessary only for Windows Server 2022 and newer, and not required for Server 2019.
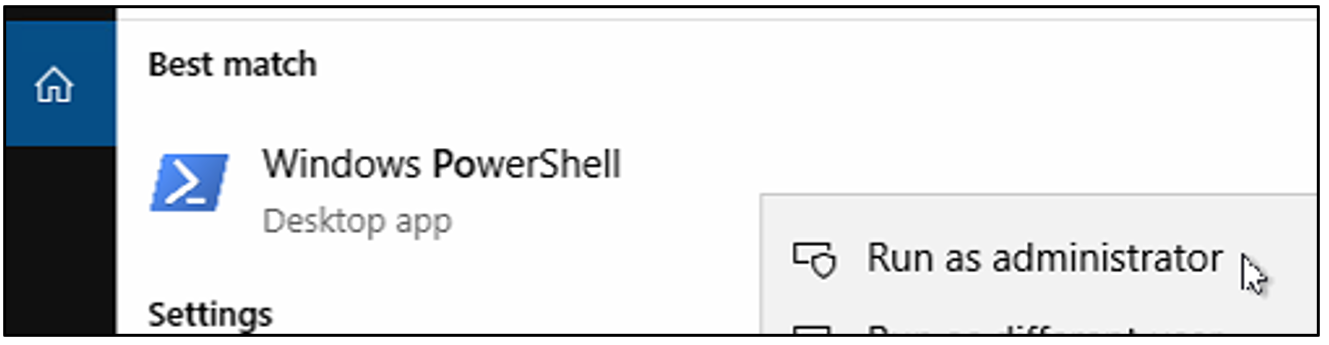
Navigate to “Power shell” and “Run as administrator”
Copy paste the script lines into power shell and press enter. Alternatively the user can copy the entire script and execute it.