How to add Remote Portal cameras to Bosch Alarm Management?
Bosch Alarm Management supports Bosch IP cameras which are registered to Remote Portal by receiving different triggers to be used in Alarm Management's Service Scenario.
So events can be forwarded to Alarm Management Event monitor website, Central Monitoring Stations.
In this article it is explained in a step-by-step guide how to activate the needed services in Remote Portal to be able to connect the cameras to Bosch Alarm Management.
2.2 Configure the Alarm Management Initial Configuration (Cloud optimized camera settings)
Cameras which are registered to Remote Portal do not get the Alarm Management ‘Initial Configuration’ applied during commissioning these cameras to Alarm Management.
Therefore we recommend you to perform 10 manual configuration steps - deviating from the camera’s factory default settings - to get correct operation over the given Internet connection.
2.2.1 Save the original camera configuration in Remote Portal
Before changing the camera’s settings, save your original camera configuration in Remote Portal:
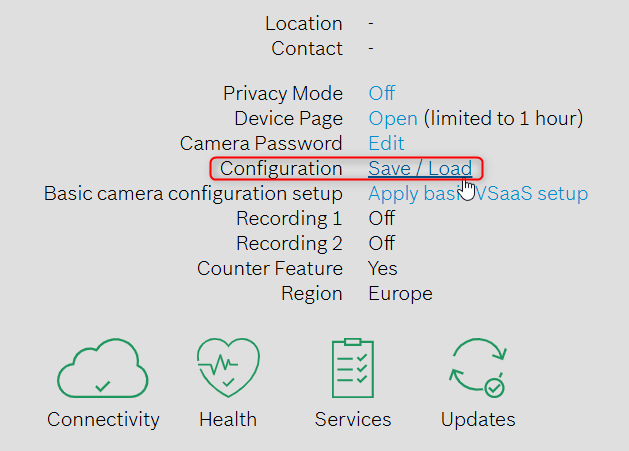
1. In Remote Portal, click the related camera card and click ConfigurationSave / Load in the camera’s detail page.
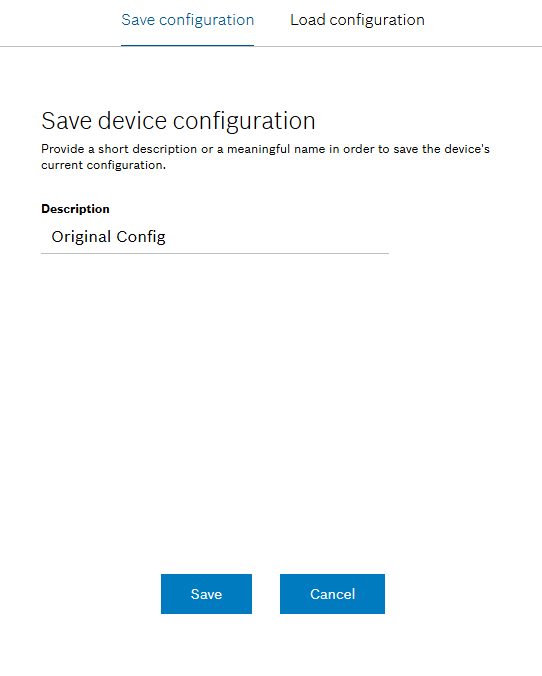
2. Select Save configuration tab and enter a description (e.g. ‘Original Config’) and click Save.
2.2.2 Configure the optimized cameras settings for Alarm Management.
Note: The following steps can be either performed in Remote Portal for every camera, or in Bosch Configuration Manager - certain settings even for multiple cameras at one time.
VRM IP address (when recording on VRM based recorder, e.g. Divar IP)
2. Click Set.
Step 3: Time Stamping
1. Navigate to Camera > Installer Menu > Display Stamping and select Time stamping Top
2. Click Set.
Step 4: Camera settings
1. Navigate to Camera > Installer Menu, select Coding standard H.264 and use the Lens Wizard to adjust camera view, focus and zoom (depends on camera model).
2. Navigate to Camera > Installer Menu > Positioning > calibrate the camera and click Set.
3. Navigate to Camera > ALC and increase Day-to-night-switchover to 0.
Step 5: Stream settings
1. Navigate to Camera > Encoder Profile > select Profile 7 and configure as follows:
Profile Name: CBS Recording
Bit rate optimization > select Low bit rate
Maximum bitrate: 1000 kbps
Encoding interval > move slider to 2 fps
Click Expert Settings button
GOP structure > select IP
I-frame distance > move slider to 4 (0.50 I-frames/s)
2. Navigate to Camera > Encoder Profile > select Profile 8 and configure as follows:
Profile Name: CBS Live
Bit rate optimization > select Minimum bit rate
Maximum bitrate: 250 kbps
Encoding interval > move slider to 5 fps
Click Expert Settings button
GOP structure > select IP
I-frame distance > move slider to 10 (0.50 I-frames/s)
3. Navigate to Camera > Encoder Streams and configure the Encoder Streams as follows:
Stream 1
Property: select maximum resolution
Non-recording profile > select 7: CBS Recording
Stream 2
Property > select SD
Non-recording profile > select 8: CBS Live
Step 6: Audio settings
1. Navigate to Camera > Audio and select Audio On
2. Input volume > move slider between blue and red color in level control
3. Line Out > move slider to max value
4. Recording format > select AAC 48 kbps
Step 7: Recording Settings
1. Navigate to Recording > Recording Scheduler > select one profile (recommended: last profile (grey))
Rename the selected profile to CBS
Mark the CBS profile > Click Select All > then click Set.
2. Navigate to Recording > Recording Profiles > select CBS profile
a. In field Stream profilesettings
Stream 1 > select 7: CBS Recording
Stream 2 > select 8: CBS Live
b. In field Settings for selected recordings
For Recording 1
Recording includes Audio (AAC 48 kbps) Metadata
Standard recording > select Continuous
Stream > select Stream 1
For Recording 2
Recording includes Audio (AAC 48 kbps) Metadata
Standard recording > select Continuous
Stream > select Stream 2
4. Navigate to Recording > Storage Management
Add Local Storage (SD Card) to Managed storage media > optional format the medium (Edit > Format)
Enable Rec. 1 and optional enable Rec. 2
Step 8: VCA Settings
1. Navigate to Alarm > VCA
2. in VCA Configuration > select Profile #1
3. Analysis type > select Intelligent Video Analytics or Essential Video Analytics (depends on camera model)
4. For MOTION+ cameras: Aggregation time > configure 1 to 4 s > click Set.
5. Click Configuration button and configure your VCA tasks, such as Motion in field, Crossing line, Loitering, etc.
Note: VCA configuration needs to be performed with Bosch Configuration Manager.
3. Activate the needed Services in Bosch Remote Portal
To connect the cameras to Alarm Management, certain services need to be activated in Remote Portal. A license is required per camera to activate these services.
3.1 The following services provide the connection to Alarm Management:
The licenses are valid 1 year after activation and usually belong to one (1) device.
Service
License (CTN)
Features
Alarm Management
CBS-ALMGT-CAM
Activates the connection to Bosch Alarm Management and enables Security Operation Centers (SOC) or end-customers to self-manage alarms in the Bosch Alarm Management.
Alarm Transmitter
CBS-ALMGT-CAT
Forward camera events with activated Alarm Management Service in the Bosch Alarm Management to 3rd party Alarm Automation Platforms.
Cloud Storage
CBS-EBR-CAM
Record, store and access video event clips in the Bosch Security Cloud.
Alarm Monitoring
CBS-MON-CMS
Use Alarm Monitoring to connect cameras to services of certified Monitoring Centers in the Bosch Partner Network.
Video Security Cloud Service 1yr
CBS-MOBILE
License to enable VideoView+ services for one camera for a 1-year period.
1. Order the required licenses by Bosch Order desk > You will get an e-mail with the related license codes included.
2. Logon Bosch Remote Portal as Administrator
3. Navigate to Service Licenses tab
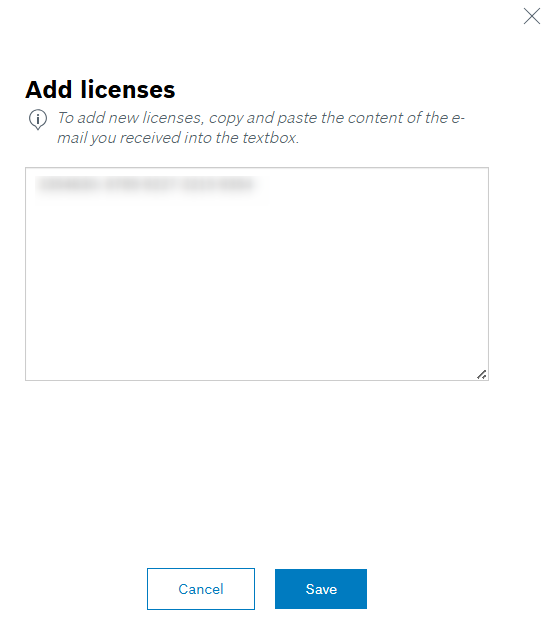
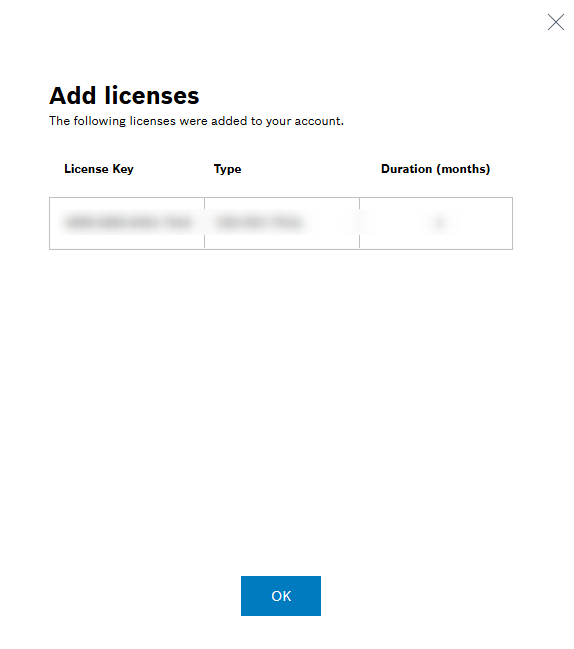
4. Click the icon > click Add licenses
5. Paste the license information of the e-mail into the text box and click Save
6. Confirm the licenses and click OK
7. The new licenses appear in the Licenses tab.
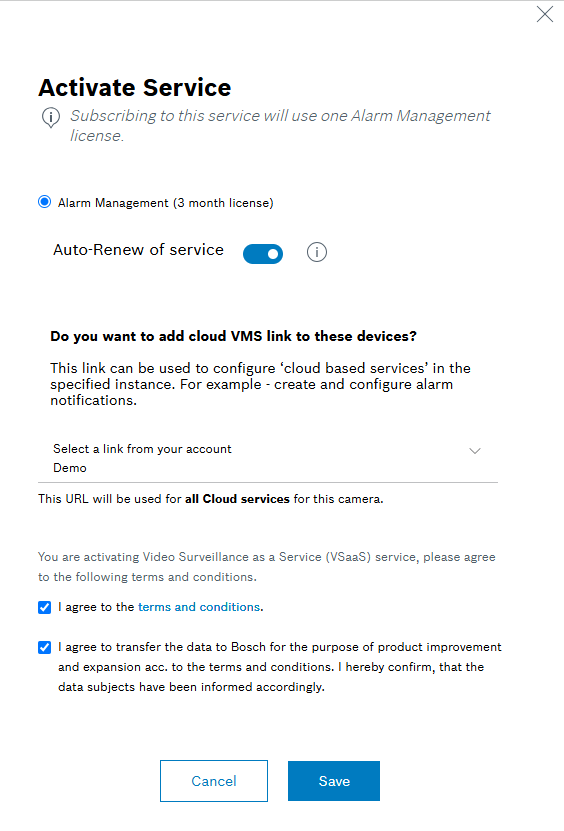
3.3 Activate services in Bosch Remote Portal
1. Logon Bosch Remote Portal as Administrator
2. Navigate to Systems tab
3. Select the required camera
4. Under Services select any available service and click Activate Service button
5. Enable with Auto-Renew to automatically use next available license after expiration and click Save.
Note: The services need to be activated for every camera.
4. Add your cameras to Alarm Management
Add Remote Portal cameras with the activated related service to Alarm Management:
1. Open Alarm Management Configuration website (/config), log on as Integrator or Config Agent.
2. Enter the related Account - or create a new Account for the customer.
3. Enter the related Site - or create new Site.
4. Click '+' button to add the camera to this Site.
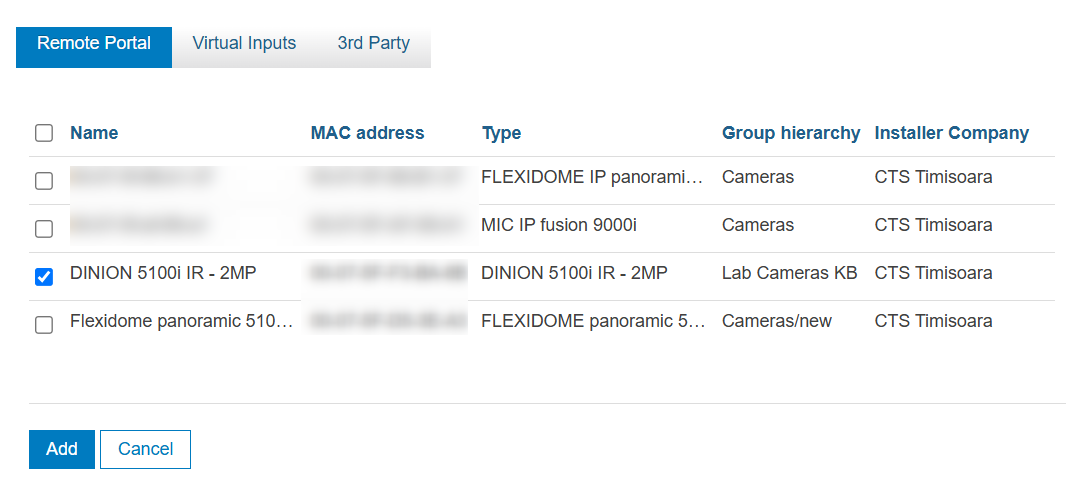
5. Select Remote Portal Devices tab.
6. Authenticate with your Remote Portaluser and password (Admin or Technician user required).
7. Click Login to Remote Portal button.
8. Select the cameras to add and click Add button.
9. The cameras are connected to Alarm Management and ready for use in the related Service Scenarios. So events can be forwarded to Alarm Management Event monitor website, Central Monitoring Stations and Bosch Site Monitor App.
Notes:
To get the connection from Remote Portal to Alarm Management, working, the cameras need to be in the same region as the Alarm Management instance.
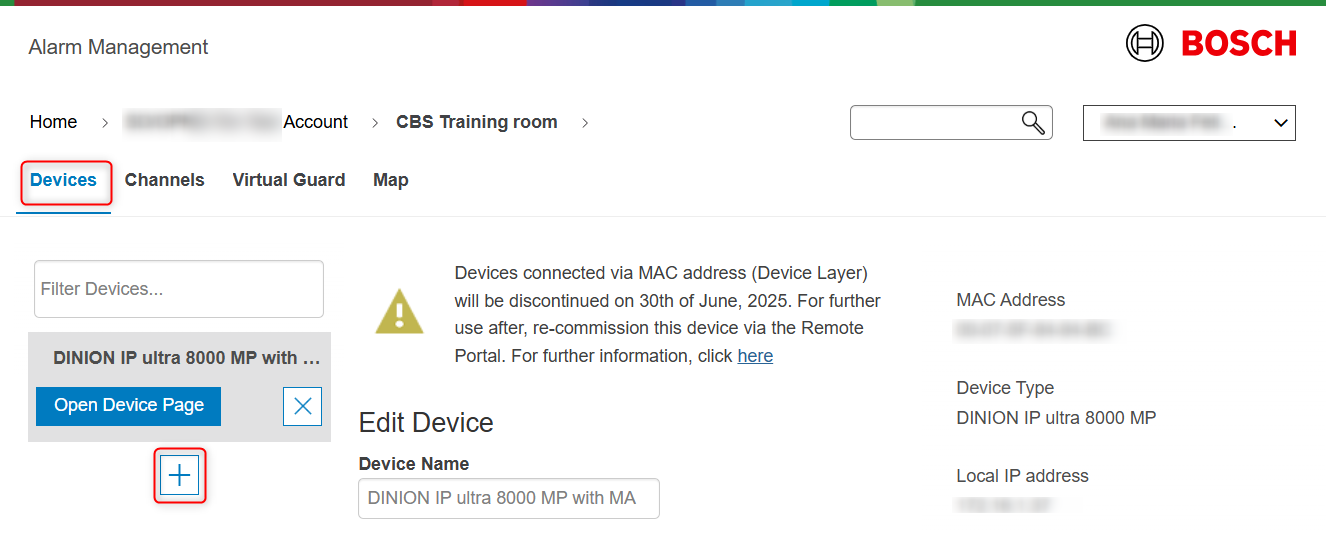
If the camera does not appear in above list, verify if the related service is activated for this camera in Remote Portal.
Nice to know:
For a better understanding of using theVideoView+ for Cameras and DIVAR IP we encourage you to join ouronline Trainingfrom KEENFINITY Academy!
JavaScript errors detected
Please note, these errors can depend on your browser setup.
If this problem persists, please contact our support.