
How to utilize the Video Security Client (VSC) with a remotely connected DIVAR IP using VideoView+ for DIVAR IP?
🕦 This procedure takes in average ~ 10 min to complete
This article provides a step-by-step guide for the following actions within the Remote Portal and Video Security Client (VSC) with a remotely connected DIVAR IP:
Logging into the Remote Portal in VSC using single sign-on credentials.
Accessing a remote DIVAR IP with BVMS credentials.
Exploring the Live tab functionality.
Exploring the Playback tab functionality.
Exploring the Forensics tab functionality.
Prerequisites:
Administrator Single sign-on ID credentials for Remote Portal
A supported DIVAR IP all-in-one, which is connected to Remote Portal
An activated and valid license for VideoView+ for DIVAR IP
Video Security Client 3.7.2 or higher
Cameras need to be integrated into the BVMS system in order to be seen and accessed in VSC
Step-by-step guide
Open Video Security Client on the remote PC, either from the Windows Desktop or from the start menu
Without logging in, only locally connected systems will show on-screen.
Click the Accounts button on the menu in the top-right corner.
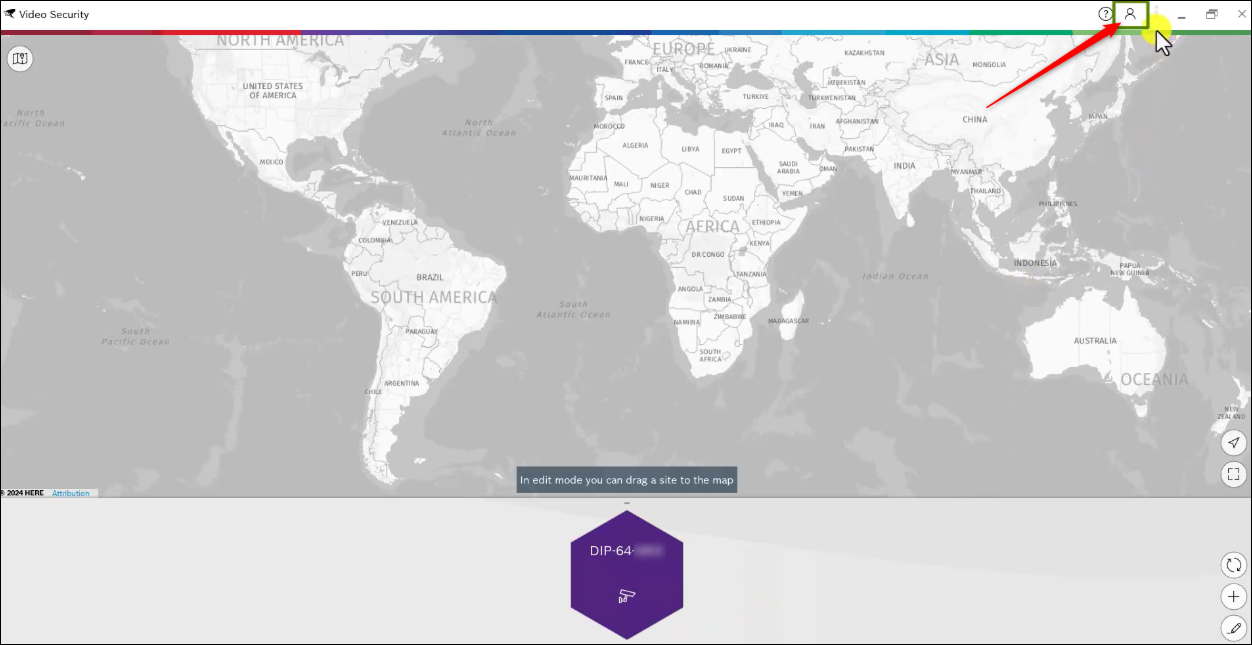
No Remote Portal accounts are currently connected. To add an account, just click the > button and Sign in.

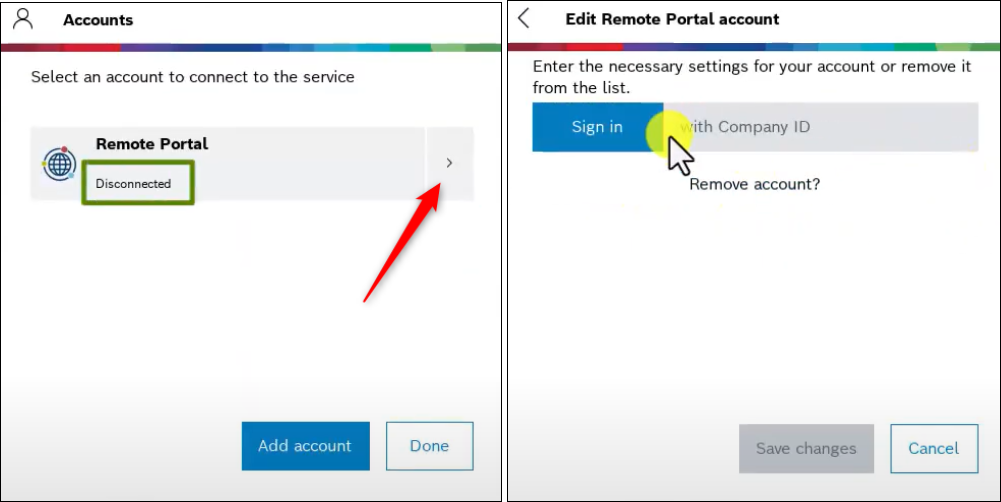
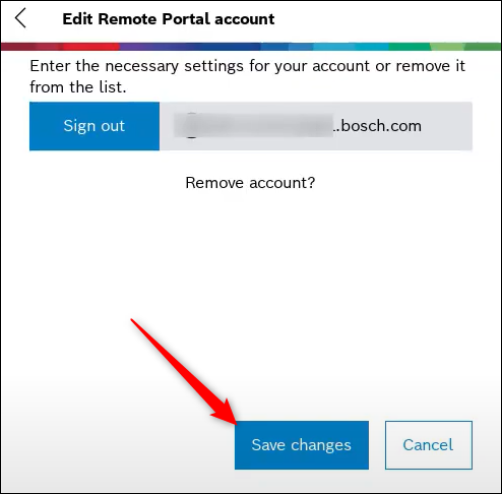
Sign in with your single sign-on Remote Portal credentials:
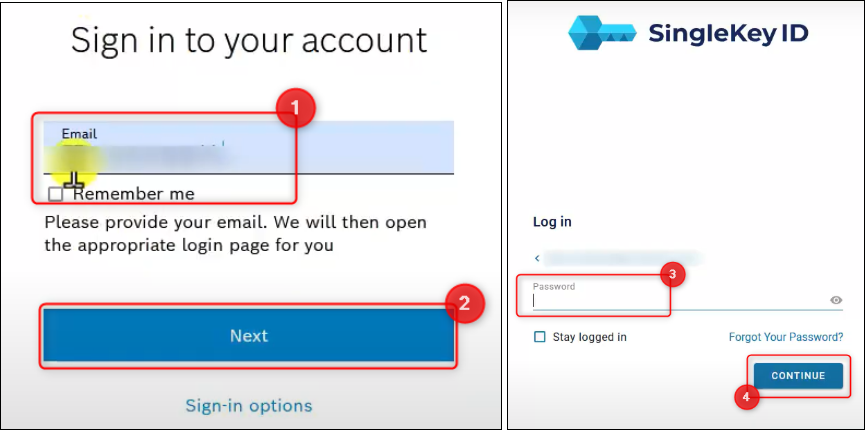
Once the account is signed in, select Save changes:
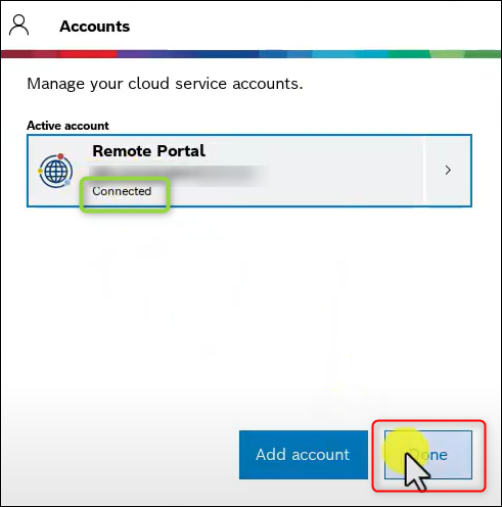
The Remote Portal account is now connected, and the attached systems are now visible. Click Done:
Now we will open one of the Remote Portal connected systems in VSC.
%20with%20a%20remotely%20connected%20DIVAR%20IP%20using%20VideoView+%20for%20DIVAR%20IP.png?inst-v=351b8a5d-2311-4dca-936f-5d1e8b7ab61e)
In order to automatically log in, starting at next log in, select Remember password.
Cameras that were open from a previous session will re-open at log-in.
%20with%20a%20remotely%20connected%20DIVAR%20IP%20using%20VideoView+%20for%20DIVAR%20IP%20(2).png?inst-v=351b8a5d-2311-4dca-936f-5d1e8b7ab61e)
Panoramic cameras automatically show a dewarped view and two detailed views which can be modified by using ePTZ.
Moving cameras have similar options for PTZ.
Now, we will take a look at the Playback options.
The Timeline is shown on the right-hand side. A blue line signifies recorded video:
%20with%20a%20remotely%20connected%20DIVAR%20IP%20using%20VideoView+%20for%20DIVAR%20IP%20(3).png?inst-v=351b8a5d-2311-4dca-936f-5d1e8b7ab61e)
The time granularity can be set at the top of the time line:
%20with%20a%20remotely%20connected%20DIVAR%20IP%20using%20VideoView+%20for%20DIVAR%20IP%20(4).png?inst-v=351b8a5d-2311-4dca-936f-5d1e8b7ab61e)
Click anywhere on the blue timeline to start playback.
%20with%20a%20remotely%20connected%20DIVAR%20IP%20using%20VideoView+%20for%20DIVAR%20IP%20(5).png?inst-v=351b8a5d-2311-4dca-936f-5d1e8b7ab61e)
The third option is Forensics used to find incidents.
There are 4 supported algorithms in VSC:

- Trigger when a face is detected

- Trigger when an object crosses a line

- Trigger when an object is detected within a field
%20with%20a%20remotely%20connected%20DIVAR%20IP%20using%20VideoView+%20for%20DIVAR%20IP%20(6).png?inst-v=351b8a5d-2311-4dca-936f-5d1e8b7ab61e)
In this article we used the Crossing a line algorithm:
Simply draw a line on the screen, then select the beginning and end times and dates for the search (e.g. 1 hour up to the current time) and click OK.
%20with%20a%20remotely%20connected%20DIVAR%20IP%20using%20VideoView+%20for%20DIVAR%20IP%20(7).png?inst-v=351b8a5d-2311-4dca-936f-5d1e8b7ab61e)
Click the magnifier to start the search.
Once the search is complete, the bottom timeline will show incidents in peaks. The higher the peak, the more times the algorithm was triggered.
The timeline on the right shows incidents vertically, with snapshots of the detected objects.
The shown timeframe can be changed at the top, to make finding specific instances easier.
%20with%20a%20remotely%20connected%20DIVAR%20IP%20using%20VideoView+%20for%20DIVAR%20IP%20(8).png?inst-v=351b8a5d-2311-4dca-936f-5d1e8b7ab61e)

Nice to know:

For a better understanding of Bosch VideoView+ for Cameras and DIVAR IP, we encourage you to join our online Training from Bosch Building Technologies Academy!

You can refer to the following YouTube videos for additional help:
Bosch Security - VideoView+ for DIVAR IP - Connecting a DIVAR IP to Remote Portal using SSO ID
Bosch Security - VideoView+ for DIVAR IP - Adding and activating licenses
Bosch Security - VideoView+ for DIVAR IP - Adding users and giving access
Bosch Security - VideoView+ for DIVAR IP - Using Video Security Client