
Upgrade from BVMS v11.1.1, v12.1 or v12.2 to v12.3 on DIVAR IP all-in-one 4000 (DIP-44xx) & 6000 (DIP-64xx)
🕒 This procedure takes in average:
for DIP 4000 AIO ~1h30 min to complete
for DIP 6000 AIO ~25 min to complete
Note
This document is specifically for DIVAR IP all-in-one 4000 (DIP-44xx) & 6000 (DIP-64xx).
The document details how to upgrade from BVMS v11.1.1 to v12.3 with System Manager.
📚 Overview: |
It is advisable that any actions performed on a Bosch Video Management Server to be done by a trained installer.
Please join the web-based trainings on Bosch Building Technologies Academy.
![]() Regular BVMS 12.1 installer will not run on any DIVAR IP all-in-one platform. The upgrade shall be performed via DIVAR IP System Manager application.
Regular BVMS 12.1 installer will not run on any DIVAR IP all-in-one platform. The upgrade shall be performed via DIVAR IP System Manager application.
Keep in mind: If you want the latest version of BVMS, it must be downloaded and applied with the latest version of System Manager.
Minimum BVMS version on DIP-44xx & DIP-64xx: BVMS v11.1.1
Update method: System Manager package
When updating DIVAR IP appliance (DIVAR IP all-in-one 4000 & 6000), managed by DIVAR IP System Manager, special corresponding packages are required to upgrade BVMS on these devices.
Note
A factory default DIVAR IP all-in-one 4000 should be booted up and configured up to the Software Selection screen.
To be automatically detected by the Software Selection screen, the DIVAR IP System Manager installation file SystemManager_x64_x.x.x.exe must be located in a folder with the following structure: Drive root\BoschAppliance\ (for example F:\BoschAppliance\ of an attached USB drive). Drive C: and Data drive(s) shall not be used for this purpose
Important
![]() Valid active SMA is required for BVMS version upgrade on DIVAR IP.
Valid active SMA is required for BVMS version upgrade on DIVAR IP.
Before upgrading BVMS to a new version on DIVAR IP, please make sure you have appropriate licenses for the new version.
![]() Good info to know: Usually, we recommend to upgrade BVMS in steps. Each version should not be more than ~two years apart. This prevents potential issues in the upgrade process.
Good info to know: Usually, we recommend to upgrade BVMS in steps. Each version should not be more than ~two years apart. This prevents potential issues in the upgrade process.
BVMS version release dates:
BVMS 11.1.1 - General availability 2022-06-03
BVMS 12.1 - General availability 2023-11-30
BVMS 12.2 - General availability 2024-05-08
BVMS 12.3 - General availability 2024-12-06
Installation prerequisites and operation notes
– The system must be connected to an active network during initial boot and package installation.
– DIVAR IP System Manager application version 2.1.0 or higher shall be installed and started. For the latest BVMS version it would be recommended to upgrade DIVAR IP System Manager to the latest version available on Download Store.
Note
In upgrade scenarios for BVMS operation mode, a manual system reboot is required after BVMS upgrade with the BVMS 12.1.0 System Manager package 1.0.
This results in a short recording gap.
This fixes the issue of updating the reading of BVMS licensing information, as well as updates BVMS version number indicated on BVMS Desktop.
Step-by-step guide
1. Upgrade from BVMS 11.1.1 to BVMS 12.1.0
Export the configuration from BVMS 11.1.1
Make sure that you have DIVAR IP System Manager installed on your devices. It is recommended to have/ upgrade the DIVAR IP System Manager to v2.5.0
Download directly: DIVAR IP System Manager 2.5.0
See here the steps about:
Release Notes: Install Install DIVAR IP System Manager 2.5.0 (page 4)
Video: DIVAR IP all-in-one 5000 and 7000 (DIP-72xx) - Installing System Manager ≥ 2.1
Video: DIVAR IP all-in-one with System Manager - Updating System Manager
Important
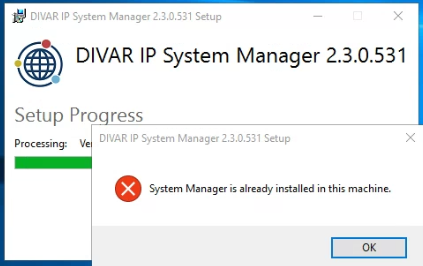
If you have an old version of DIVAR IP System Manager on your system, please be sure that before installing the latest version of DIVAR IP System Manager, first you uninstall the older version. Otherwise, if you try run directly the latest version of DIVAR IP System Manager, it will not allow you to perform the installation properly. If you do that, “System Manager is already installed in this machine” message will be displayed, and the installation will not be finalized.
Make sure that DIVAR IP devices that have an old DIVAR IP System Manager version are upgraded to the latest DIVAR IP System Manager version, via the Software packages page.
‼️ DIVAR IP System Manager 2.5.0 is the minimum version for all the DIVAR IP all-in-one family systems to connect to Remote Portal after 2025-05-27. The background is an upgrade of Certification Authority used to connect to Remote Portal. Users need to have the administrator role in their Remote Portal account(s) to connect a DIVAR IP system.
It is always recommended to use the latest version of DIVAR IP System Manager. The latest version supersedes the previous ones and is the only supported version.
_____________________________
⚠️ Notice:
DIVAR IP System Manager 2.5.0 requires an update of the SuperDoctor service to version 5.19.0.1080. The update will overwrite the existing SuperDoctor settings. You must reapply any specific settings after the update. Make sure to note down your settings before you start the update. After the update, the SuperDoctor password will be reset to the default password DivaripSD5.
During the DIVAR IP System Manager 2.5.0 installation, the SuperDoctor monitoring service will be deactivated. You must activate it after the installation. Bosch strongly recommends to change the default password immediately after the first signin to SuperDoctor
2. Download BVMS 12.1.0 System Manager package 1.0
Download directly: BVMS_12.1.0_SystemManager_package_1.0 and BVMS_12.1.0_Updates_SystemManager_package_1.13 → ReadMe.txt | also available on Download Area |
and continue to follow the steps as explained below (3-10):
3. Save the BVMS 12.1.0 System Manager package 1.0 and BVMS_12.1.0_Updates_SystemManager_package_1.13 to a storage medium such as a USB stick.
Note: Installing System Manager from any other location than the USB stick is not supported and a factory default might be required!
4. Unzip the files on the storage medium.
Do not change the folder structure of the unzipped files!
5. Connect the storage medium to your DIVAR IP all-in-one 4000/ 6000 system
6. Start the DIVAR IP System Manager application:
– If you are signed in to Windows with the BVRAdmin administrator account, double click the DIVAR IP System Manager icon on the Windows desktop. The DIVAR IP System Manager application starts.
– If your system is running in BVMS operation mode, click the DIVAR IP System Manager icon on the BVMS desktop and sign in to the BVRAdmin administrator account. The DIVAR IP System Manager application opens in a full screen dialog box (You can exit the dialog box by pressing ALT + F4).
7. In the column Software packages Name, click the respective option button (BVMS) to select the software application that you want to upgrade
8. In the column Available version, select the BVMS 12.1 to which you want to upgrade your software application and then click Next. If applicable, a license agreement dialog box is displayed.
9. Read and accept the license agreement, then click Install to continue. The installation starts and the installation dialog box shows the installation progress. Do not turn off the system and do not remove the storage media during the installation process.
10. After all software packages are installed successfully, you will receive the message Installation finished successfully at the top of the page
11. Import the saved BVMS 11.0 configuration backup in Configuration Client and then > Save > Save and Activate
Warning
According to Release notes (page 4), the upgrade from previous version of BVMS with the BVMS 12.1.0 System Manager package requires a manual system reboot.
This fixes the issue of updating the reading of BVMS licensing information, as well as updates BVMS version number indicated on BVMS Desktop.
12. Upgrade from BVMS 12.1.0 or 11.1.1 to BVMS 12.2.0
![]() Given that there are ~two years apart between BVMS 11.1.1 and BVMS 12.2, you can perform the upgrade directly from BVMS 11.1.1 to BVMS 12.2 by following the steps from 13-21 below.
Given that there are ~two years apart between BVMS 11.1.1 and BVMS 12.2, you can perform the upgrade directly from BVMS 11.1.1 to BVMS 12.2 by following the steps from 13-21 below.
BVMS 12.2 - General availability 2024-05-08
BVMS 11.1.1 - General availability 2022-06-03
![]() First, before performing the upgrade to BVMS v12.2.0, please be sure to take into consideration this information.
First, before performing the upgrade to BVMS v12.2.0, please be sure to take into consideration this information.
Download BVMS_12.2.0_SystemManager_package_1.1
Download directly: BVMS_12.2.0_SystemManager_package_1.1 and BVMS_12.2.0_Updates_SystemManager_package_1.6.1 → ReadMe.txt | also available on Download Area |
and continue to follow the steps as explained below (13-21):
13. Save the BVMS_12.2.0_SystemManager_package_1.1 and BVMS_12.2.0_Updates_SystemManager_package_1.6.1 to a storage medium such as a USB stick.
Note: Installing System Manager from any other location than the USB stick is not supported and a factory default might be required!
14. Unzip the files on the storage medium.
Do not change the folder structure of the unzipped files!
15. Connect the storage medium to your DIVAR IP all-in-one 4000/ 6000 system
16. Start the DIVAR IP System Manager application:
– If you are signed in to Windows with the BVRAdmin administrator account, double click the DIVAR IP System Manager icon on the Windows desktop. The DIVAR IP System Manager application starts.
– If your system is running in BVMS operation mode, click the DIVAR IP System Manager icon on the BVMS desktop and sign in to the BVRAdmin administrator account. The DIVAR IP System Manager application opens in a full screen dialog box (You can exit the dialog box by pressing ALT + F4).
17. In the column Software packages Name, click the respective option button (BVMS) to select the software application that you want to upgrade
18. In the column Available version, select the BVMS 12.2 to which you want to upgrade your software application and then click Next. If applicable, a license agreement dialog box is displayed.
19. Read and accept the license agreement, then click Install to continue. The installation starts and the installation dialog box shows the installation progress. Do not turn off the system and do not remove the storage media during the installation process.
20. After all software packages are installed successfully, you will receive the message Installation finished successfully at the top of the page
21. Import the saved BVMS 12.1.0 or 11.1.1 (if you upgraded from this version) configuration backup in Configuration Client and then > Save > Save and Activate
22. Upgrade from BVMS 12.2.0, 12.1.0 or 11.1.1 to BVMS 12.3
Export the configuration from version 12.2.0 or 12.1.0 or 11.1.1 (depending on the version of your DIP and where you start the upgrade from).
![]() Given that there are ~two years apart between BVMS 12.2 or BVMS 12.1 and BVMS 12.3, you can perform the upgrade directly from BVMS 12.2 or 12.1 to BVMS 12.3 by following the steps below.
Given that there are ~two years apart between BVMS 12.2 or BVMS 12.1 and BVMS 12.3, you can perform the upgrade directly from BVMS 12.2 or 12.1 to BVMS 12.3 by following the steps below.
Considering that each version should not be more than ~two years apart and to prevent potential issues during the upgrade process, when upgrading from BVMS v11.1.1 to BVMS v12.3, first upgrade to v12.2 (steps 13-21 above) and then to v12.3 (steps 23-31 below).
BVMS 12.3 - General availability 2024-12-06
BVMS 12.2 - General availability 2024-05-08
BVMS 12.1 - General availability 2023-11-30
BVMS 11.1.1 - General availability 2022-06-03
![]() First, before performing the upgrade to BVMS v12.2.0, please be sure to take into consideration this information.
First, before performing the upgrade to BVMS v12.2.0, please be sure to take into consideration this information.
Download BVMS_12.3.0_SystemManager_package_1.1
Download directly: BVMS_12.3.0_SystemManager_package_1.1 | also available on Download Area |
and continue to follow the steps as explained below (23-31).
In upgrade scenarios for BVMS operation mode, a manual system reboot is not technically required, but recommended after BVMS upgrade with the BVMS 12.3.0 System Manager package 1.1.
This results in a short recording gap.
23. Save the BVMS_12.3.0_SystemManager_package_1.1 and BVMS_12.3.0_Updates_SystemManager_package_1.2 to a storage medium such as a USB stick.
Note: Installing System Manager from any other location than the USB stick is not supported and a factory default might be required!
24. Unzip the files on the storage medium.
Do not change the folder structure of the unzipped files!
25. Connect the storage medium to your DIVAR IP all-in-one 4000/ 6000 system
26. Start the DIVAR IP System Manager application:
– If you are signed in to Windows with the BVRAdmin administrator account, double click the DIVAR IP System Manager icon on the Windows desktop. The DIVAR IP System Manager application starts.
– If your system is running in BVMS operation mode, click the DIVAR IP System Manager icon on the BVMS desktop and sign in to the BVRAdmin administrator account. The DIVAR IP System Manager application opens in a full screen dialog box (You can exit the dialog box by pressing ALT + F4).
27. In the column Software packages Name, click the respective option button (BVMS) to select the software application that you want to upgrade
28. In the column Available version, select the BVMS 12.3 to which you want to upgrade your software application and then click Next. If applicable, a license agreement dialog box is displayed.
29. Read and accept the license agreement, then click Install to continue. The installation starts and the installation dialog box shows the installation progress. Do not turn off the system and do not remove the storage media during the installation process.
30. After all software packages are installed successfully, you will receive the message Installation finished successfully at the top of the page
31. Import the saved BVMS 12.2.0 or 12.1.0 (if you upgraded from this version) configuration backup in Configuration Client and then > Save > Save and Activate

Nice to know:
The Initial system setup and Choosing operation mode or Upgrading software instructions in the DIVAR IP all in-one 4000 systems are also available in Installation Manuals and User Manuals, and in the Application Note "DIVAR IP all‑in‑one Remote Portal connectivity".
When a major software application of the Operation mode is upgraded (for example, BVMS application in the Full video recording and management system, including BVMS, VRM and iSCSI storage Operation mode), corresponding dependent software applications are also upgraded (for example, VRM, VSG, etc.)
Important Notice after BVMS Upgrade
After upgrading BVMS to the latest version, please ensure the following:
Device Compatibility: All integrated devices (e.g., cameras, encoders, decoders etc.) are running firmware versions compatible with the new BVMS version. Compatibility details can be found in the official BVMS Release Notes. under the Versions chapter.
Hardware Requirements: Verify that your system meets the hardware requirements, especially regarding GPU and hardware drivers.
Bosch strongly recommends using the driver versions specified in the Release Notes to ensure optimal performance and reliable system operation.
Neglecting these steps may result in limited functionality or performance issues.
Prepare your DIVAR IP all-in-one devices to connect to Remote Portal as per Application Note "DIVAR IP all‑in‑one Remote Portal connectivity" (page 6)
Release Notes DIVAR IP System Manager 2.5.0
How to install BVMS 12.0.1 on a DIVAR IP 4000 or 6000 AIO if the initial image is 11.1.1?
❕ Keep in mind
If the DIVAR IP all-in-one system was provisioned to the Remote Portal prior to the official launch date of the VideoView+ for DIVAR IP service and Remote System Management service is not activated, the Video Connector has to be installed or updated locally on the DIVAR IP via DIVAR IP System Manager application.
According to the Release notes (Video-Connector 1.0.0 SystemManager package 1.0):
The Video Connector is a software component that is used in the VideoView+ for DIVAR IP solution to connect to the corresponding back-end component in the cloud, and transport video from DIVAR IP. The Video-Connector_1.0.0_SystemManager_package_1.0.zip contains a Video Connector installer software package for the DIVAR IP System Manager application. It is used to install or update the Video Connector component on the DIVAR IP appliances managed by the DIVAR IP System Manager.