Out of the factory, DHCP is enabled in the Bosch IP cameras. Therefore the network settings get applied automatically in the camera from the router.
Also the cloud connecting mechanism starts automatically for the first 8 hours after the camera is powered up. (not CPP14).
In some customer's network DHCP needs to be disabled and IP addresses are set manually.
Note: Not firmware specific. This ability is available for all cameras which can be commissioned to Remote Portal (f/w 6.40 and later)
To be able to deploy such camera with DHCP disabled to Remote Portal, please perform the following steps.
Step-by-step guide
1. Configure network settings correctly
Perform these steps in Configuration Manager.
1. Navigate to Network> Network Access
2. Configure
-
IP address
-
Subnet Mask
-
Gateway
-
DNS Server address
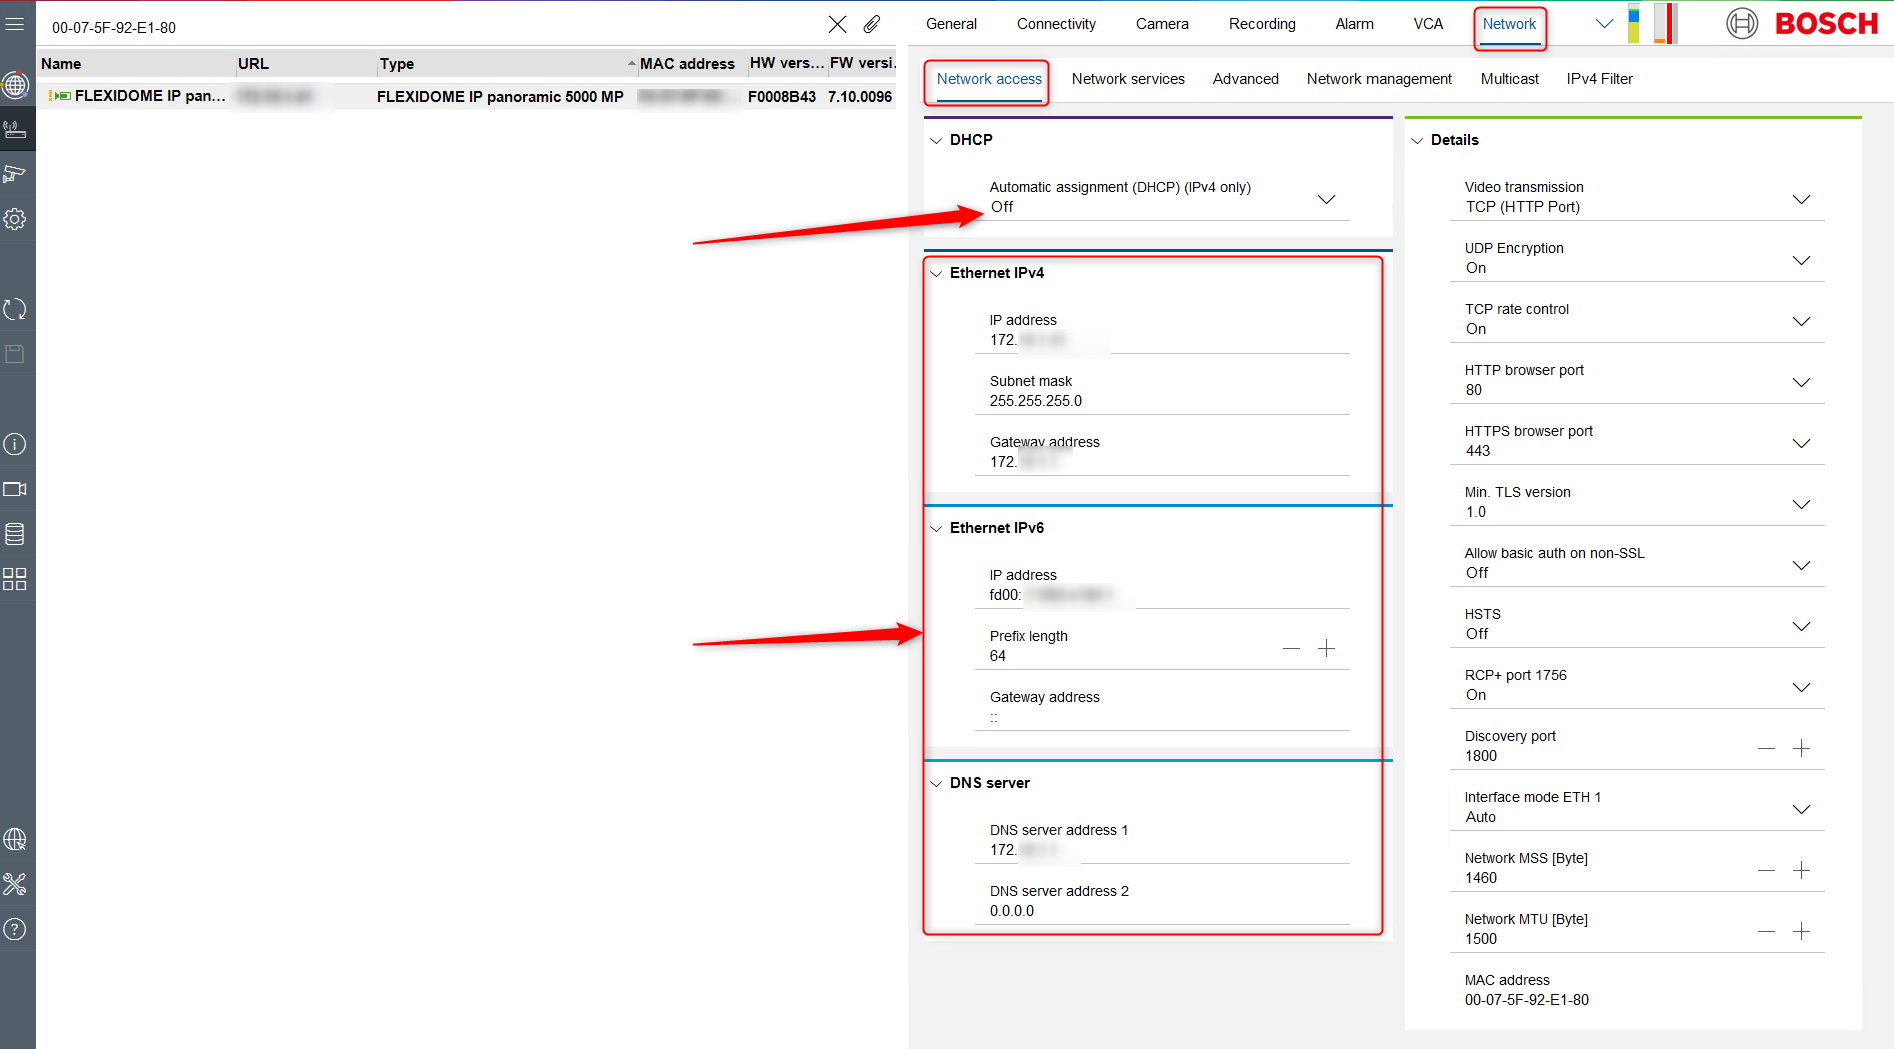
3. Click Set
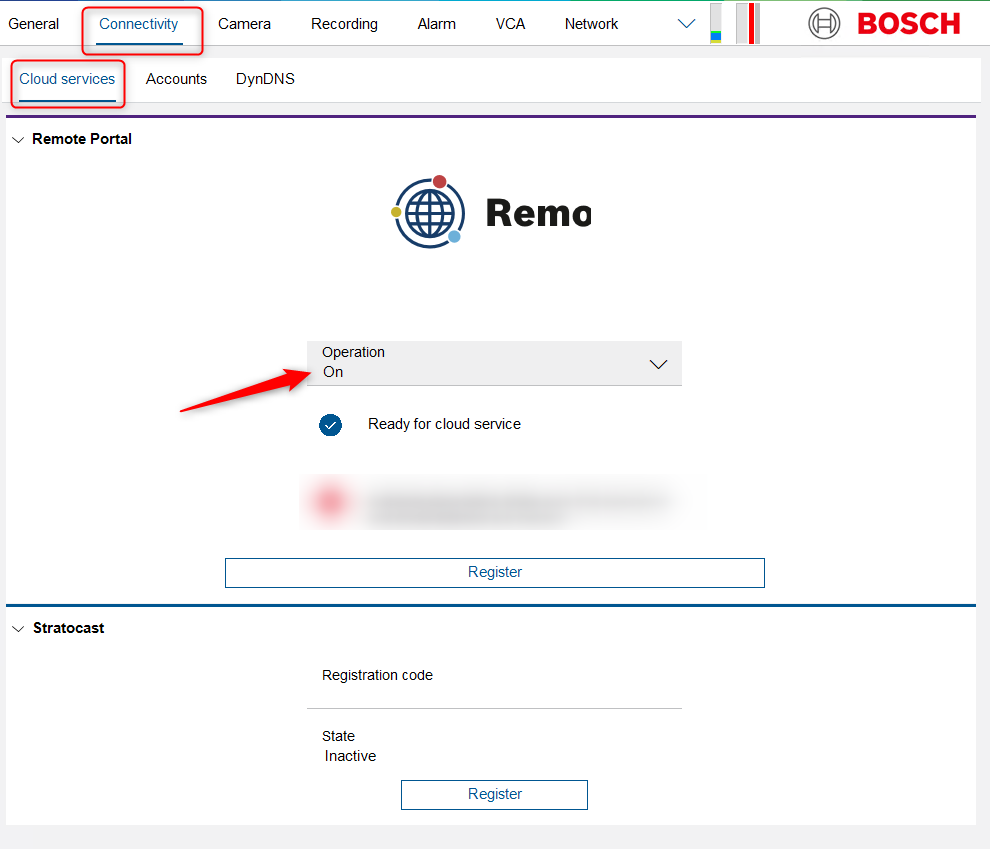
2. Enable cloud operation mode
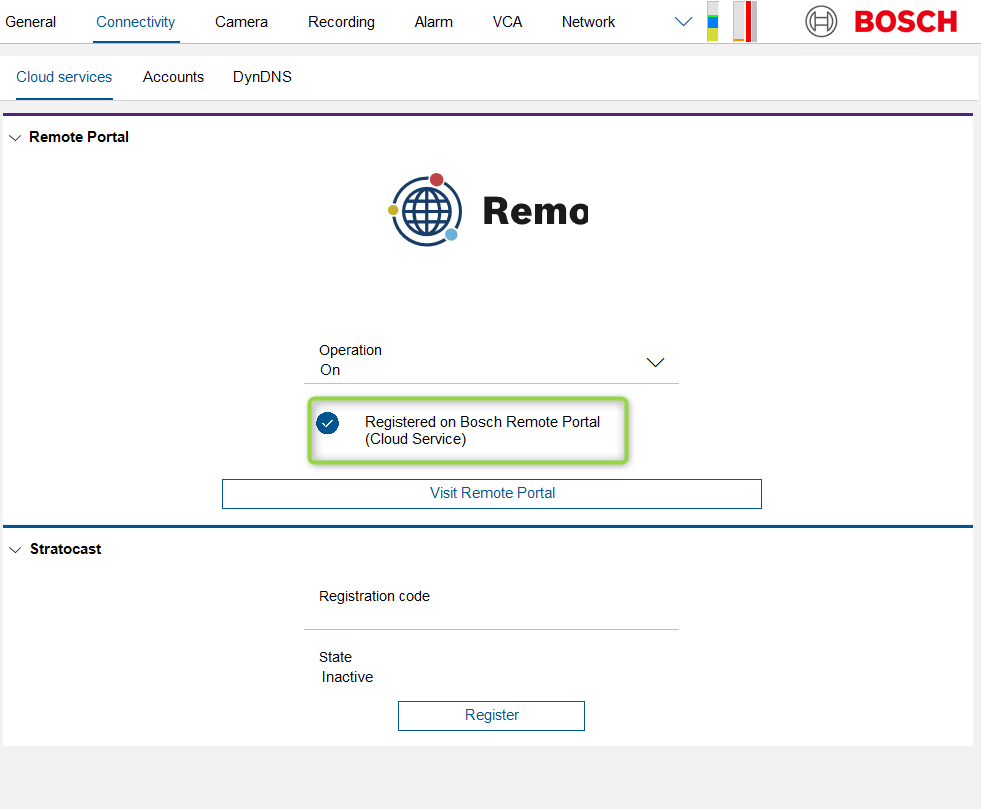
1. Navigate to Connectivity > Cloud services
2. Set Cloud operation mode to On
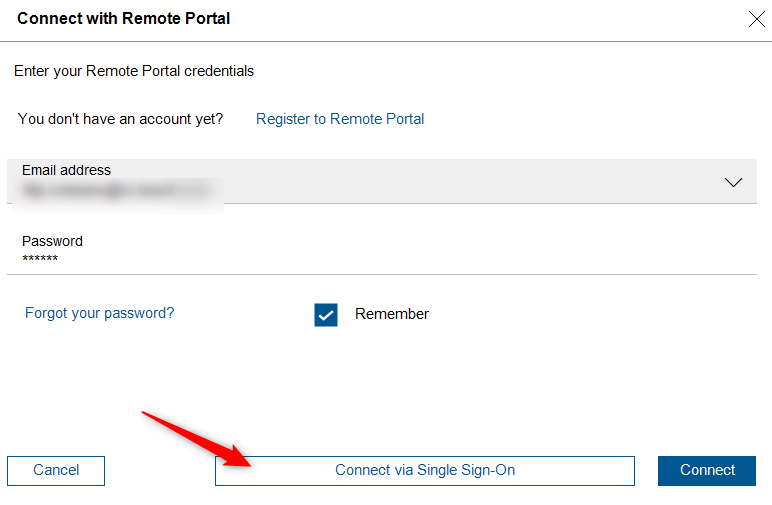
3. Connect to Remote Portal
1. Navigate to Connectivity > Cloud services
2. Click Register button
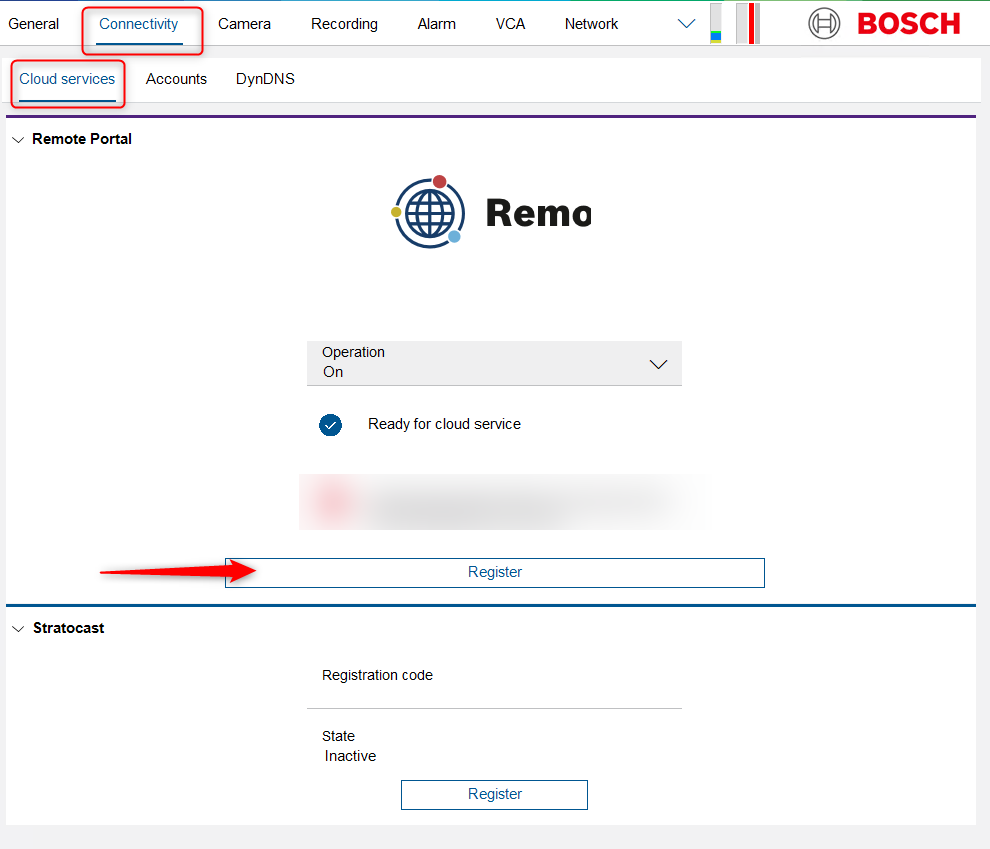
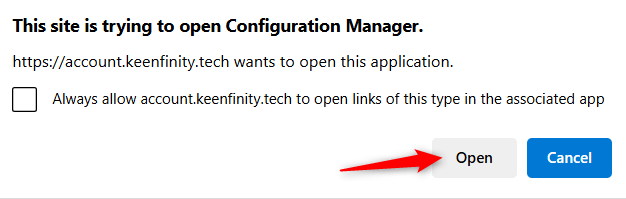
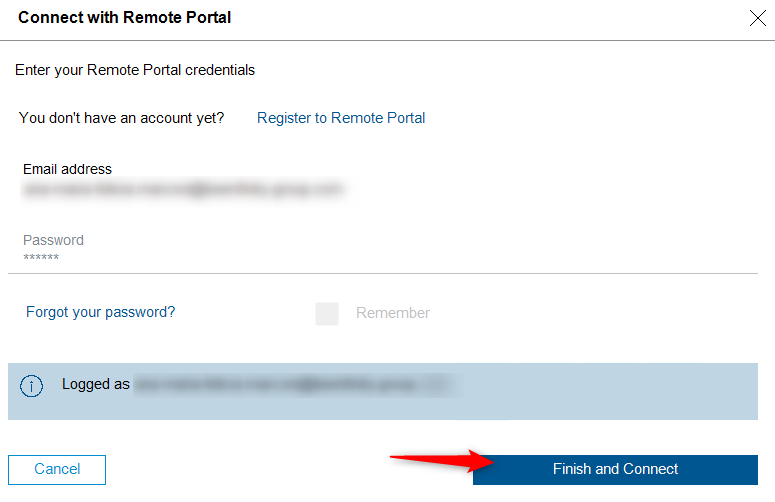
3. Connect via Single Sign-On. See also: How to convert the Remote Portal account to Single Sign-On ID (SSO: KeenfinityID - KFID)?
4. The connectivity state shows Registered.
Note: Be sure that you are a Remote Portal user which belongs to one (1) Company in Remote Portal only, or select the Default Commissioning Company.
For troubleshooting please visit the article Troubleshooting Camera Connectivity & Remote Portal.
4. Verify the connection to Remote Portal’s Video Relay
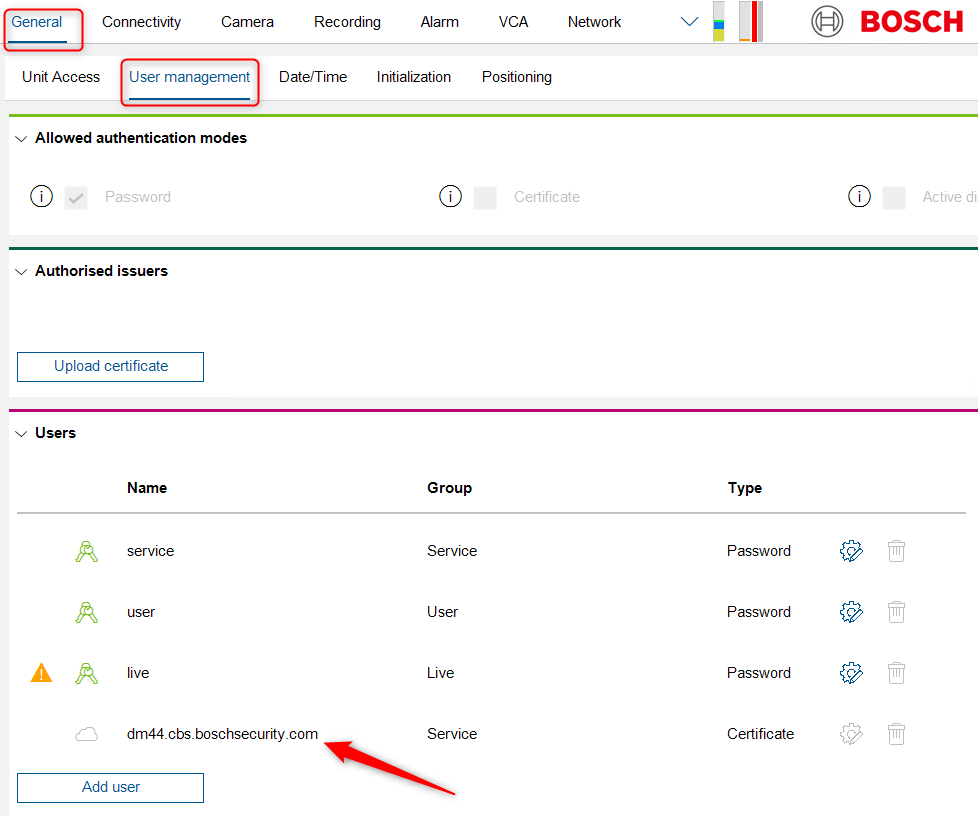
1. Navigate to General > User management
2. Verify if the correct Cloud user is created:
|
Type: Cloud user |
Region |
|---|---|
|
Europe |
|
|
America |
|
|
Asia Pacific |