
The RAID configuration is stored on the HDDs themselves, not only on the chassis.
So when you move all original disks together into a new, empty chassis, the system can import the existing RAID instead of creating a new one.
Step-by-step guide
1. Power off the new unit
-
Make sure the new DIP 74XX chassis is completely powered off
-
Do not insert disks while powered on
2. Insert the HDDs from the faulty unit
-
Insert all HDDs from the faulty/replaced DIP 74XX unit
-
Keep the original disk order (slot 1 → slot 1, slot 2 → slot 2, etc.)
-
This is critical to avoid RAID inconsistency
-
-
How to replace the HDDs in the DIVAR IP all-in-one 7000 (gen4)?
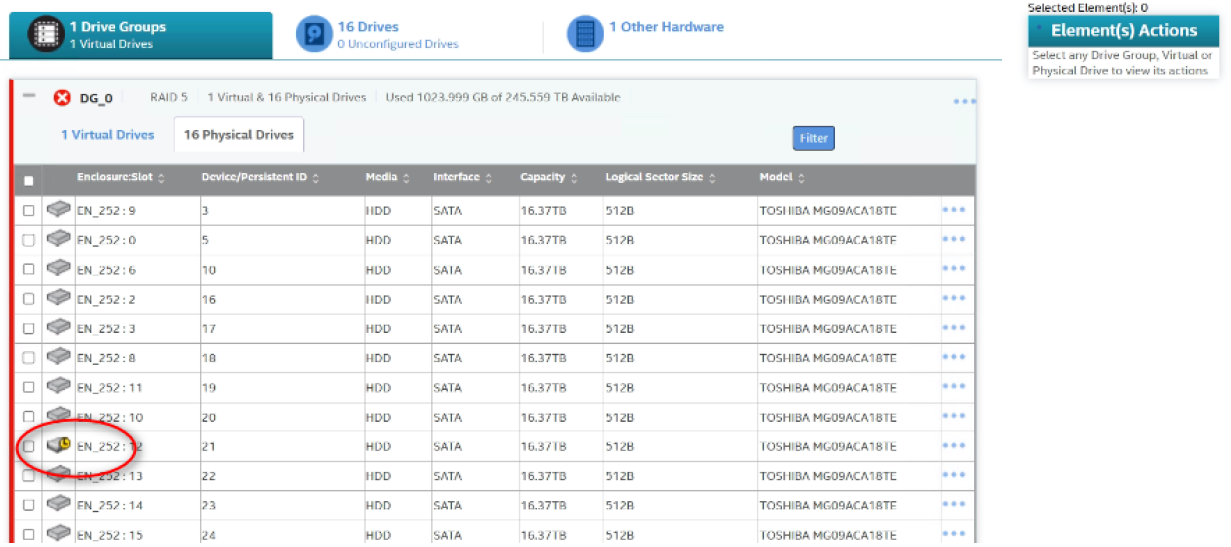
If the RAID is degraded after powering on the new unit, please refer to the following steps for the RAID import:
3. LSA RAID import steps
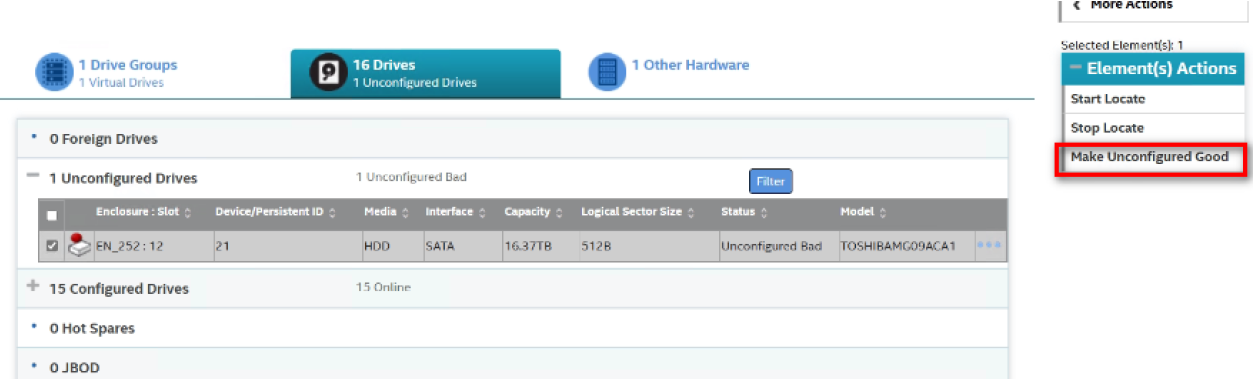
Drives marked as Unconfigured Bad must be set to Unconfigured Good before they can be imported for RAID rebuild.
-
Select drive make unconfigured Good:
-
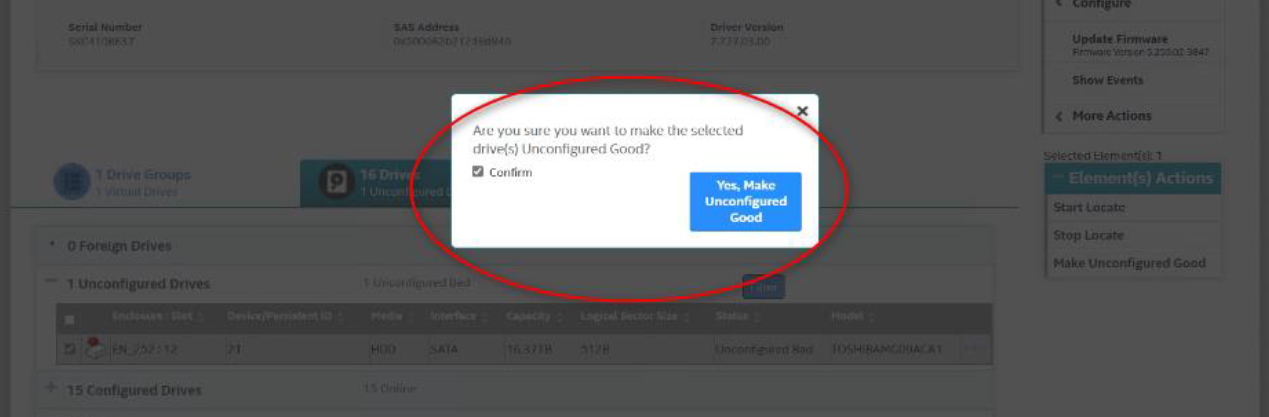
Make sure the “unconfigured Good drive” is selected and click “Yes, Make Unconfigured Good” button:
-
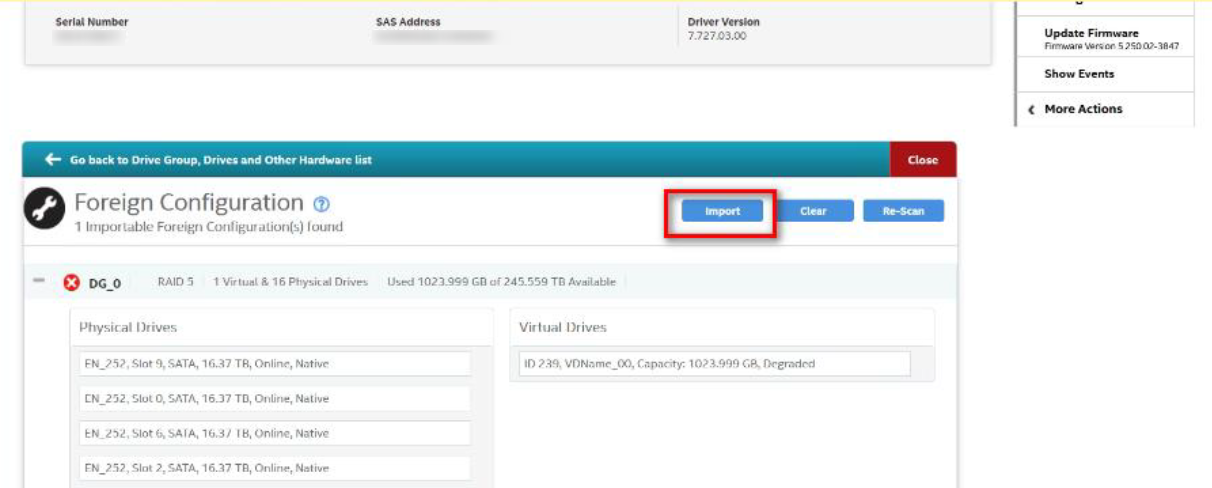
Select Foreign Configuration for the “Unconfigure Good” drive:

-
Import the “Foreign Configuration”
-
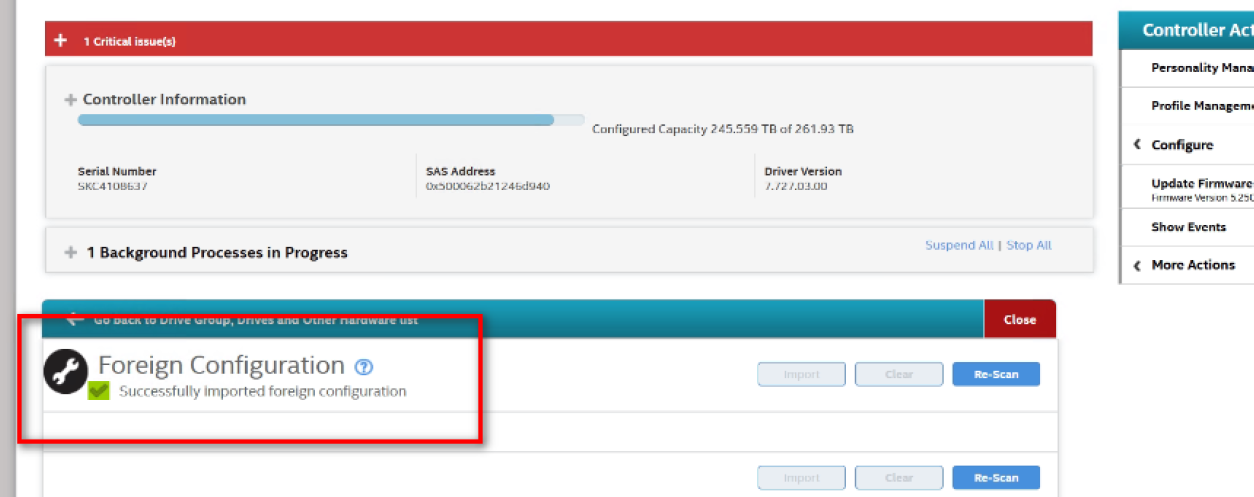
Foreign Configuration drive successfully imported:
-
Rebuild RAID after the drive is imported
When the RAID is healthy but VHDs / LUNs are not visible, you can manually import (attach) the VHDs using PowerShell.
PowerShell procedure to import VHDs
1. Open PowerShell as Administrator
-
Right-click Start
-
Select Windows PowerShell (Admin)
2. List available VHD files & import VHDs
-
Navigate to the folder where DIP stores VHDs: Get-ChildItem -Path "D:\\" -Recurse -Filter *.vhd*
-
Attach (import) the VHD. Use the following command as example: Mount-VHD -Path "D:\VHDs\Recording_LUN1.vhdx"
-
This attaches the VHD without modifying data.
-
3. Verify the disk is online
After mounting, check disk status: Get-Disk
If the disk is Offline, bring it online (Optional, if required): Set-Disk -Number <DiskNumber> -IsOffline $false