
🕒 This procedure takes in average ~ 5 min to complete
Preparation
-
Refer to DIP-74 installation manual before replacing components
-
The DIP-74 system supports power redundancy allowing the user to swap the power supply without shutting down the system. However, it is recommended to turn off the system power to avoid potential risks during maintenance.
This procedure describes how to safely remove and replace hard disks drives (HDDs) in the DIVAR IP all-in-one 7000 (gen4).
Step-by-step guide
-
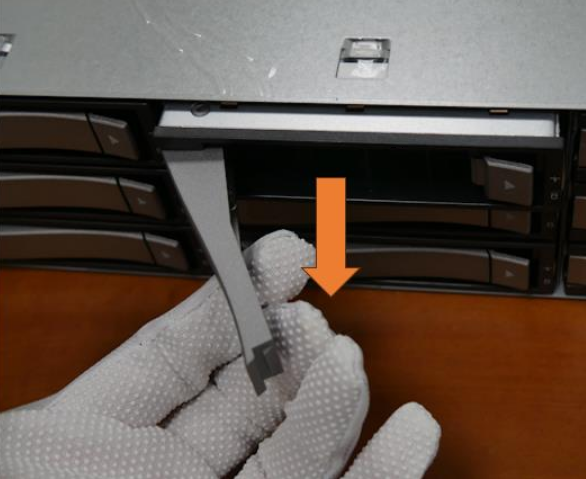
Press the release button to the right of the hard drive tray. This extends the hard drive tray handle.
-
Use the handle to pull the hard drive tray out of the chassis
-
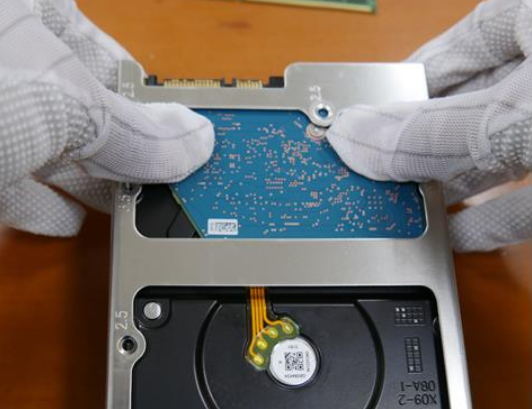
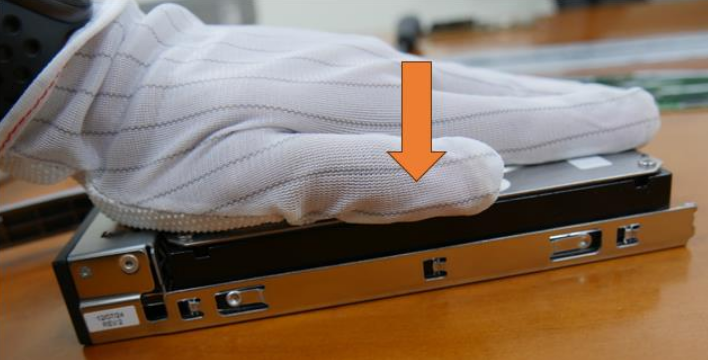
Press the hard drive from the bottom of the hard drive tray to loosen it from the hard drive tray, then remove the hard drive from the hard drive tray
-
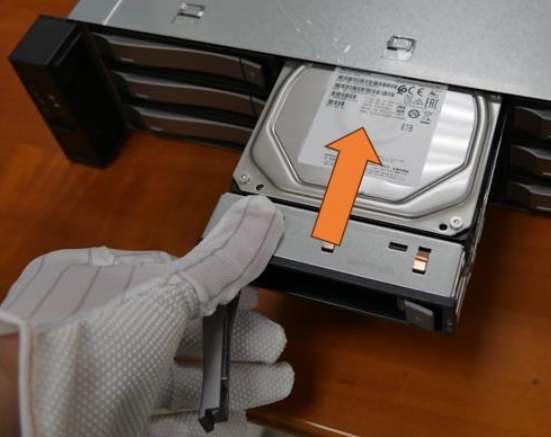
Press the hard drive into the hard drive tray until it clicks into place and is seated securely in the hard drive tray.
-
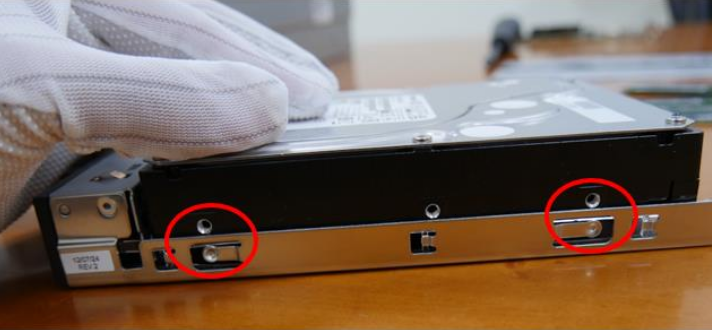
Make sure the location point fit properly and push to put the hard drive into hard drive tray.
-
Insert the hard drive tray horizontally into the hard drive bay, orienting the hard drive tray so that the release button is on the right.
-
Push the hard drive tray into the bay until the handle retracts and the hard drive tray clicks into the locked position Put the hard drive tray back.
![]()