
How to configure the VideoView service incl. push alarm notification?
Bosch Remote Portal provides the VideoView+ Service which allows to display live video, replay of recorded video on the camera, and a forensic search on Video Security Client.
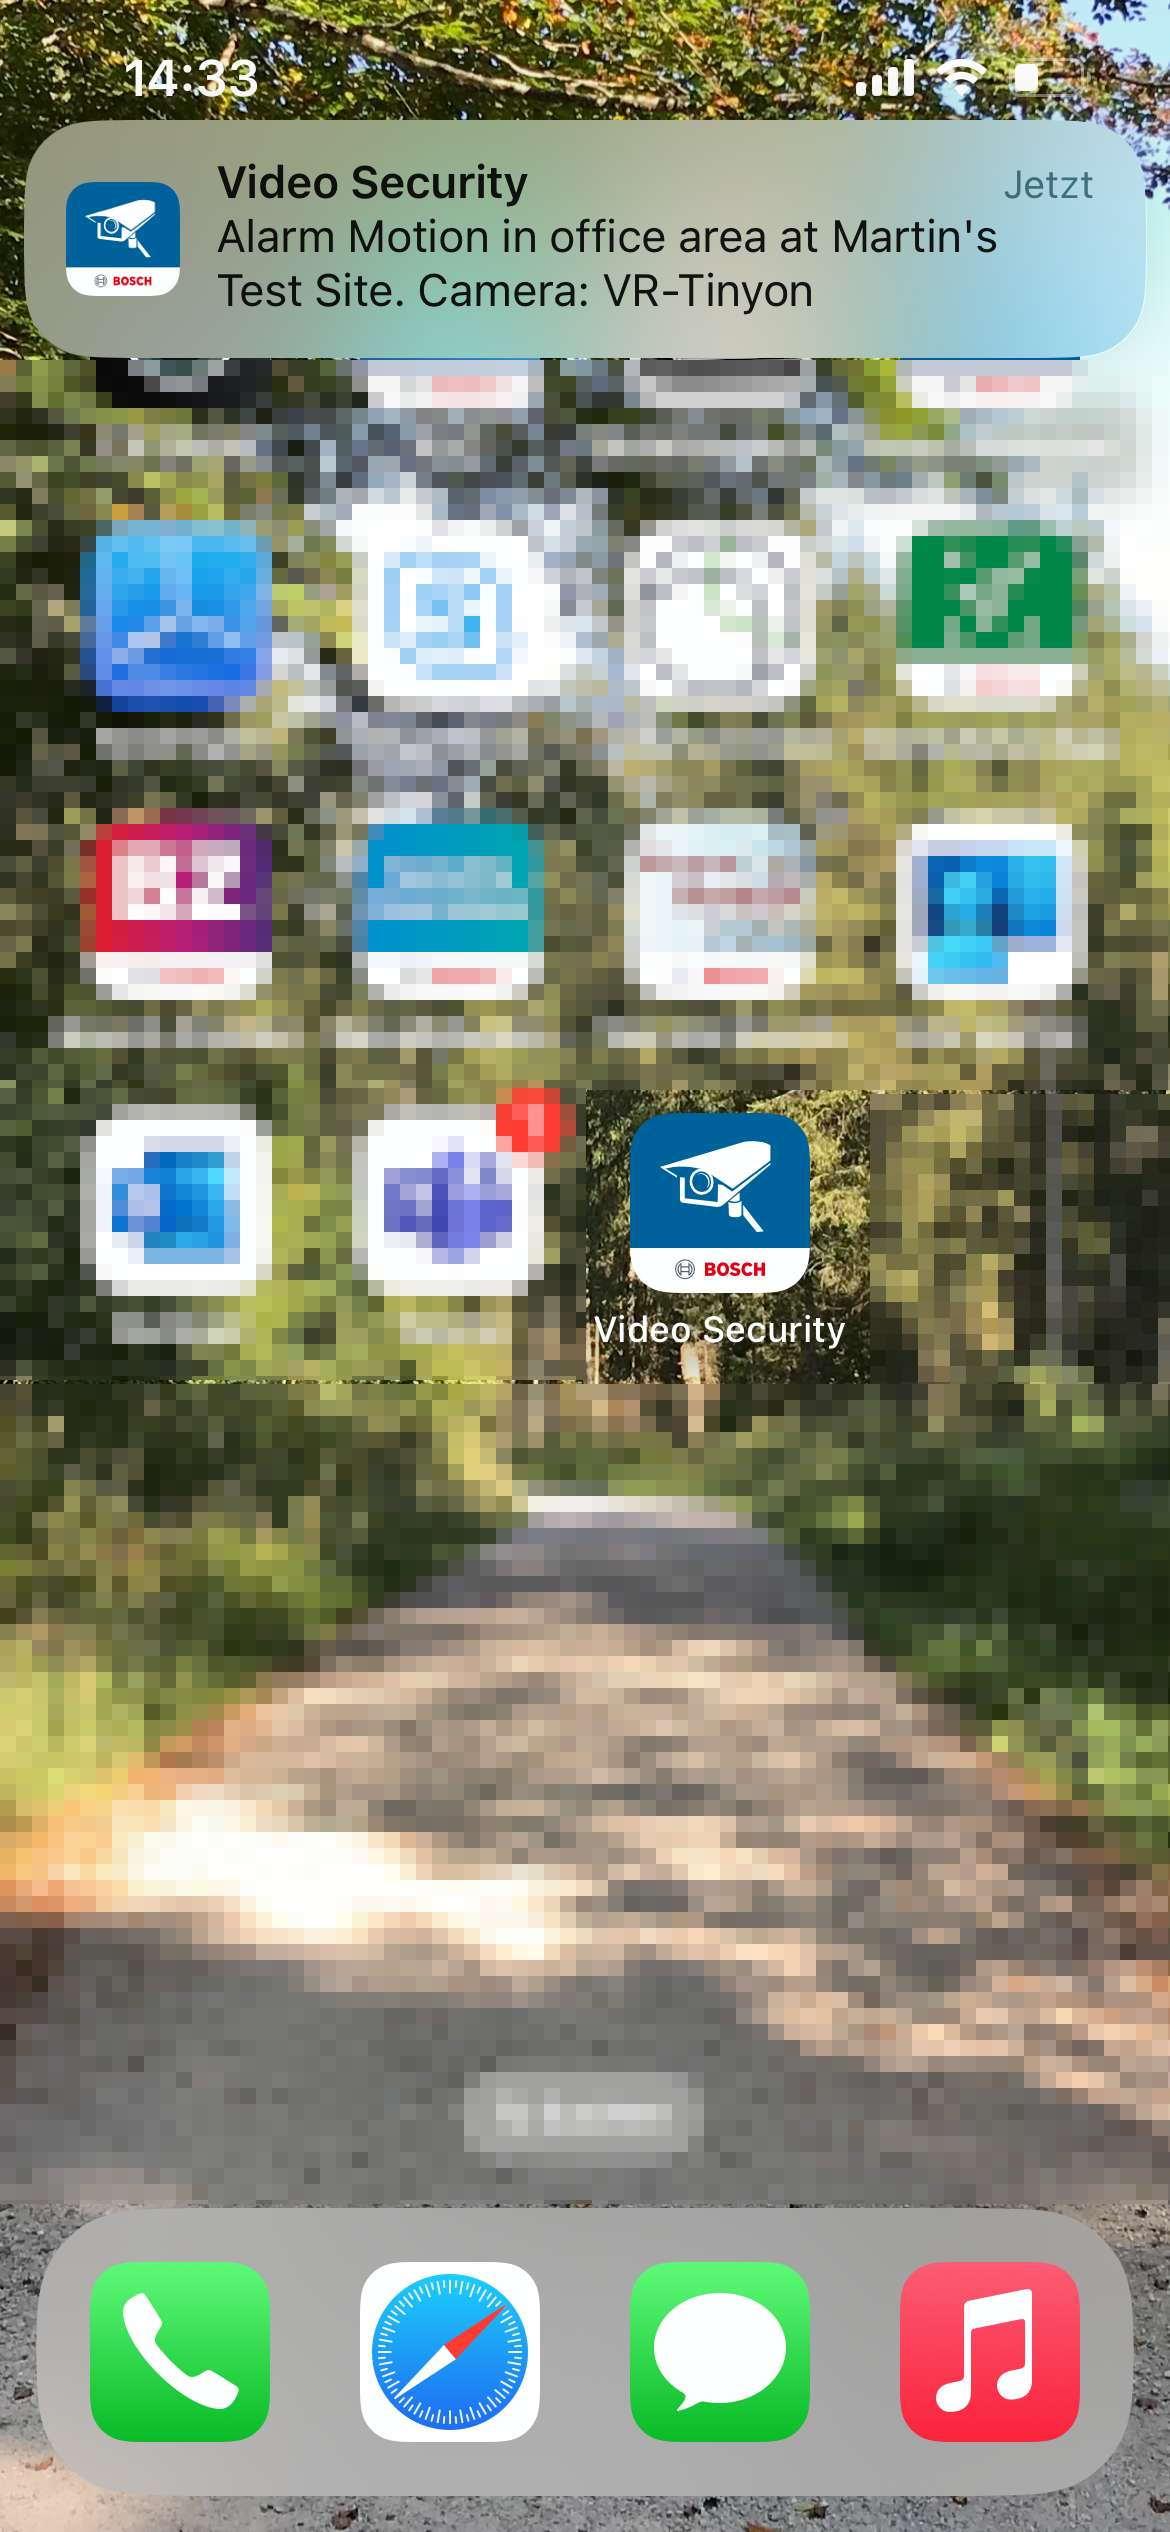
Further the Video Security App (on iOS and Android) can receive push alarm notifications triggered by motion in the camera image, for example.
This article explains how to configure this service to receive push alarm notifications.
To get Push Alarm Notifications working, the following steps need to be performed.
Step-by-step guide
1. Configure your cameras in the local network with Bosch Configuration Manager.
- Download Bosch Configuration Manager from https://downloadstore.boschsecurity.com and install it on your Windows computer.
- Scan the local network and configure your cameras accordingly (e.g. camera name, stream settings, recording settings, motion detection, etc.)
2. Add your cameras to Bosch Remote Portal in the local network with Bosch Configuration Manager.
- Create your company in Bosch Remote Portal (if not yet done) according to How to create a company's account in Bosch Remote Portal.
In case you use SingleKey ID or a customer's IDP to login to Remote Portal, go to user settings and generate a technical password. You can use the technical password in Configuration Manager to connect to your Remote Portal account for the next 8 hours. - Go to Configuration manager and multi-select the cameras to be added to Bosch Remote Portal in the camera list > select Connectivity > set Operation to ON and click the Save button.
- Click Register and enter your Remote Portal credentials (technical password).
Hereby, the following articles might further guide you:
- How to add Bosch IP cameras to Bosch Remote Portal?
- How to add Remote Portal cameras to Bosch Alarm Management?
- Troubleshooting Camera Connectivity & Bosch Remote Portal
- How to set up password for SingleKey ID in Alarm Management?
- How to create a technical password in Remote Portal?
- How to move a camera to another account in Remote Portal?
Important note: For an easy license management we recommend to create separate Remote Portal accounts for your end customers, otherwise license management will become challenging. Especially with Auto-Renew on it could happen that licenses of a customer A, get assigned to and consumed by cameras of customers B, who never bought a license.
3. Group your cameras in Bosch Remote Portal
Group your cameras in Bosch Remote Portal according to your customer's need.

Hereby, the following article might further guide you:
4. Activate the VideoView+ service in Remote Portal
1. In Remote Portal select the Service Licenses tab and add the purchased VideoView+ licenses.
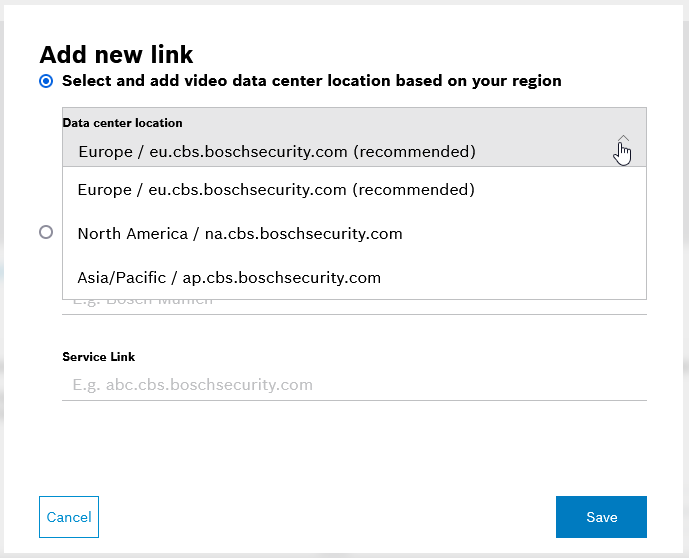
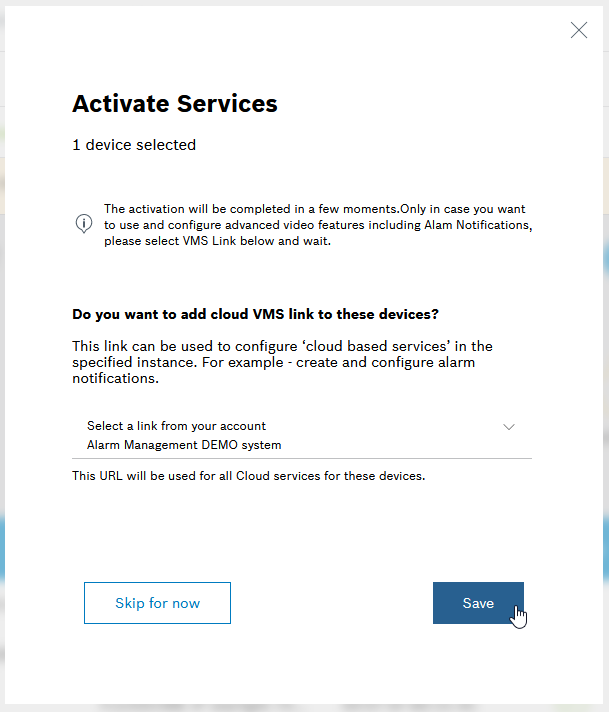
2. In Account Settings, add the link to one of our multi-tenant Alarm Management instances, preferably the one of your region
- North America & Latin America: na.cbs.boschsecurity.com
- Europe, Middle East, Africa: eu.cbs.boschsecurity.com
- Asia-Pacific: ap.cbs.boschsecurity.com
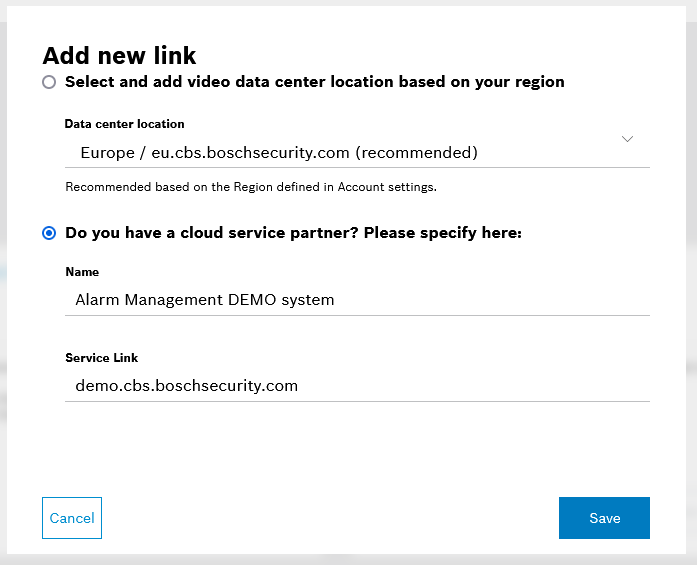
or link to your Alarm Management system in case you have a dedicated Alarm Management instance. In the following we'll use the demo.cbs.boschsecurity.com instance as an example. The same manual selection can be done for
- Australia: aus.cbs.boschsecurity.com
- Thailand: th.cbs.boschsecurity.com

If you do not have such an account, it will be created via the system when you set the link to an Alarm Management instance and you will receive a confirmation e-mail within 3 working days.
In case you do not receive this e-mail please contact:
- North America: technical.support@us.bosch.com
- Latin America: soporte.seguridad@bosch.com
- Europe, Middle East, Africa, Asia-Pacific: centralsupport.bt@bosch.com
and provide the following items:
- Installer company name
- Installer company admin email address
- Account name
- The reason for the account creation
- What type of licenses do you want to be created?
Note: You can still continue to activate VideoView+ licenses, as shown in the following steps. You do not need to wait until you got your Alarm Management account (as Installer Company user) for license activation. Just selecting the link to an Alarm Management instance in Remote Portal will be sufficient to continue.
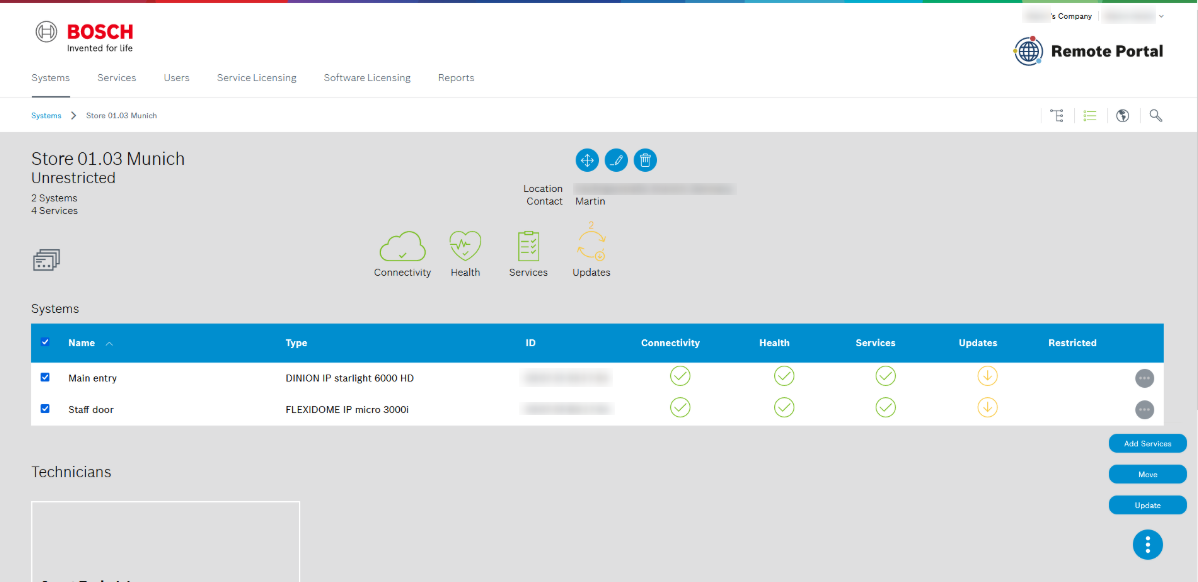
3. In Systems tab, select the List view in Systems tab and mark the group or single cameras
4. Click Add Services, mark VideoView+, in case it's the very first time you activate a VideoView+ license also need to accept the terms and conditions of use, then click Next.
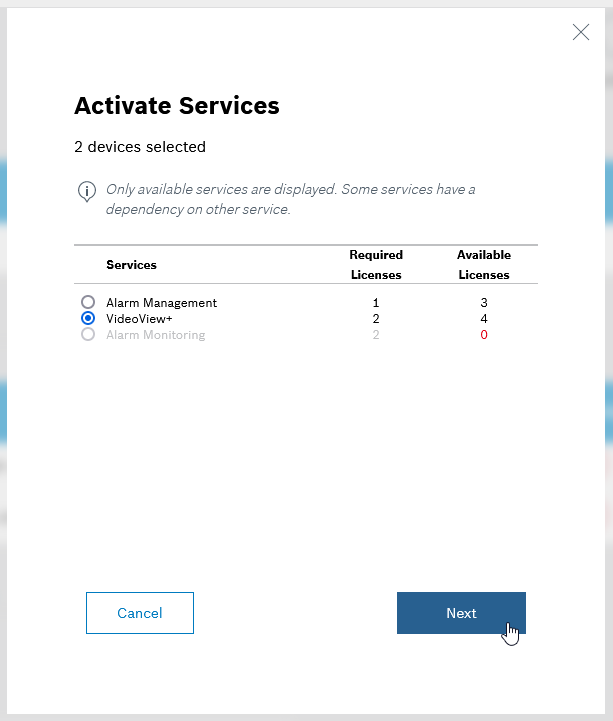
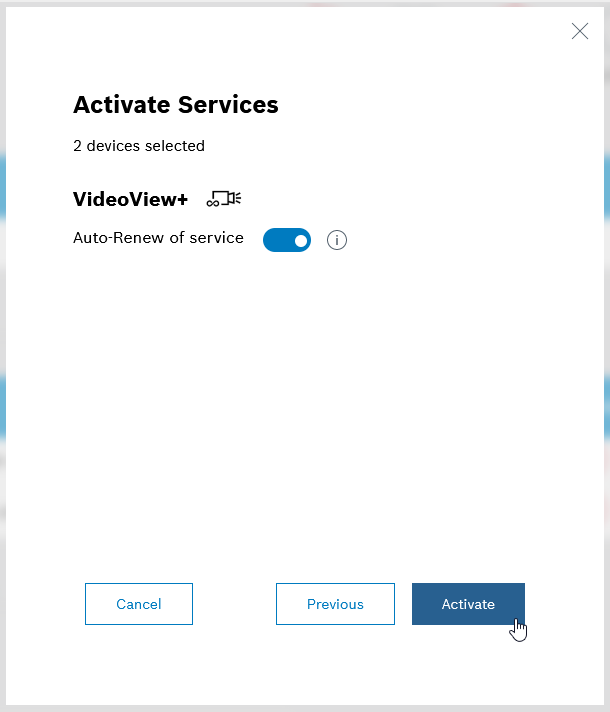
5. If you have only one end customer in your Remote Portal account select with Auto-Renew, otherwise do not use Auto-Renew, and click Activate.
6.
5. Create a site and add cameras to Alarm Management via RP group import
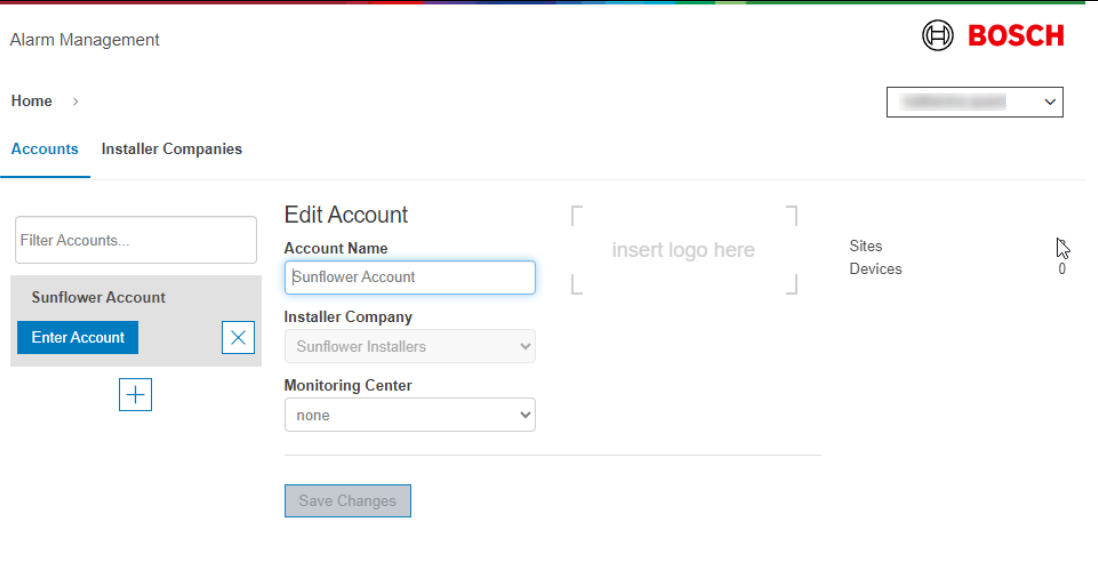
1. Logon Alarm Management Configuration with the credentials you received via e-mail.
2. Go to Accounts and enter your account by clicking on Enter Account
From here on you can either use the Remote Portal group import function, to import existing groups including devices from you Remote Portal account to create a new site in Alarm Management, s. section 5.1 for details, or you can manually configure a new site in Alarm Management and add cameras to your Alarm Management instance as described in section 5.2
5.1 RP group import based approach
To create a site and add cameras via the RP group import function, please proceed as follows:
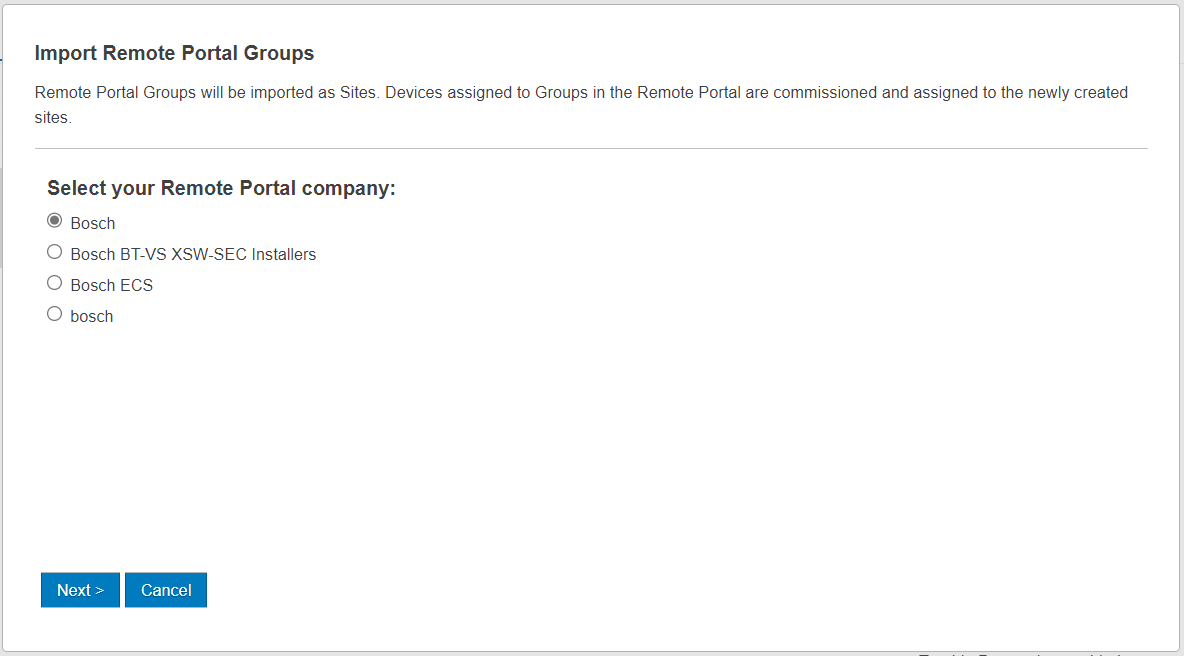
1. Click the Remote Portal group import button
2. Select your Remote Portal account you want to import site(s) from and click Next.
3. Select the Remote Portal group(s), which you plan to import as a site in Alarm Management and click Import as Sites.
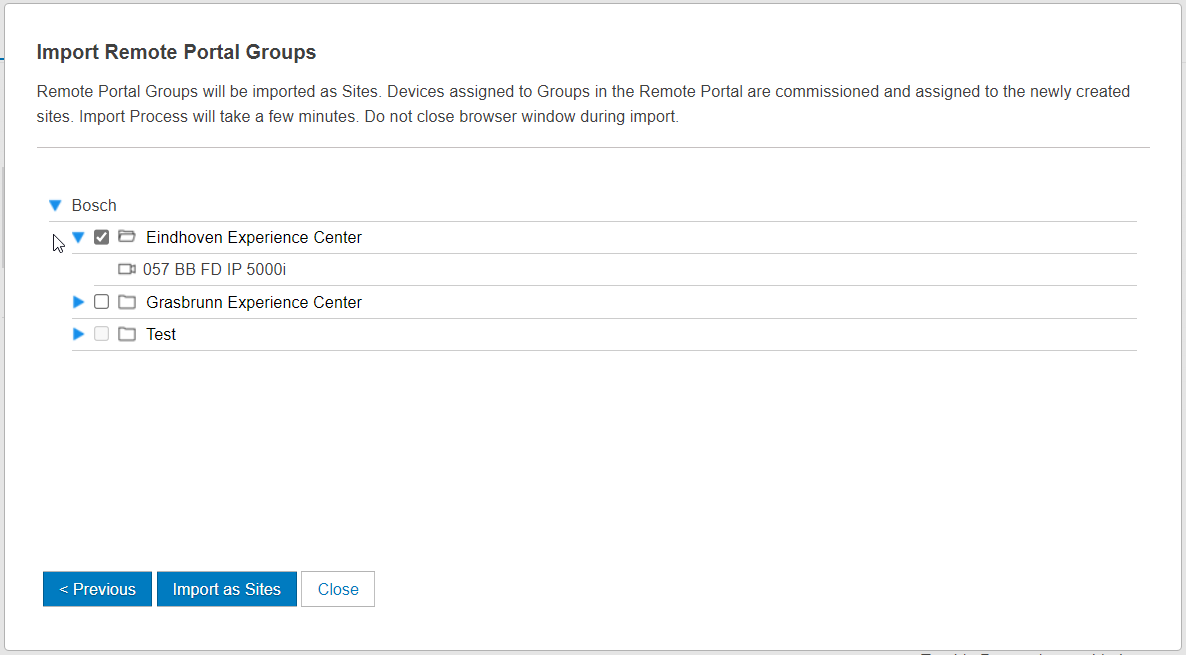
4. The imported Remote portal group(s) will then appear as a site in the selected Alarm Management account. You can enter the site by clicking Enter Site to check if all cameras have been imported successfully as well.

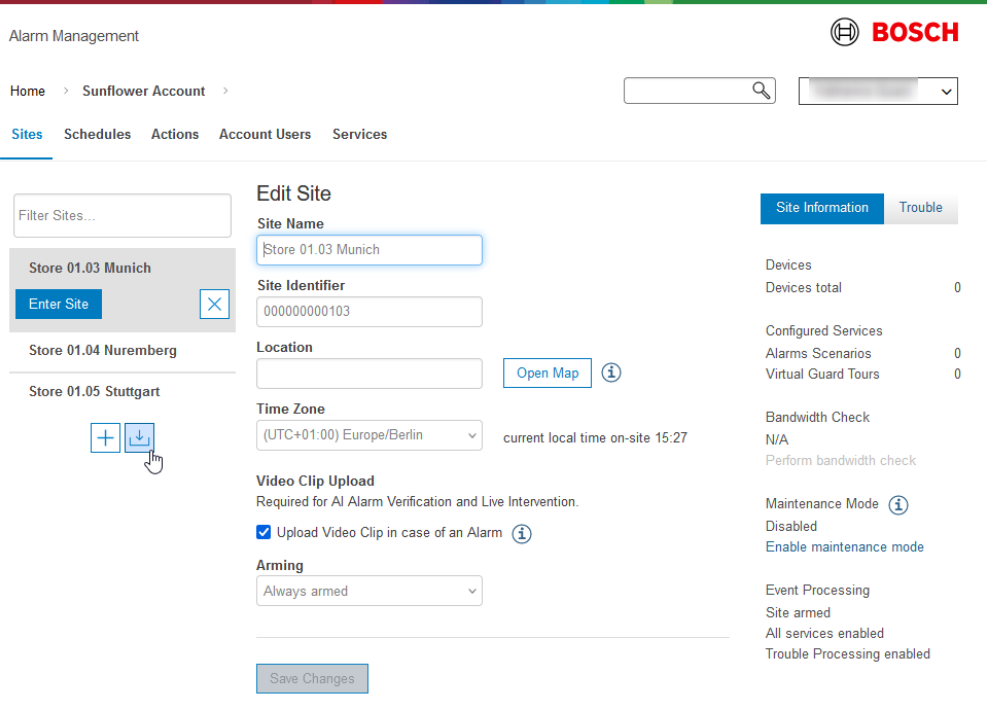
5.2 Manual approach
After you have entered the account in Alarm Management, in which you manually want to create a site in Alarm Management and add cameras, please proceed as follows:
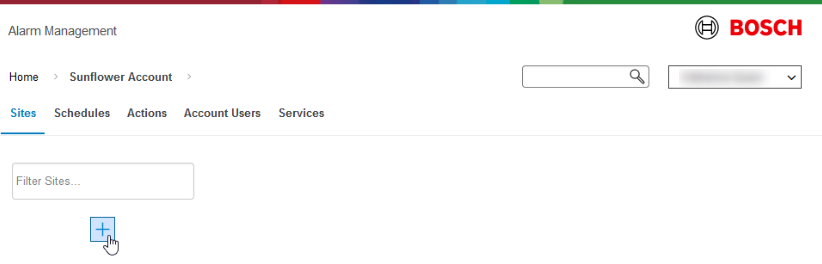
1. Select Sites and create a new site by clicking on the + sign.
2. Enter the required information (Site Name, Site Identifier, Location and Time Zone) for your site and click Create.
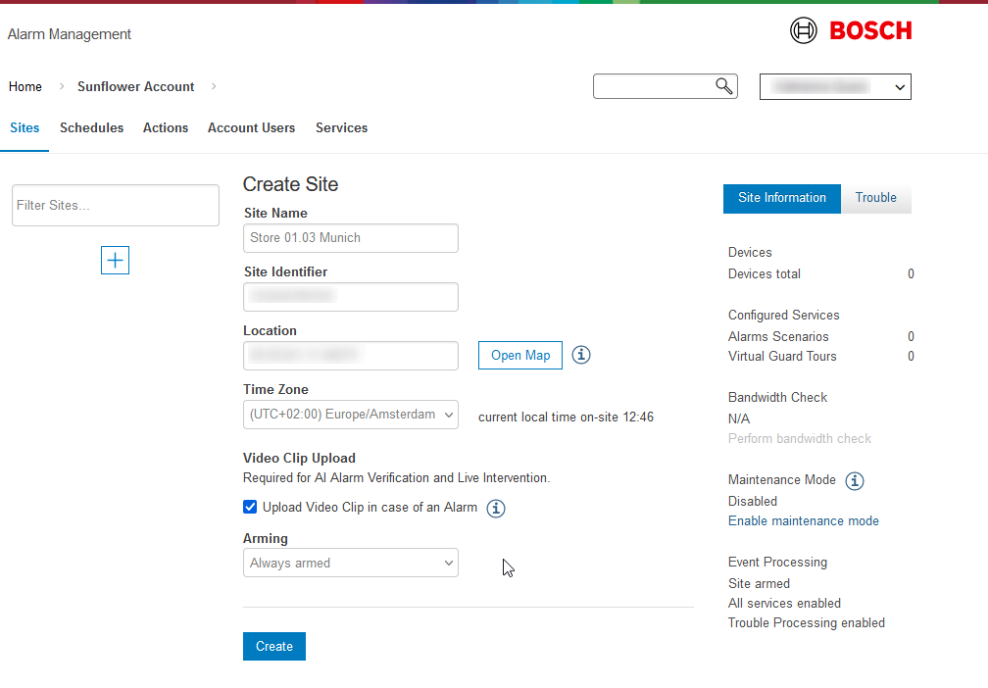
3. You have now successfully created a site in your account. Click Enter Site to enter your site.

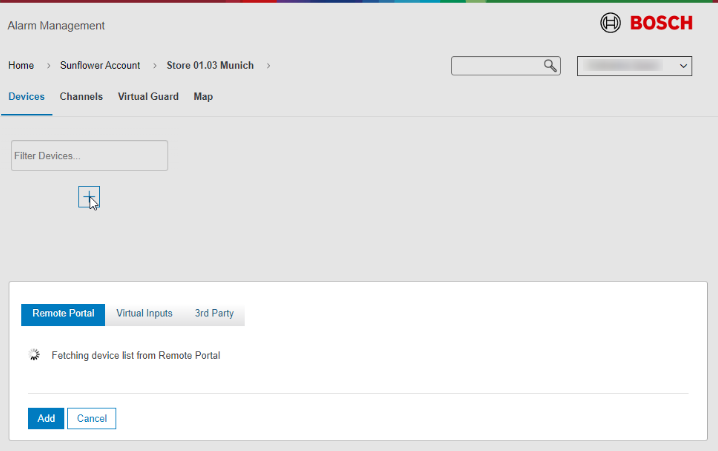
4. Add the cameras from Remote Portal to the Site:
a. In the Site, click the + icon and Alarm Management will automatically start fetching your Remote Portal cameras:
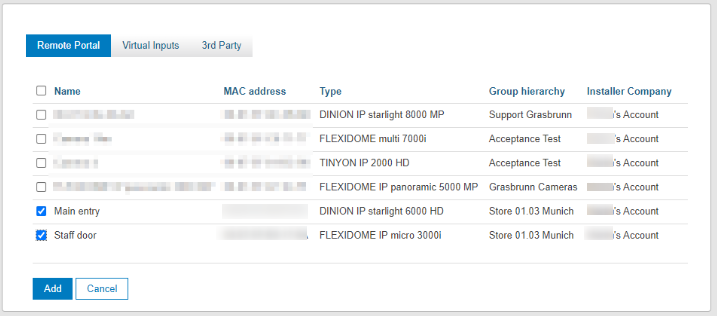
b. Select the cameras which you want to add to your site (note the Group hierarchy displayed), and click Add
6. Configure the Smart Notification service
Alarm Management offers two options to configure the Smart Notification service, a basic option for fast and easy setup and a more advanced option, which you can also use to fine tune an existing Smart Notification service.
Basic Smart Notification configuration
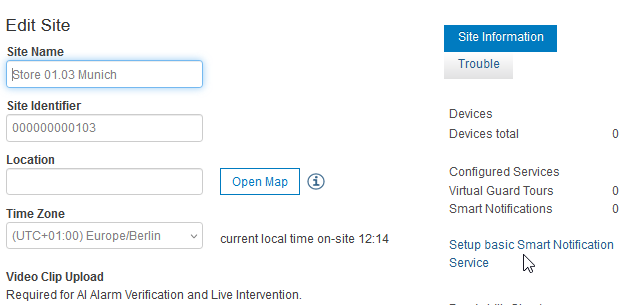
Enter the site for which you want to configure a Smart Notification service and on the right hand side click Setup basic Smart Notification Service.
This will configure a smart notification service for all the cameras in your site using the first IVA event (IVA Event 1) as triggering event, an Arming Period set to "Always" and will set all account users of the site as recipients. Optionally you can add a notification message, by default the push notification message always includes and starts with the following structure: "Alarm <name of the Smart Notification service> at < site name>. Camera: <camera name>".
The basic configuration of the Smart Notification can be later modified and adjusted to your needs.
Note: If the user, who is doing the configuration (System User or Company User), has no Account User yet an Account User will be created with the same mail address as the configuring user.

Advanced Smart Notification configuration
1. Create an Account User for the customer > the customer gets an e-mail with credentials from the system.
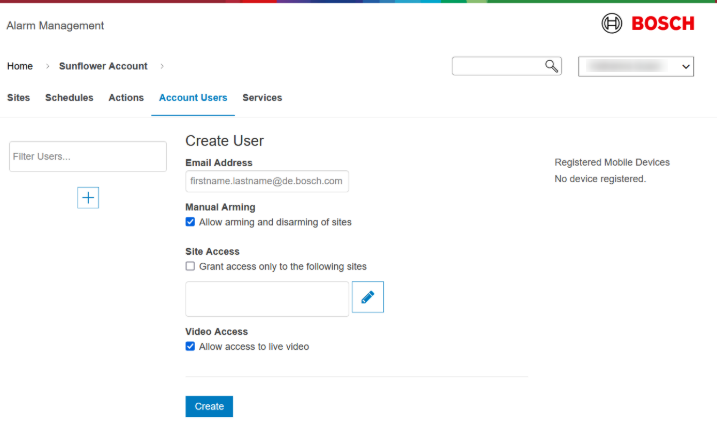
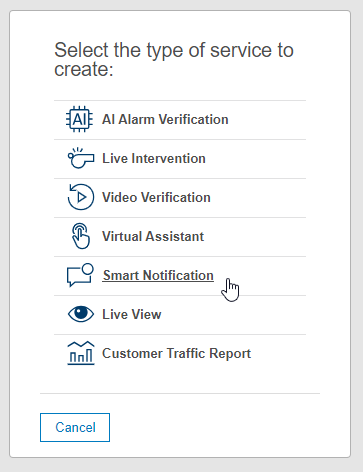
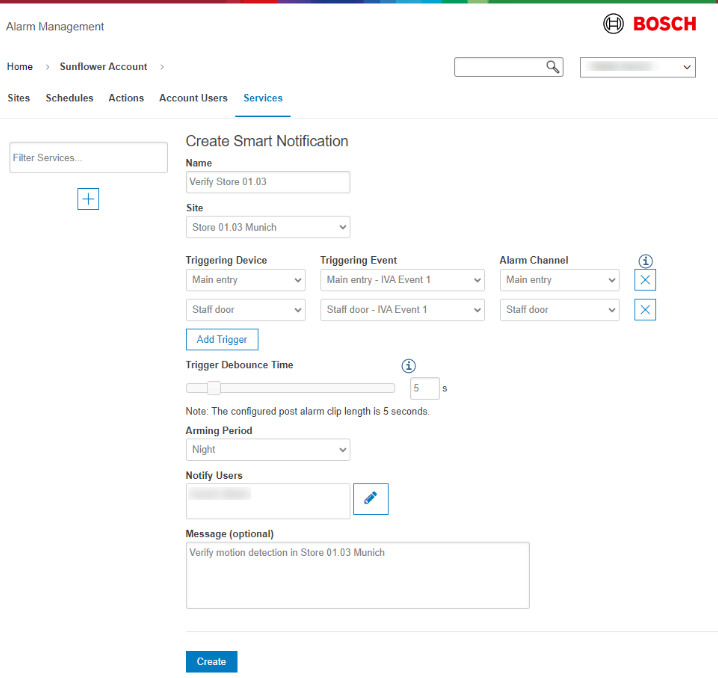
2. Create a a Smart Notification service. Therefore, go to Services and select Smart Notification.
3. Configure the triggers (e.g. motion), schedule and select the recipient(s) of the push alarm notifications. Recipients can only be Account Users.
Hereby, the following articles might further guide you:
- How to add Remote Portal cameras to Bosch Alarm Management?
- How to set up a Smart Notification service in Bosch Alarm Management?
7. Logon Bosch Video Security Client and receive Push Alarm Notifications
1. Download Bosch Video Security Client from https://downloadstore.boschsecurity.com or Apple Store or Google Play and install on your device.
2. Allow notifications from the VSC app on your device.
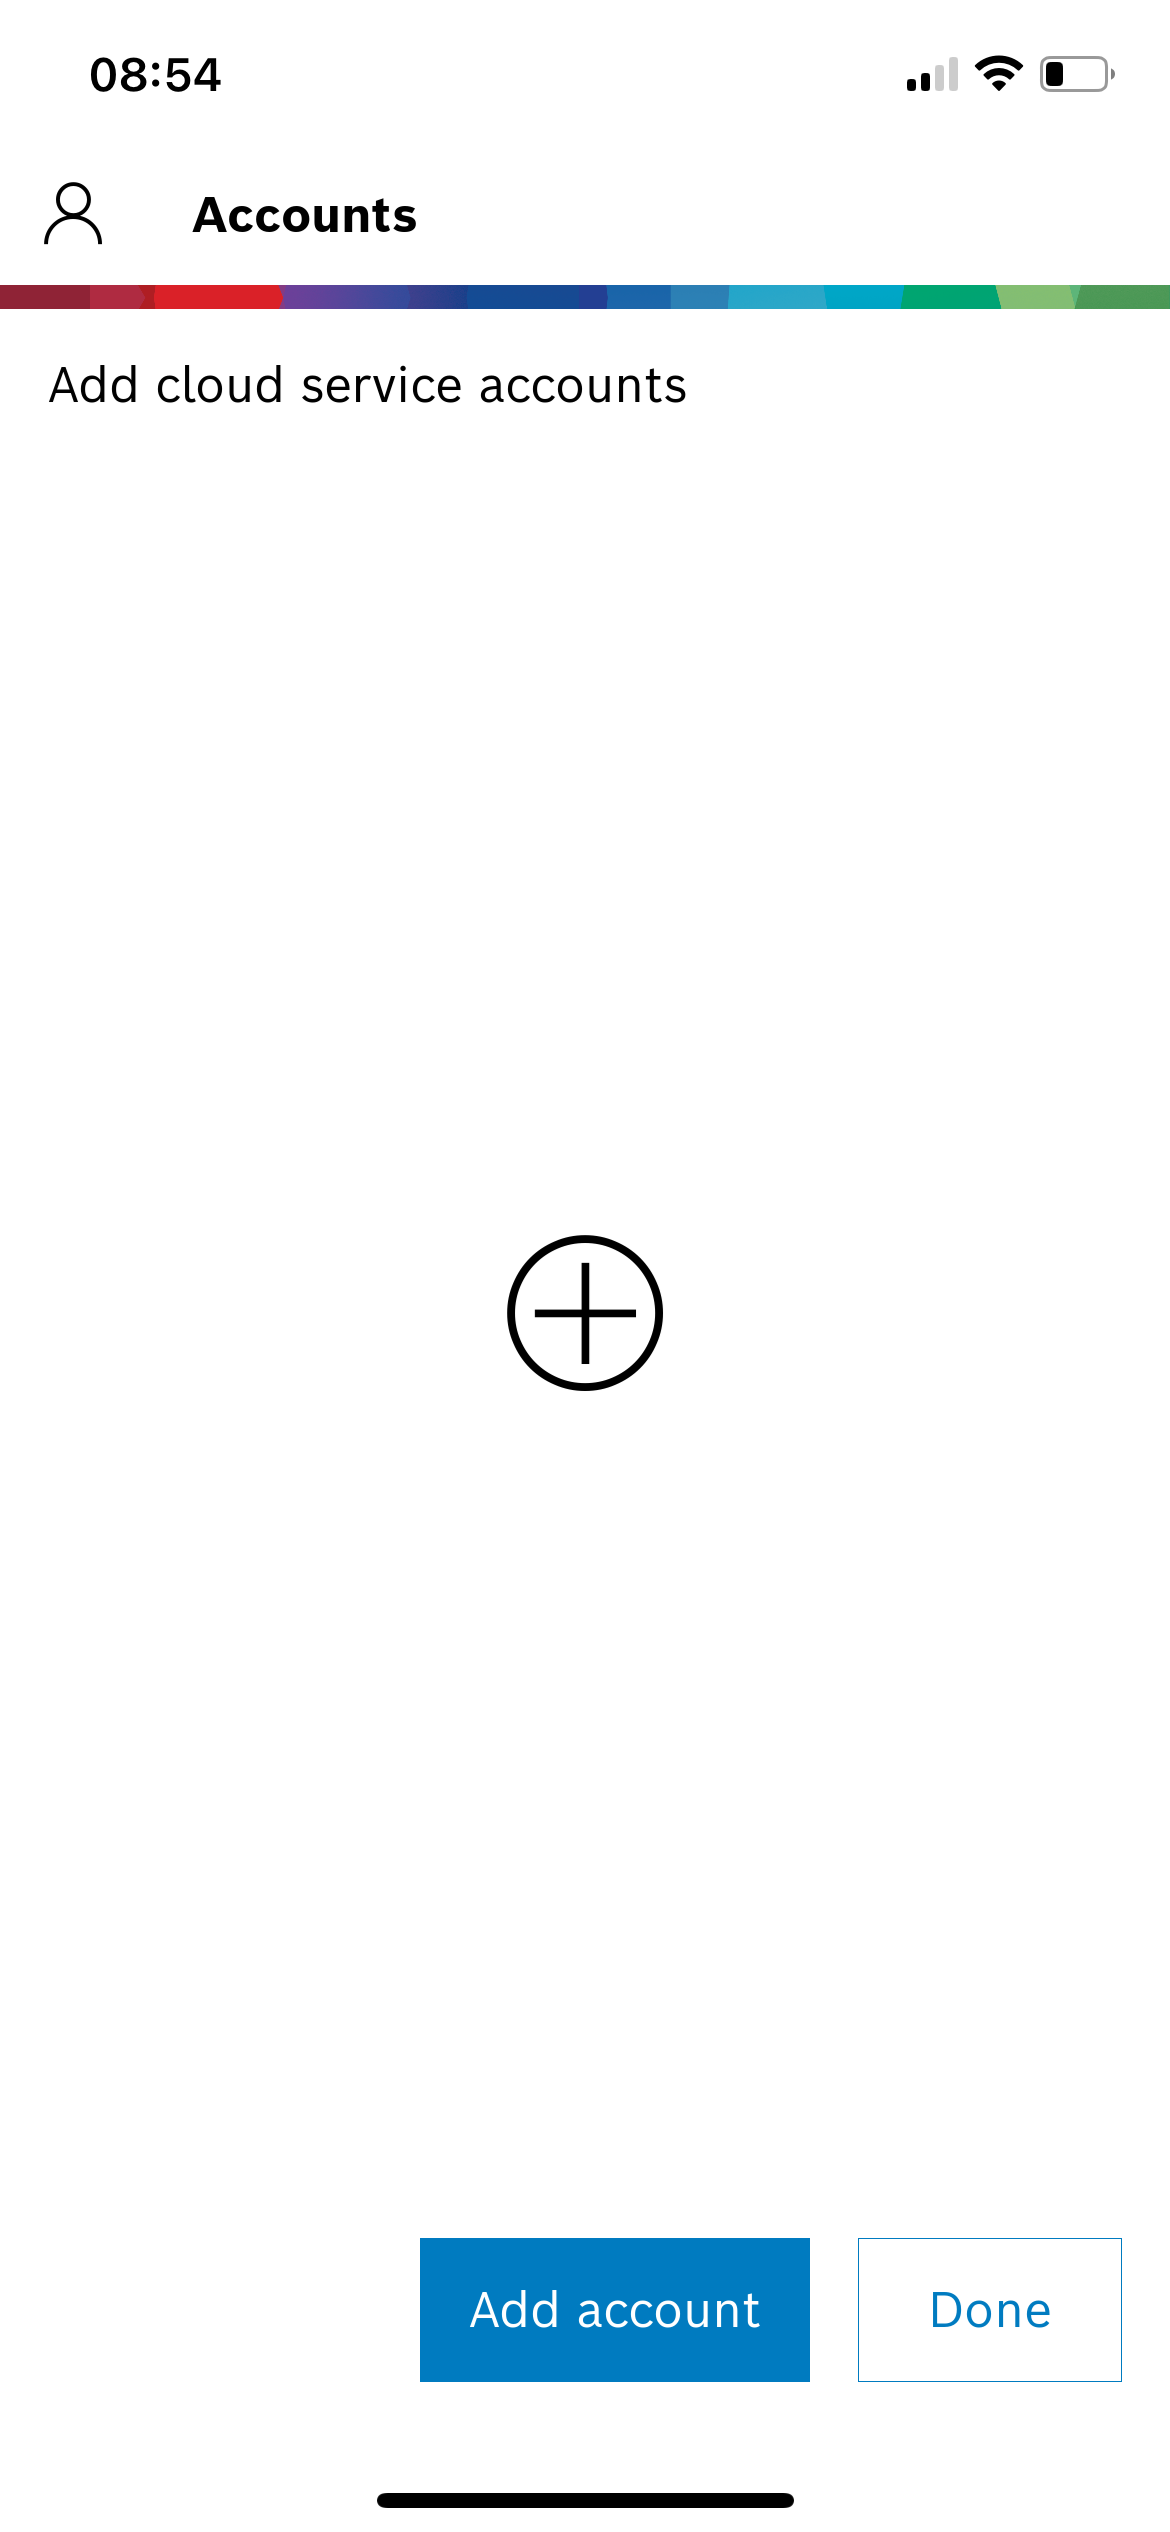
3. In Video Security Client, select Cloud Service and add an account
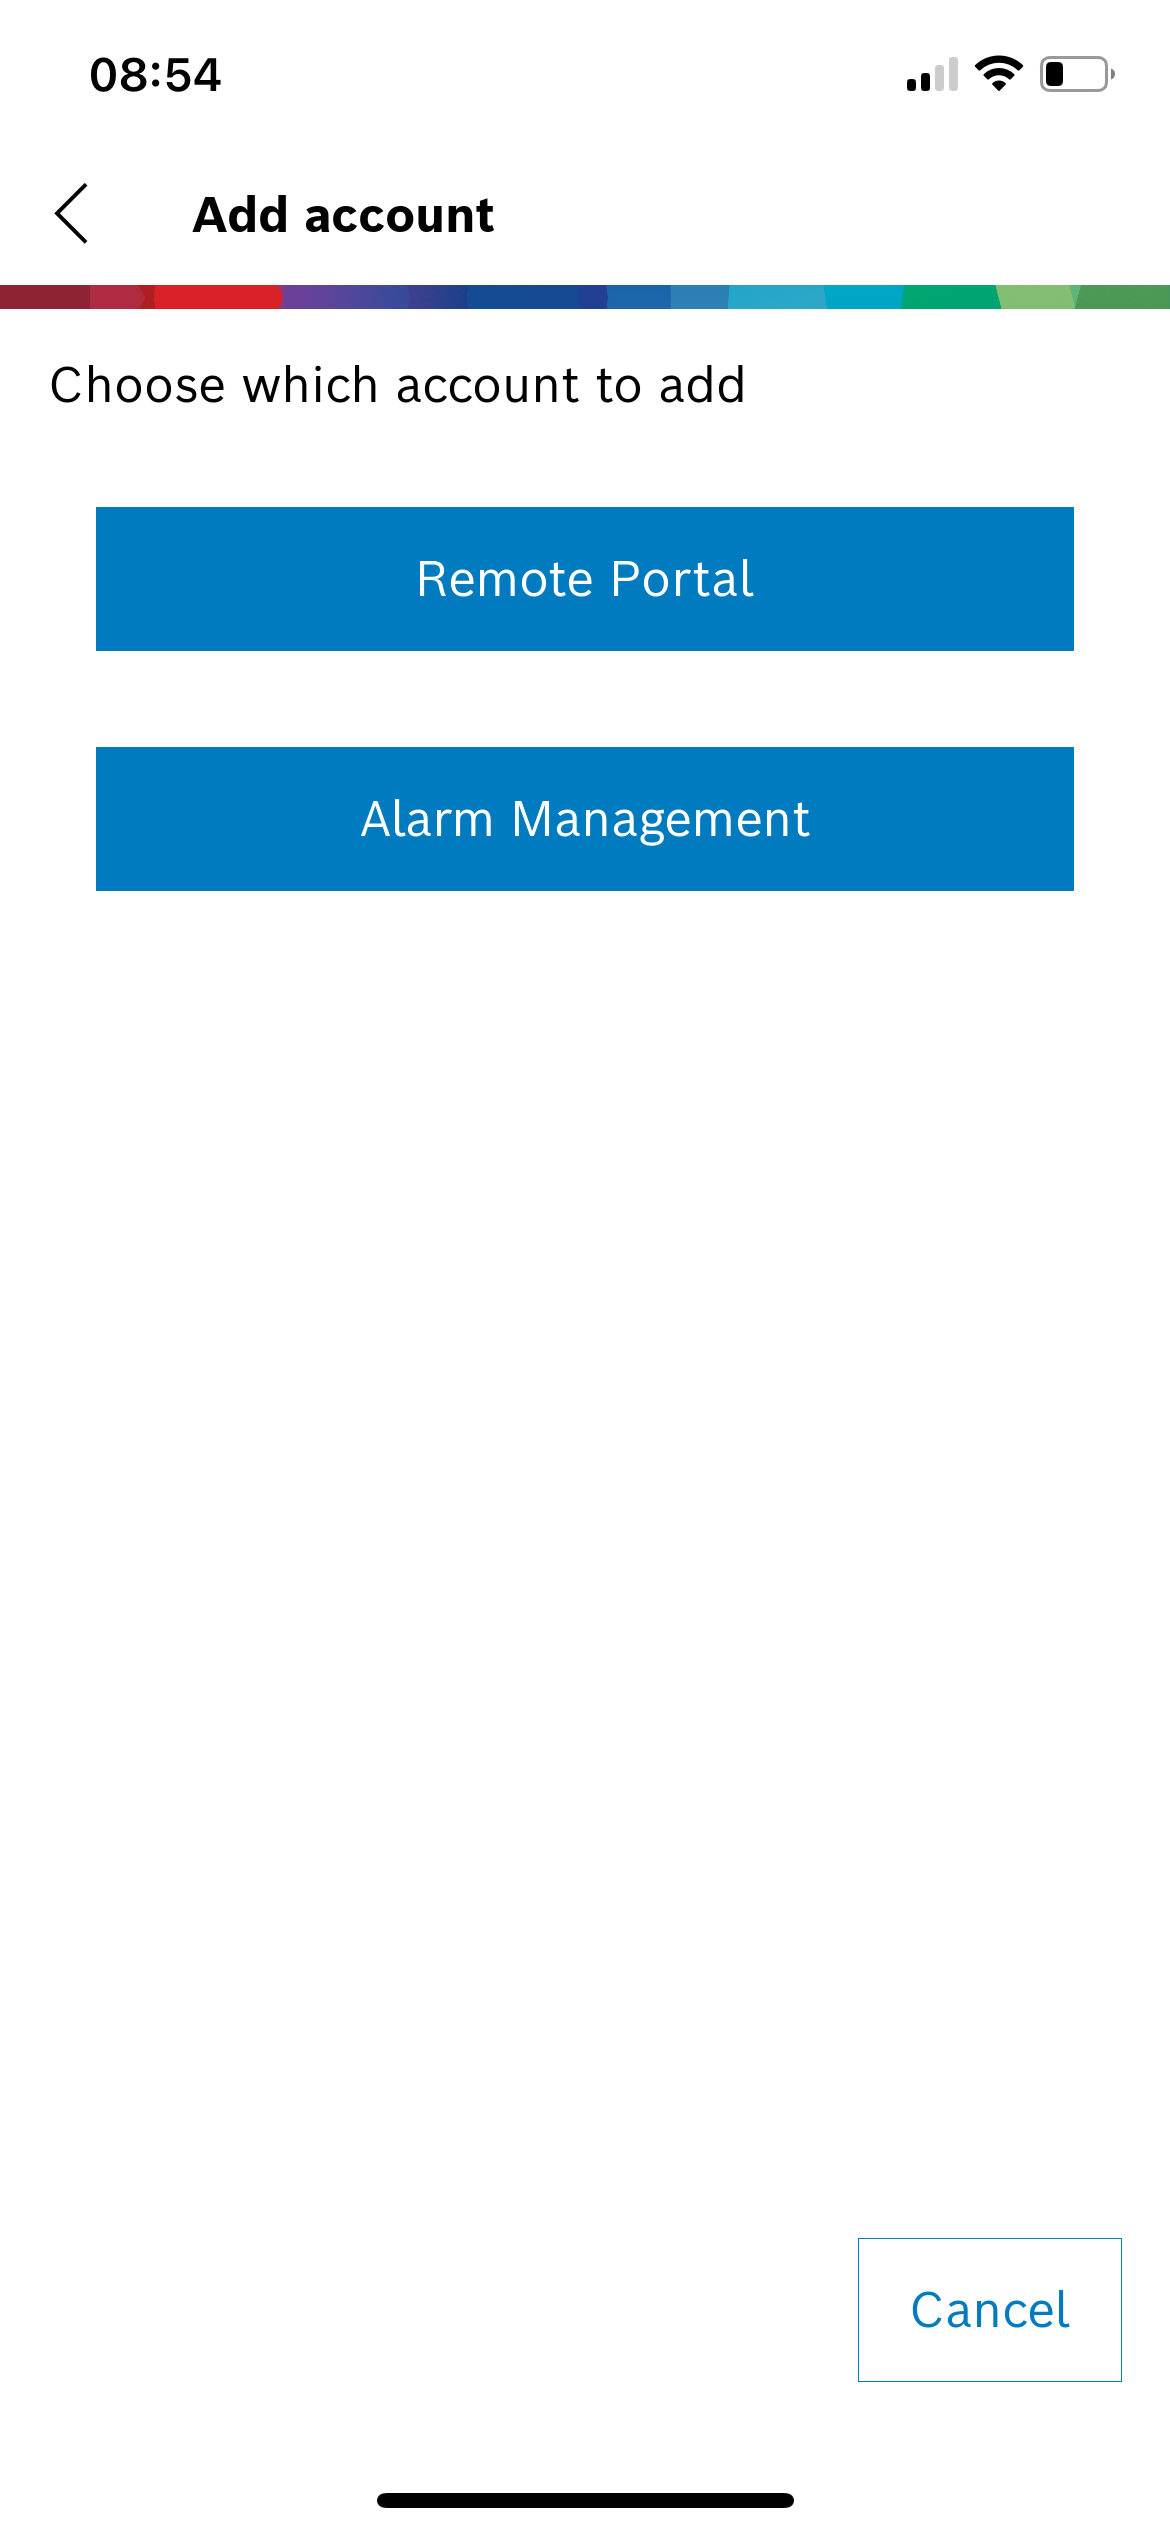
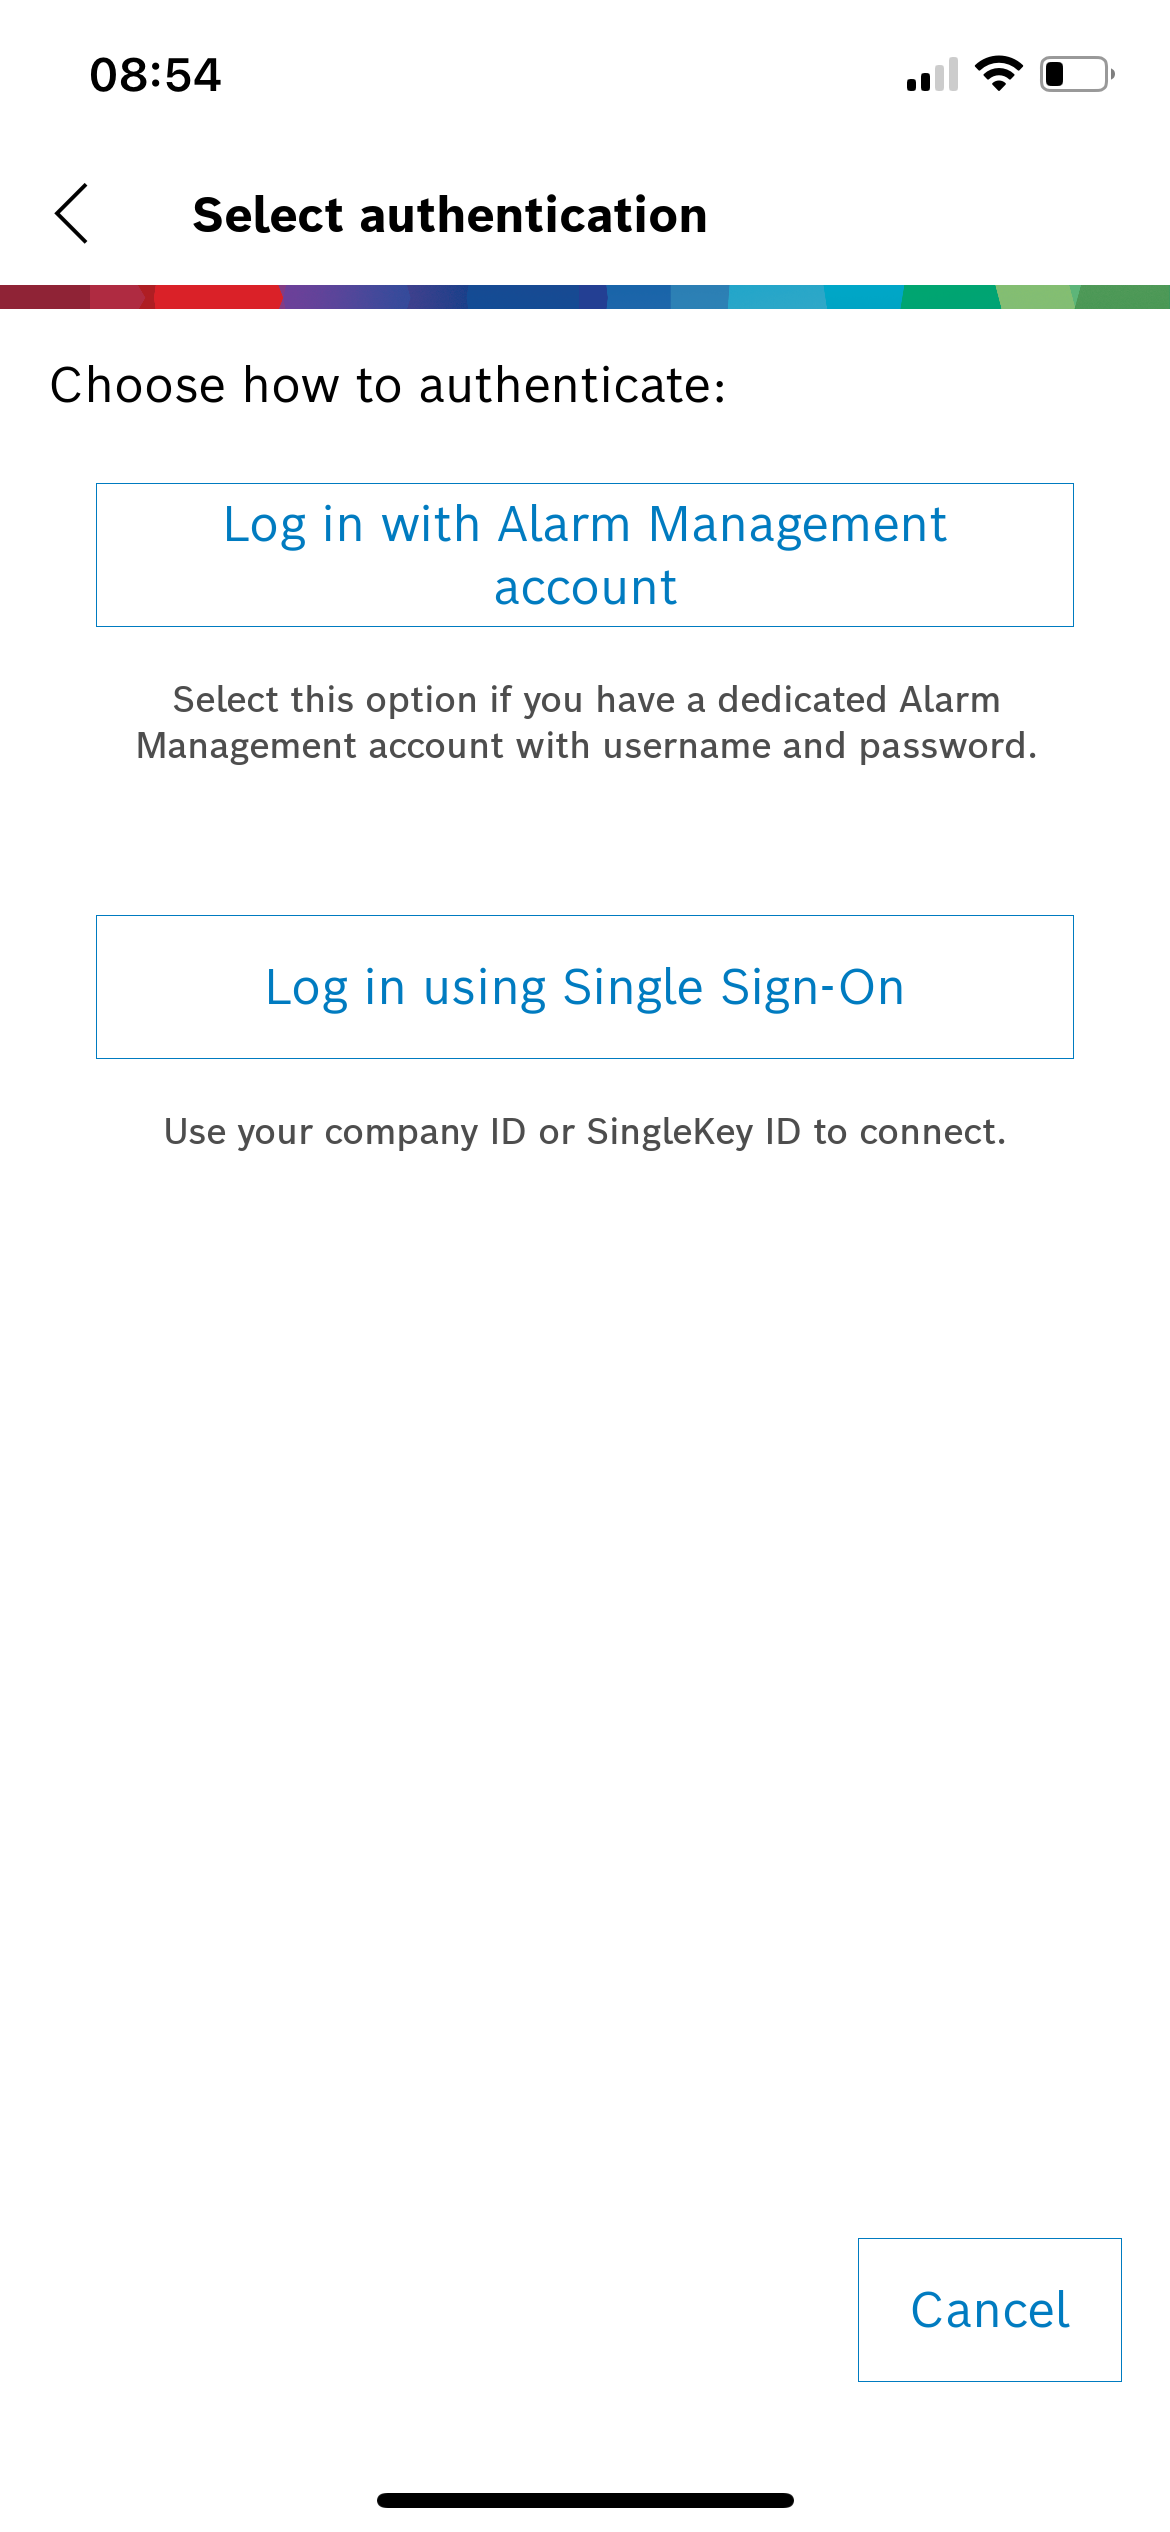
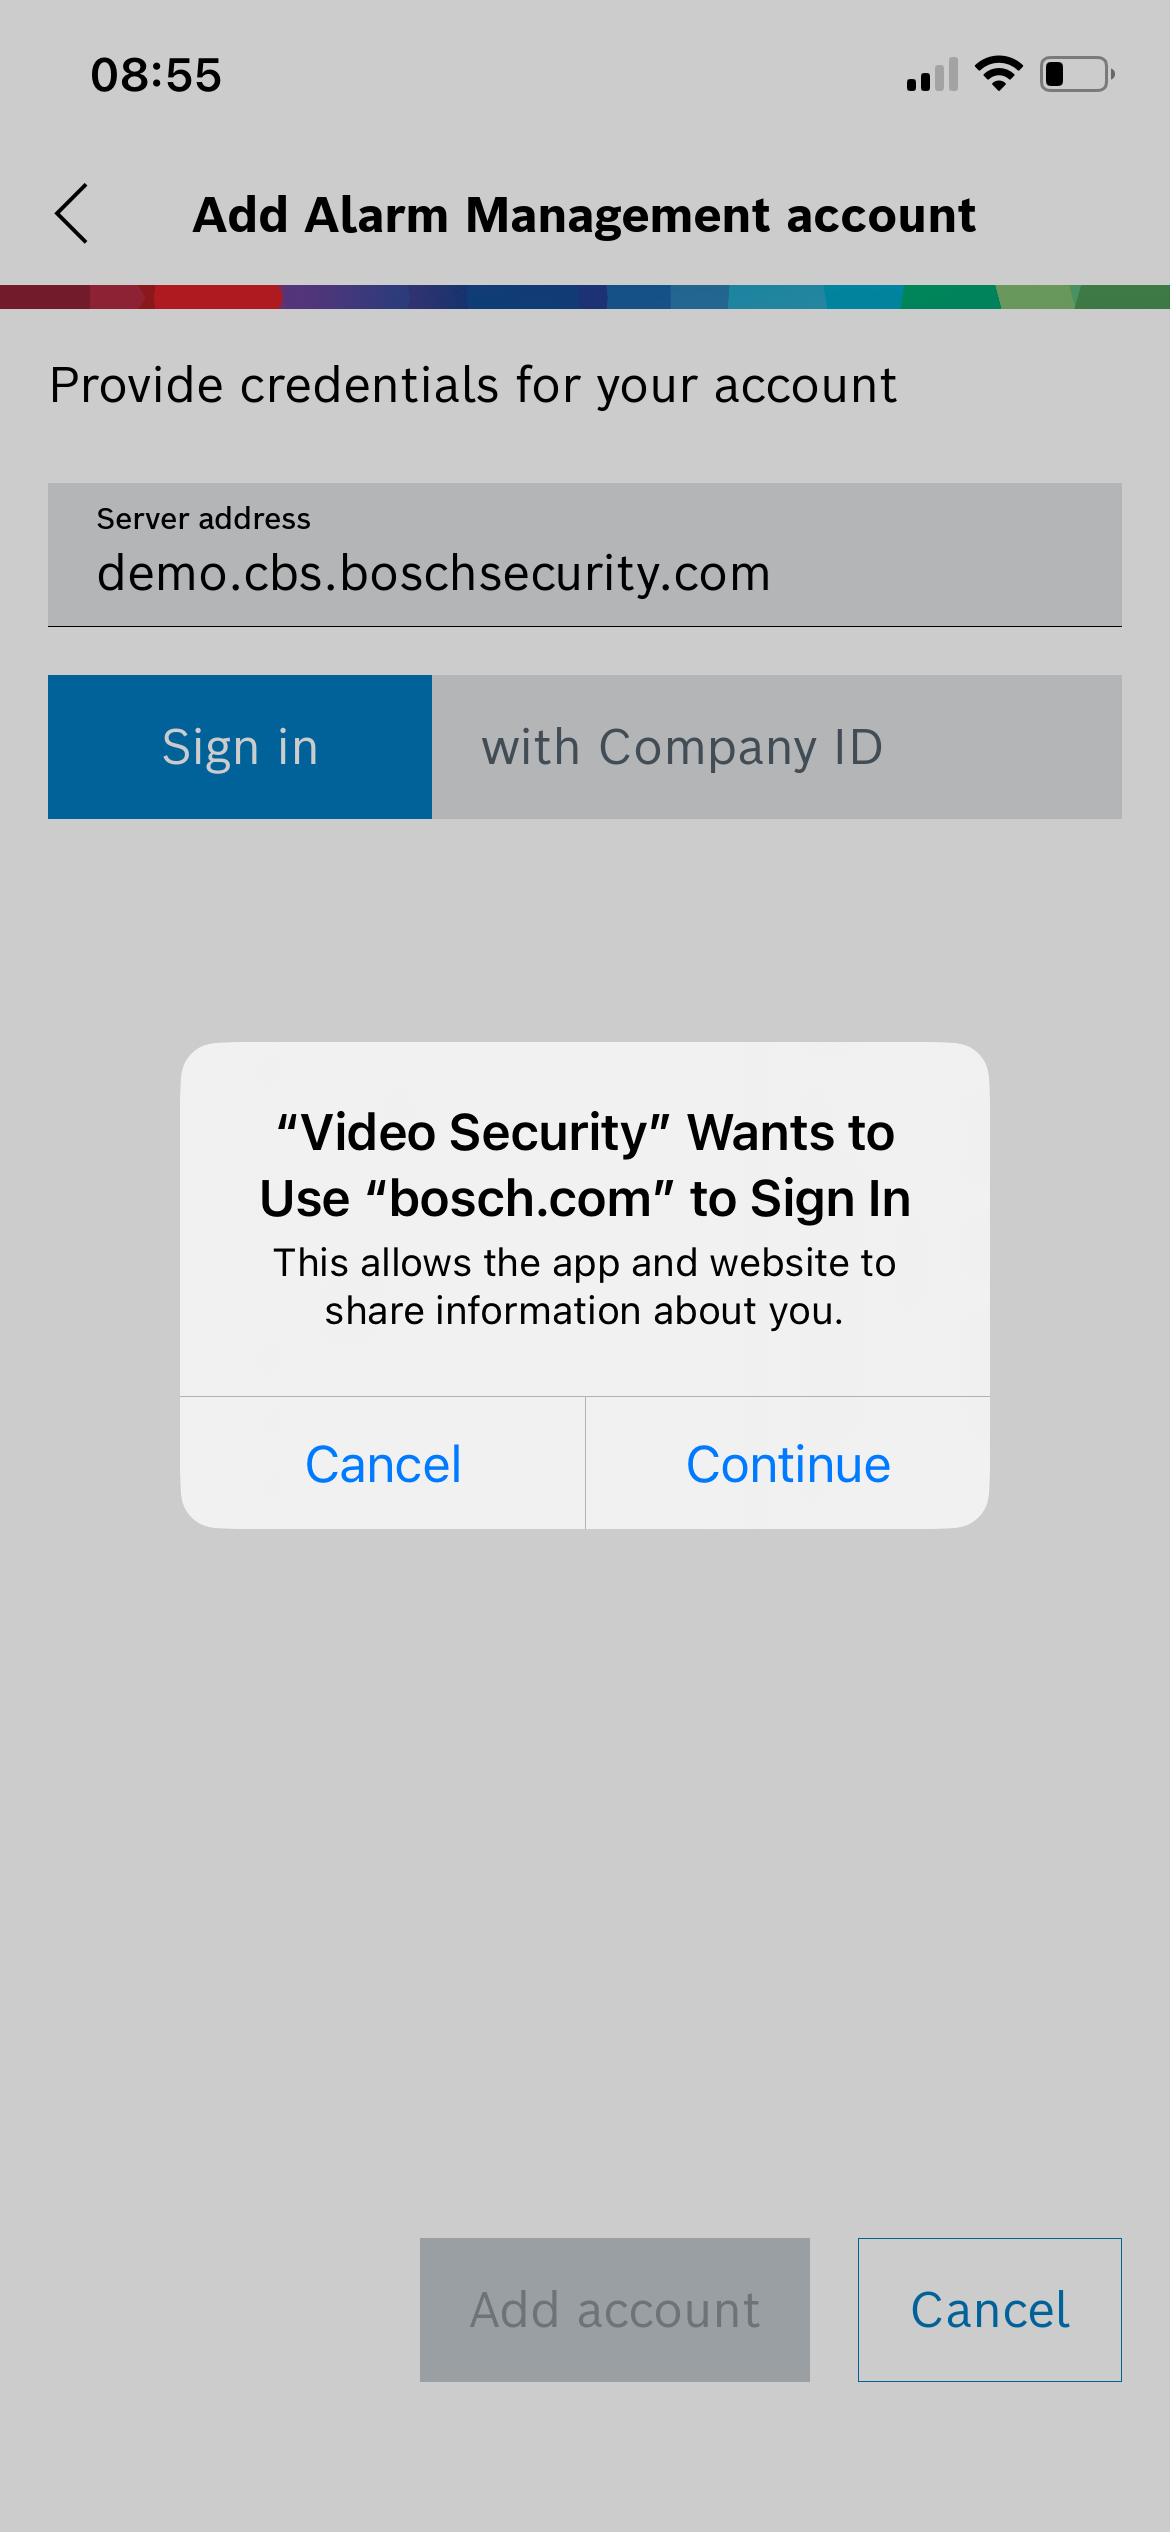
4. Select Alarm Management and select "Log in using Single Sign-On"
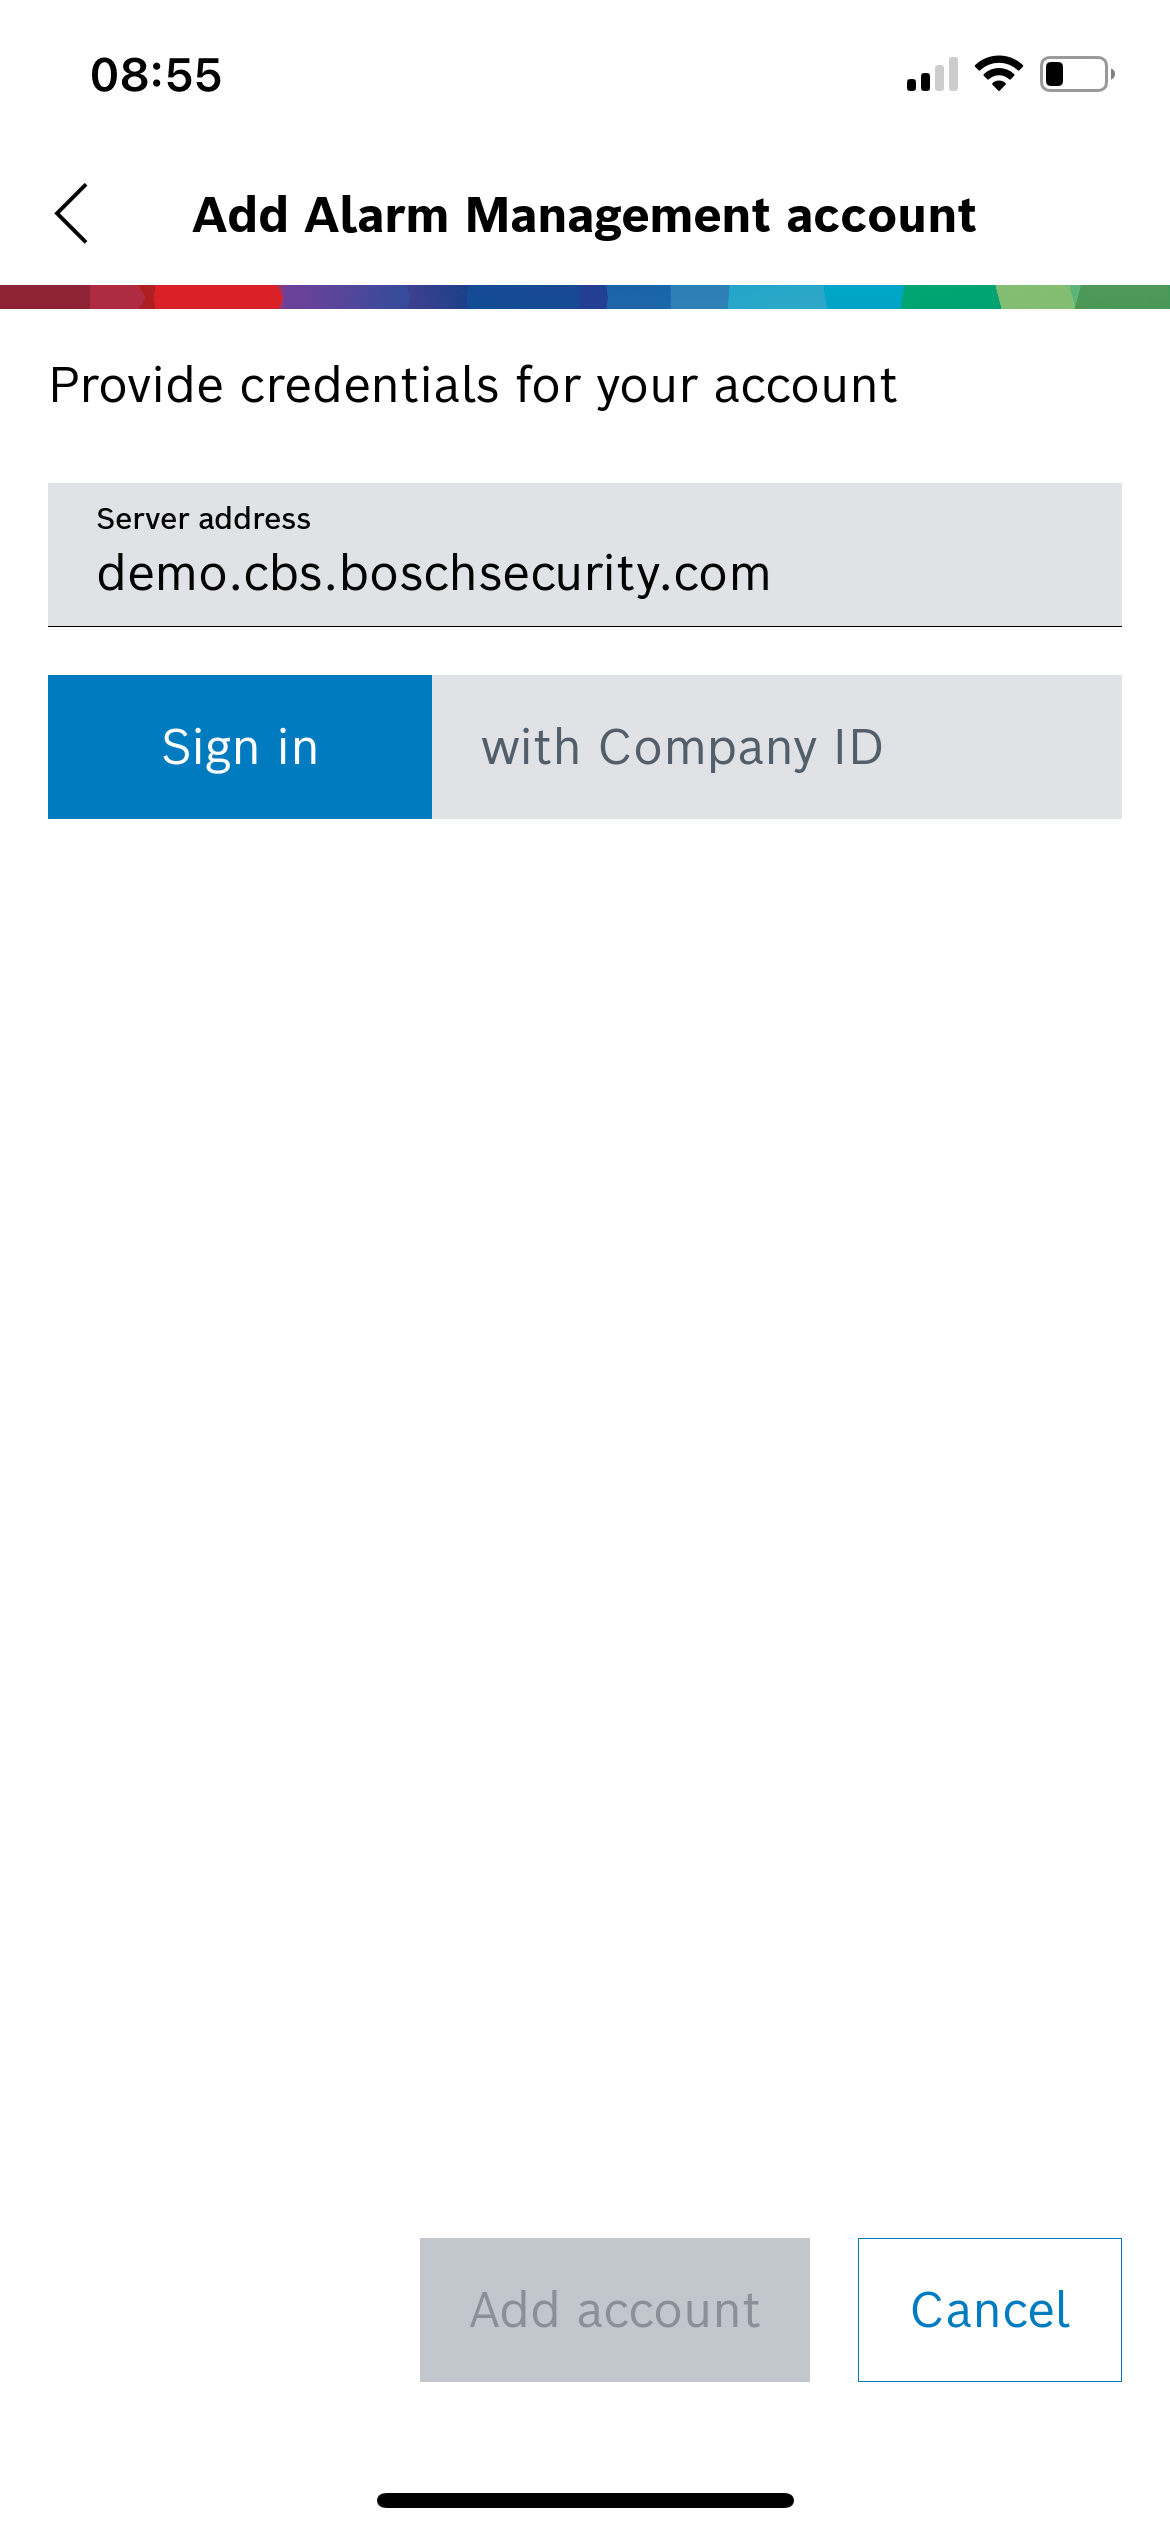
5. Enter server address of the desired Alarm Management instance and click on Sign in, tap Continue
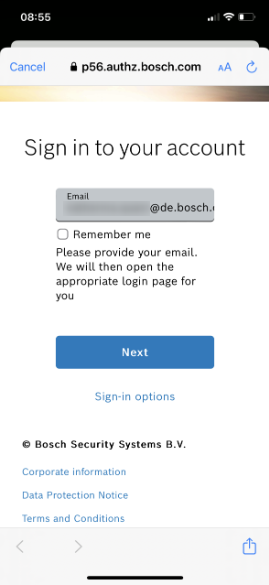
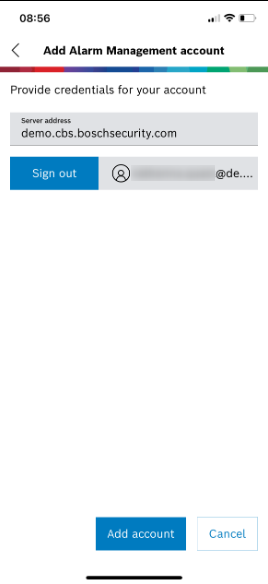
6. Enter your email address, which is used for your Account User, and tap Next, tap Add account
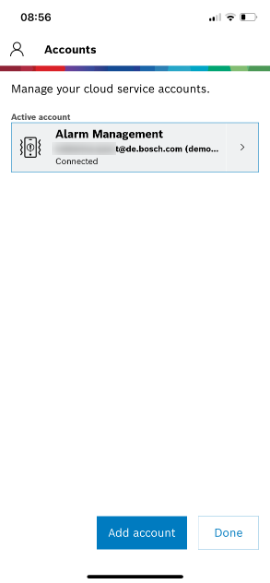
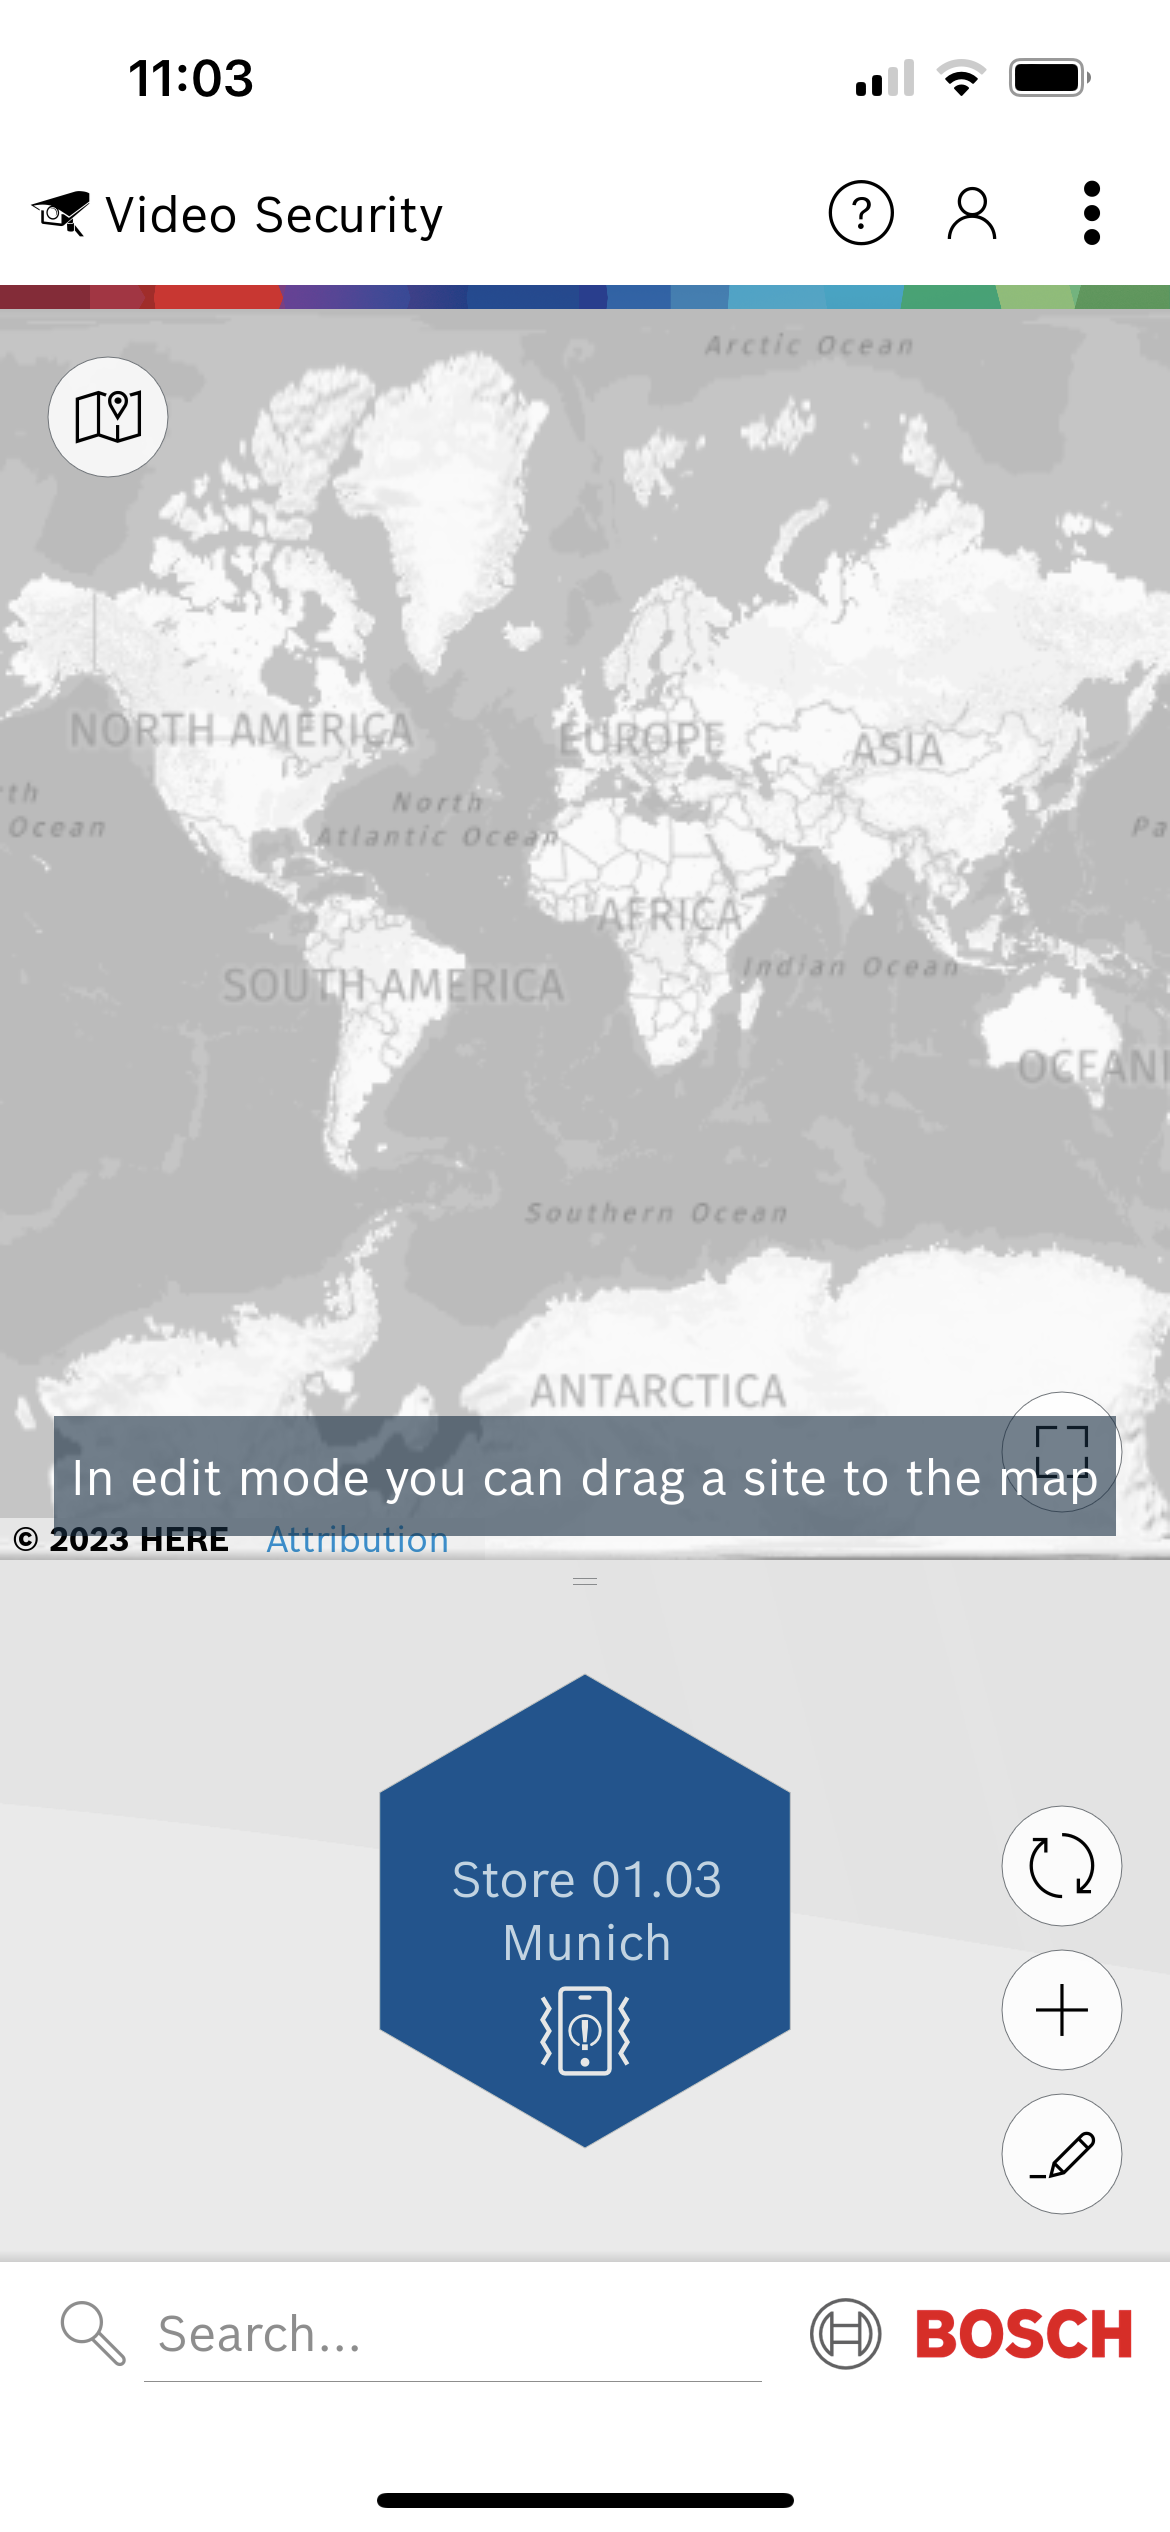
7. The account is now connected to the service, tap Done, your site is / sites are displayed
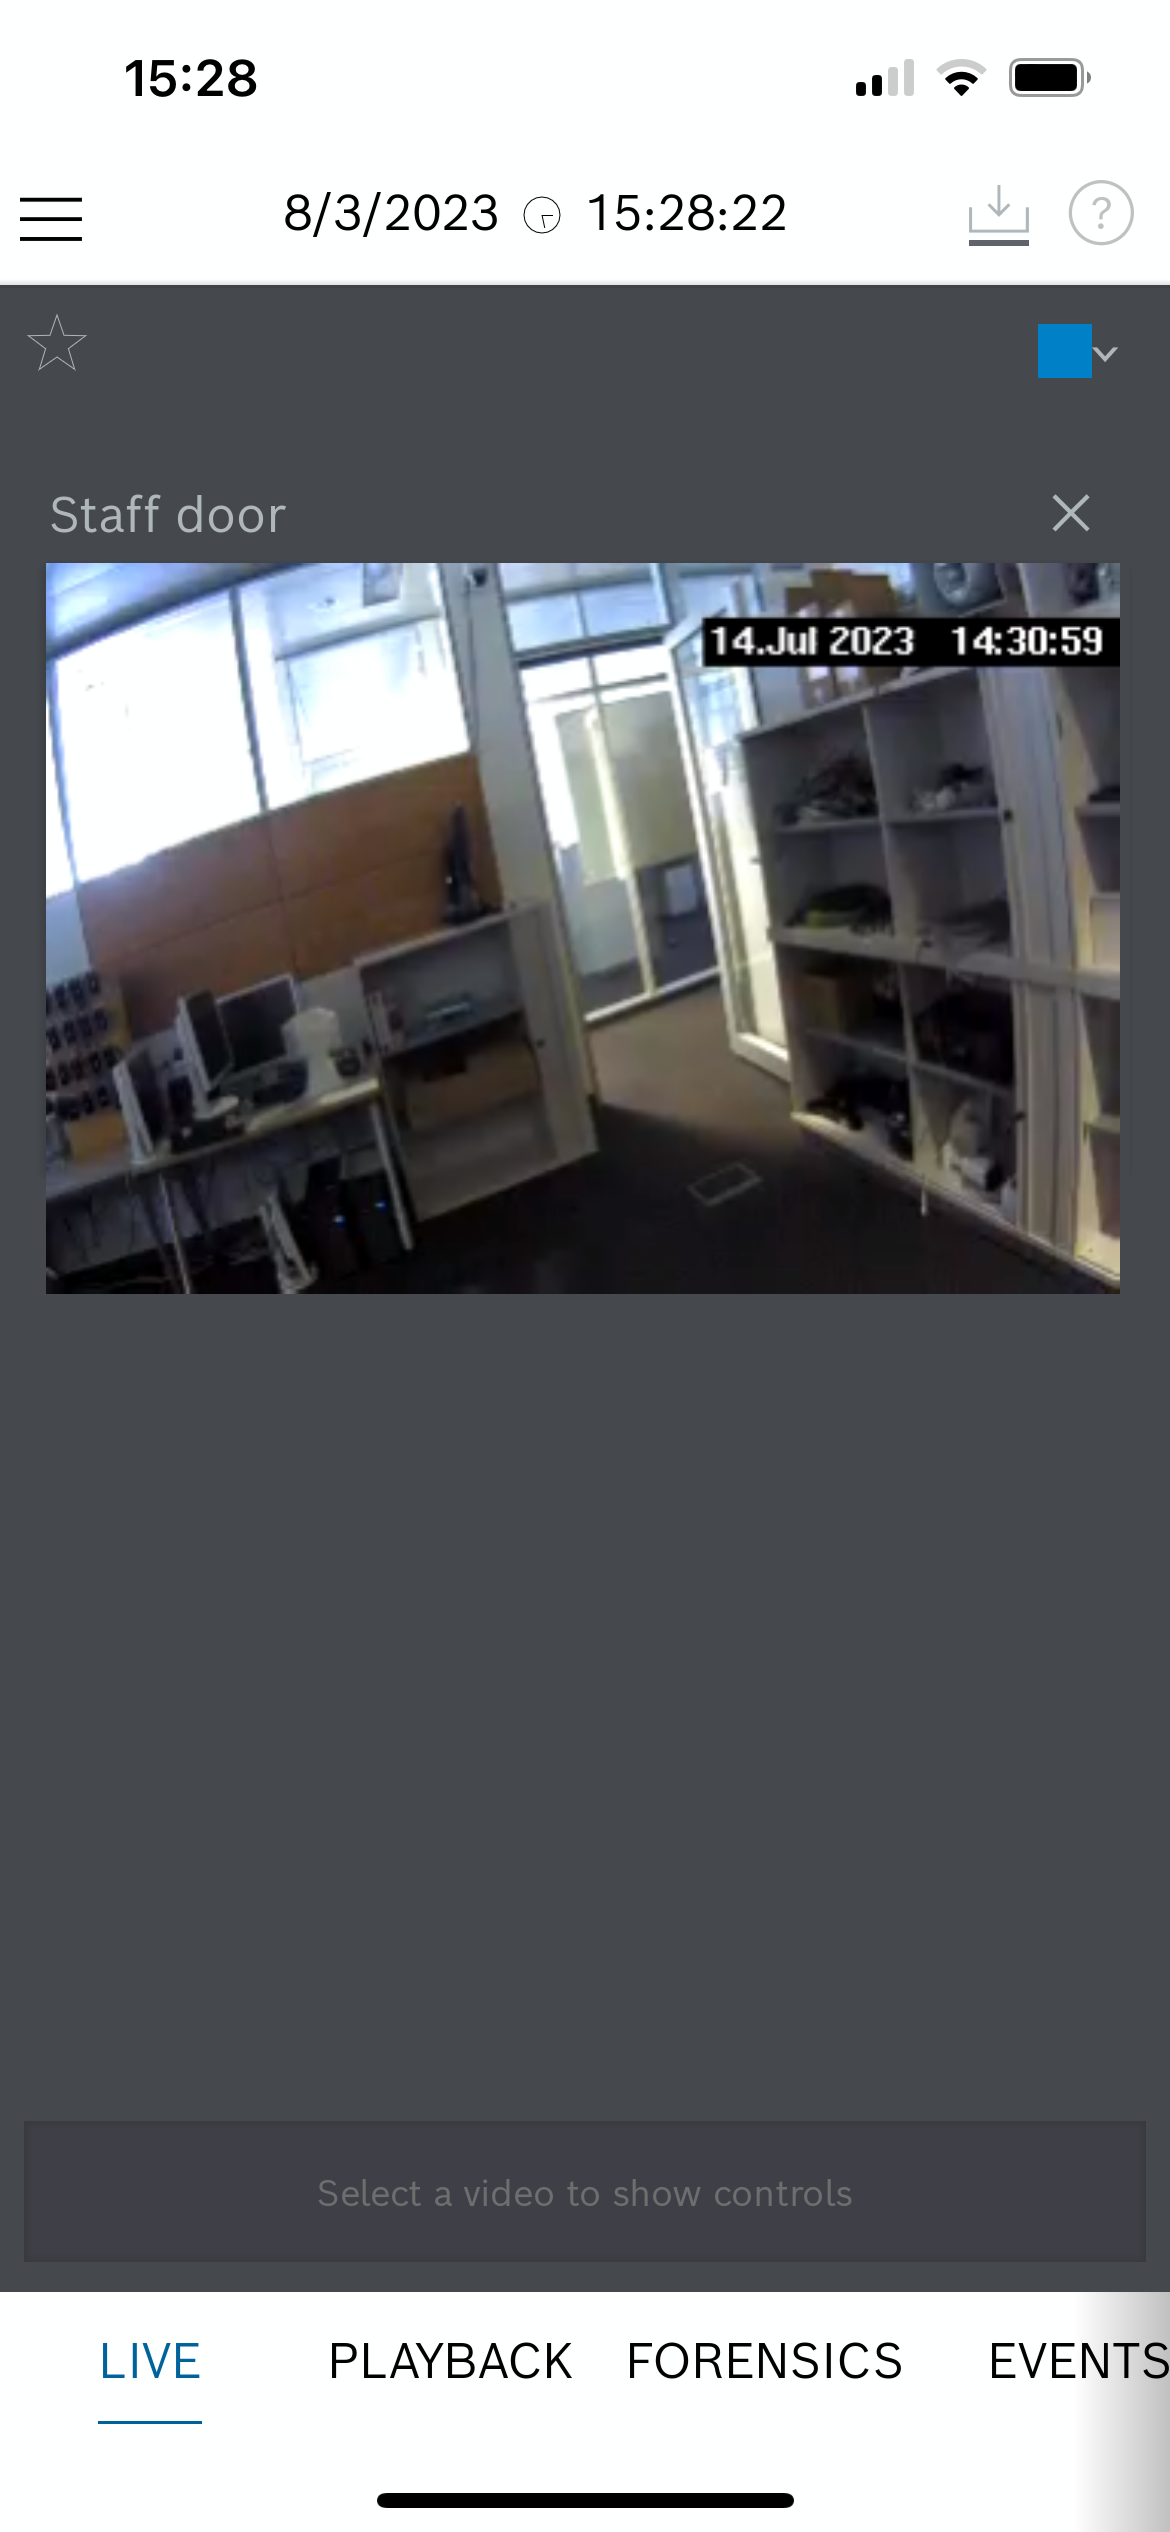
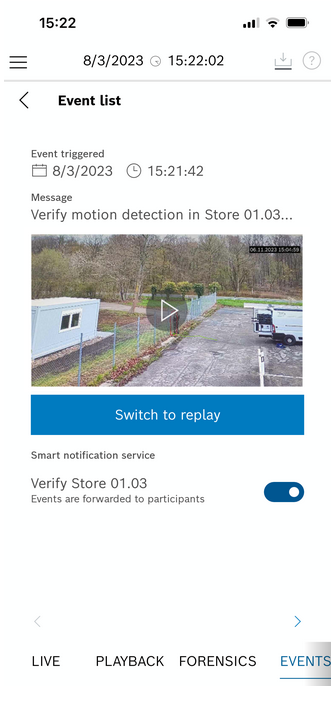
8. Tap the site icon to display your cameras (live video), to replay recordings on the camera and to receive push alarm notifications.
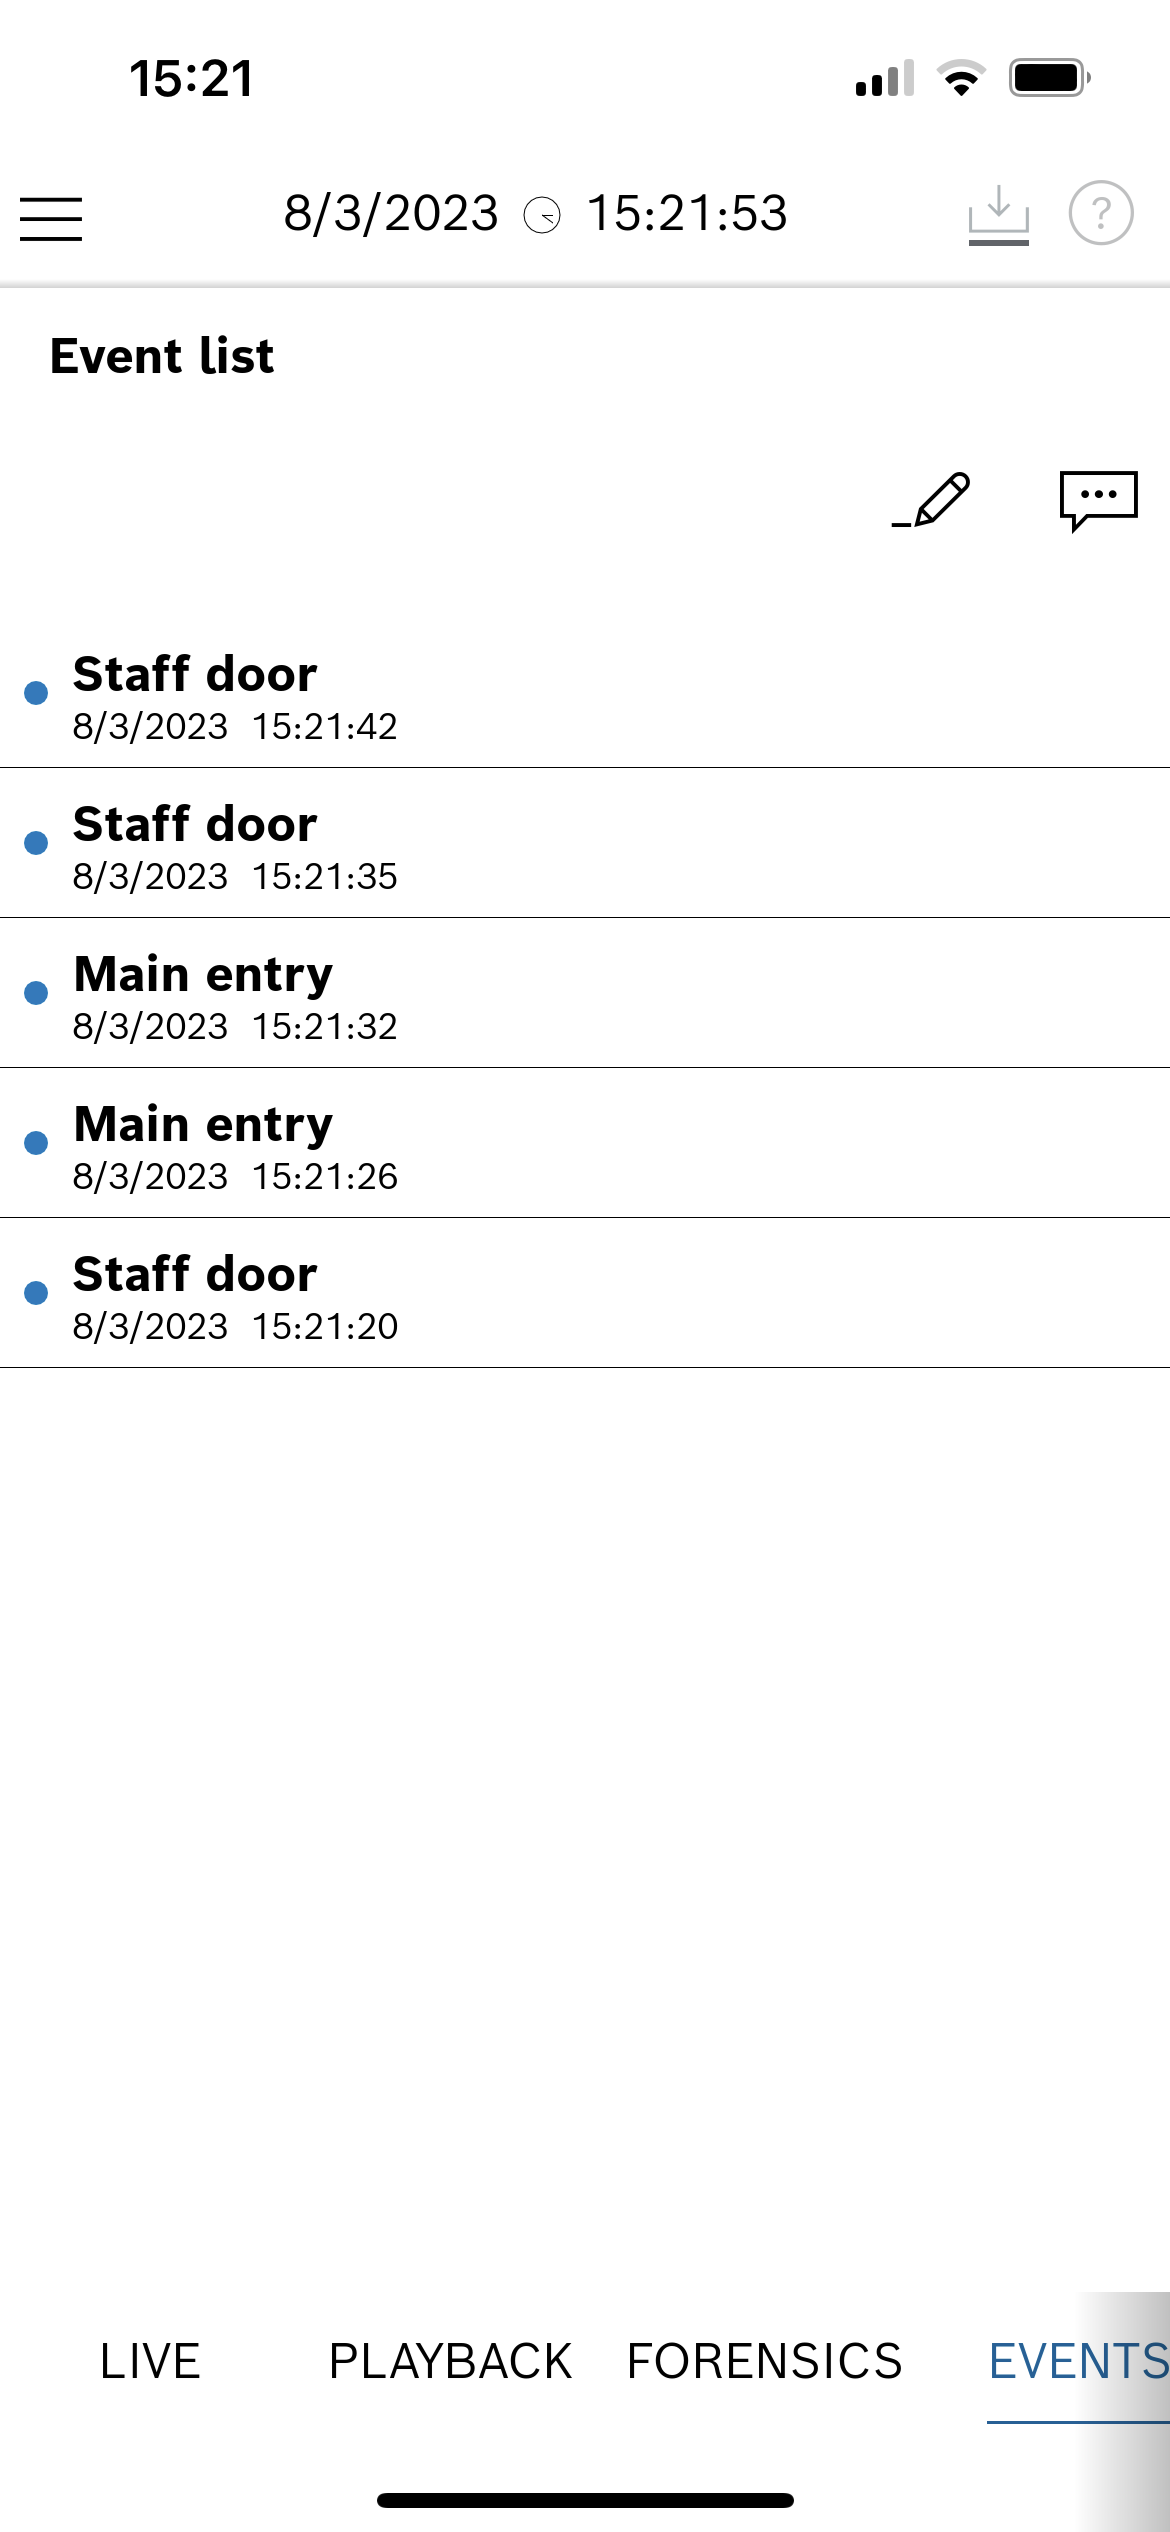
9. Verify the events in the event list, tab the play button to replay the event clip stored in the cloud
Note: Push Notifications can only be received on Video Security Client running on iOS and Android, not on its Windows version. Event list and alarm clip replay are available on all three OS platforms (Windows, iOS and Android).