
Remote Portal connects you to your Security devices from anywhere and lets you perform remote administration and maintenance anytime.
In this article it is explained in a step-by-step guide how you can register IP cameras to Remote Portal.
Step-by-step guide
Option 1: Register your cameras through camera website
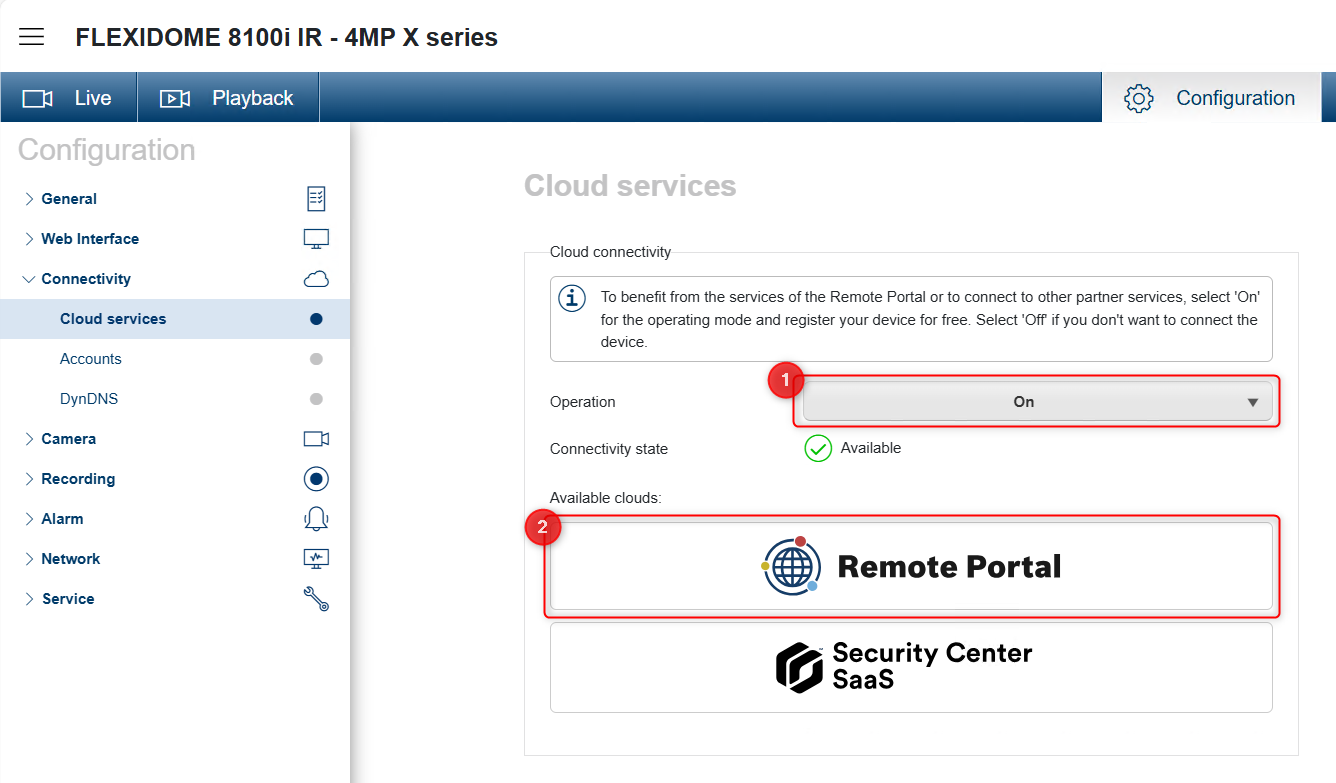
1. Open camera website in local network
2. Select Configuration
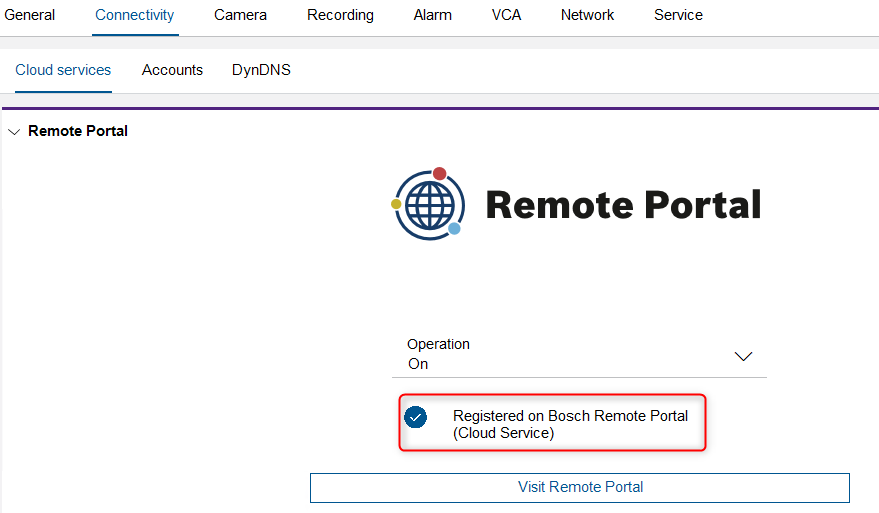
3. Navigate to Connectivity > Cloud services
(information) Note: In Firmware versions earlier than v.7.70, the camera can be registered to Remote Portal under Network > Advanced tab.
4. In field Cloud-based services switch Operation to On
5. Click the Remote Portal button
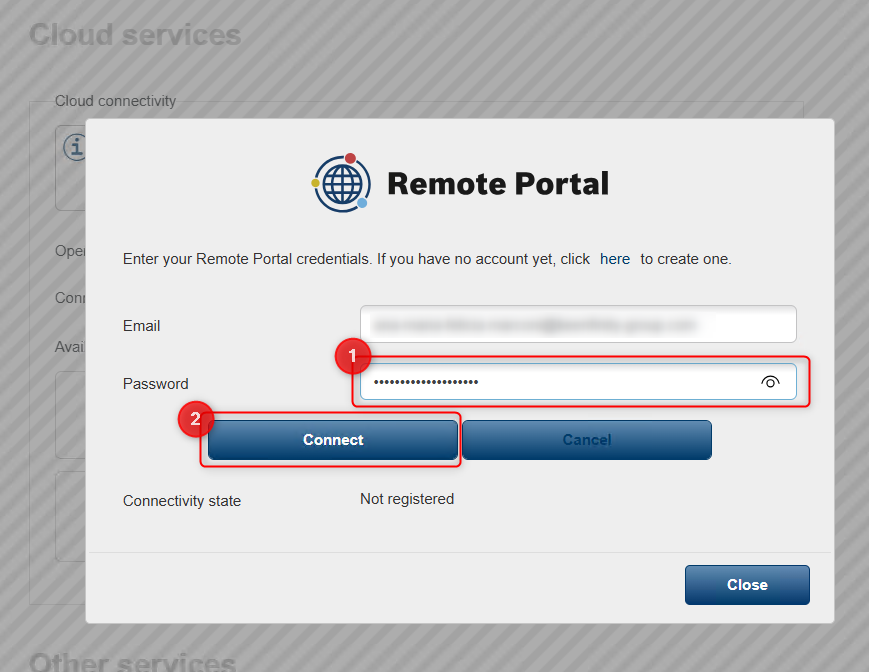
6. Enter your user name and password of Remote Portal (Admin or Technician) or connect with a technical password if you converted your Remote Portal account to Single Sign-On ID (SSO: KeenfinityID - KFID)
Nice to know:
-
How to set up password for Keenfinity ID in Alarm Management?
-
How to convert the Remote Portal account to Single Sign-On ID (SSO: KeenfinityID - KFID)?
7. Once you have generated the technical password in your Remote Portal account, copy it and paste it in the password field in the camera's web GUI > click Connect
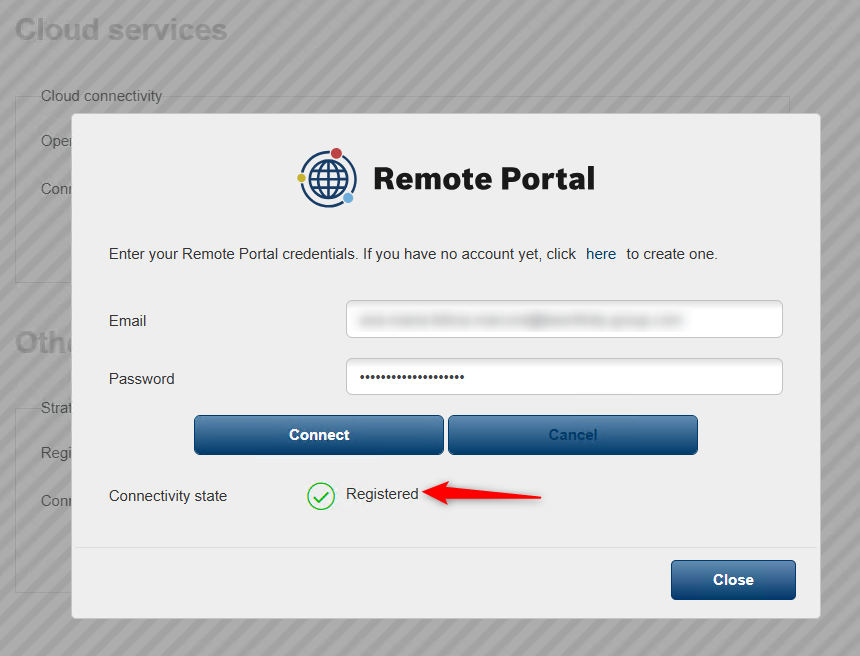
Wait until the Connectivity state changes to "Registered" and close the window:
The Connectivity state from the camera WEB GUI will change to Connected:
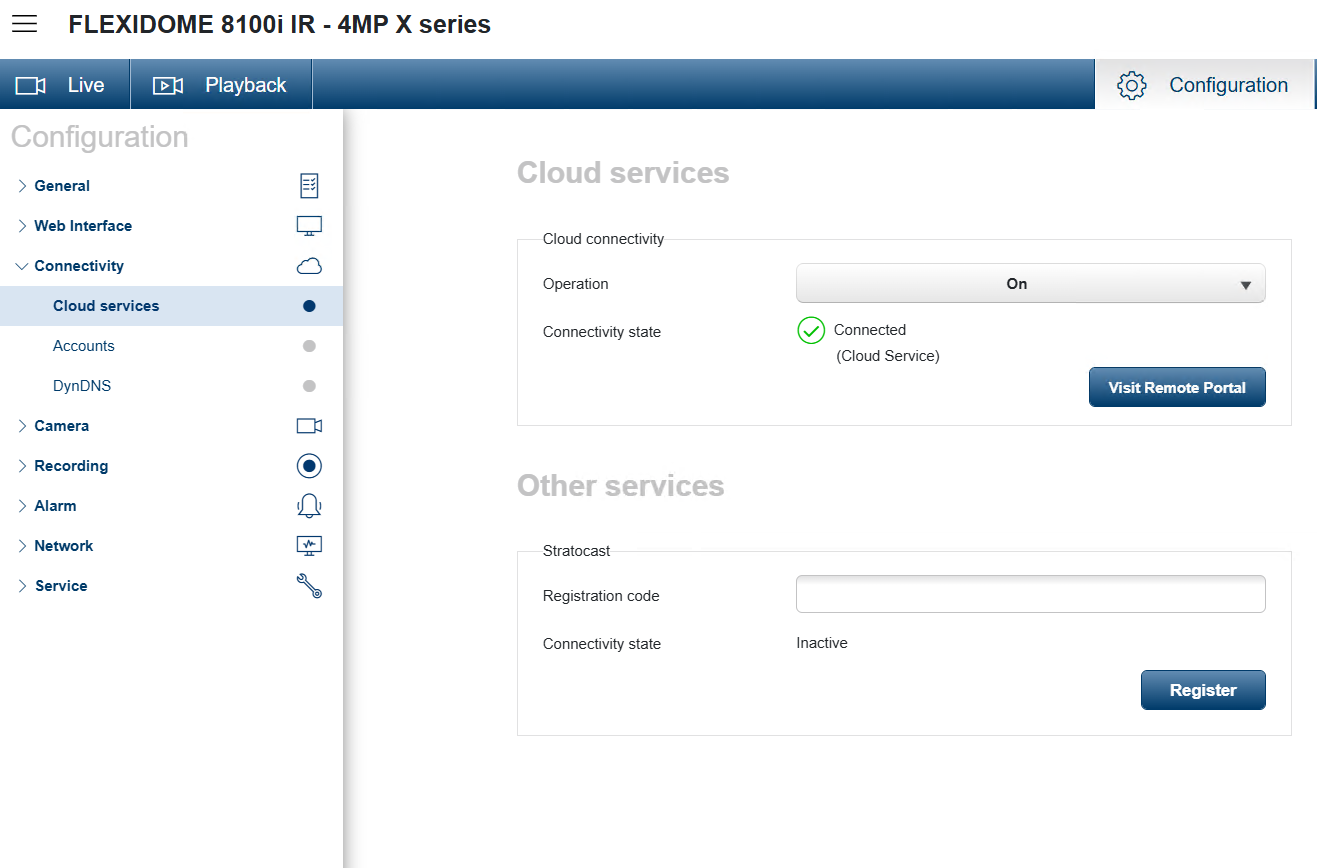
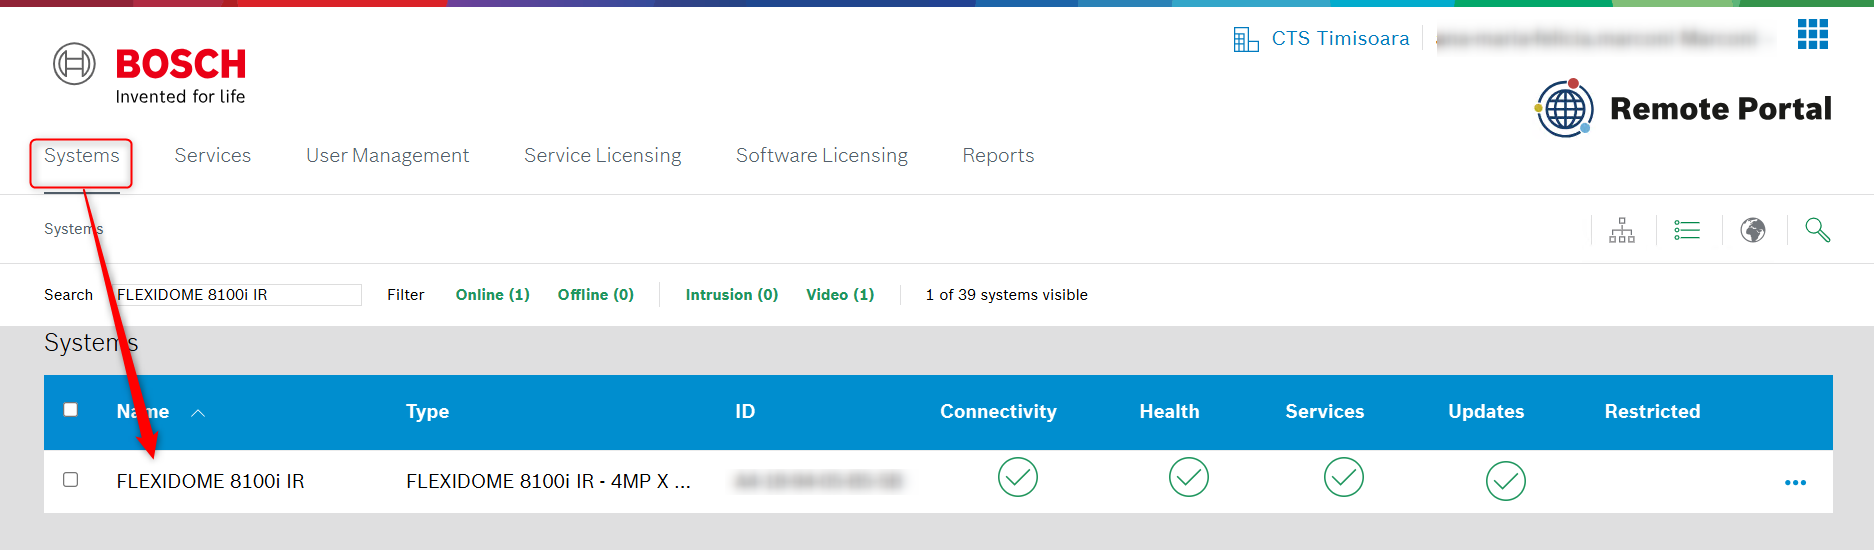
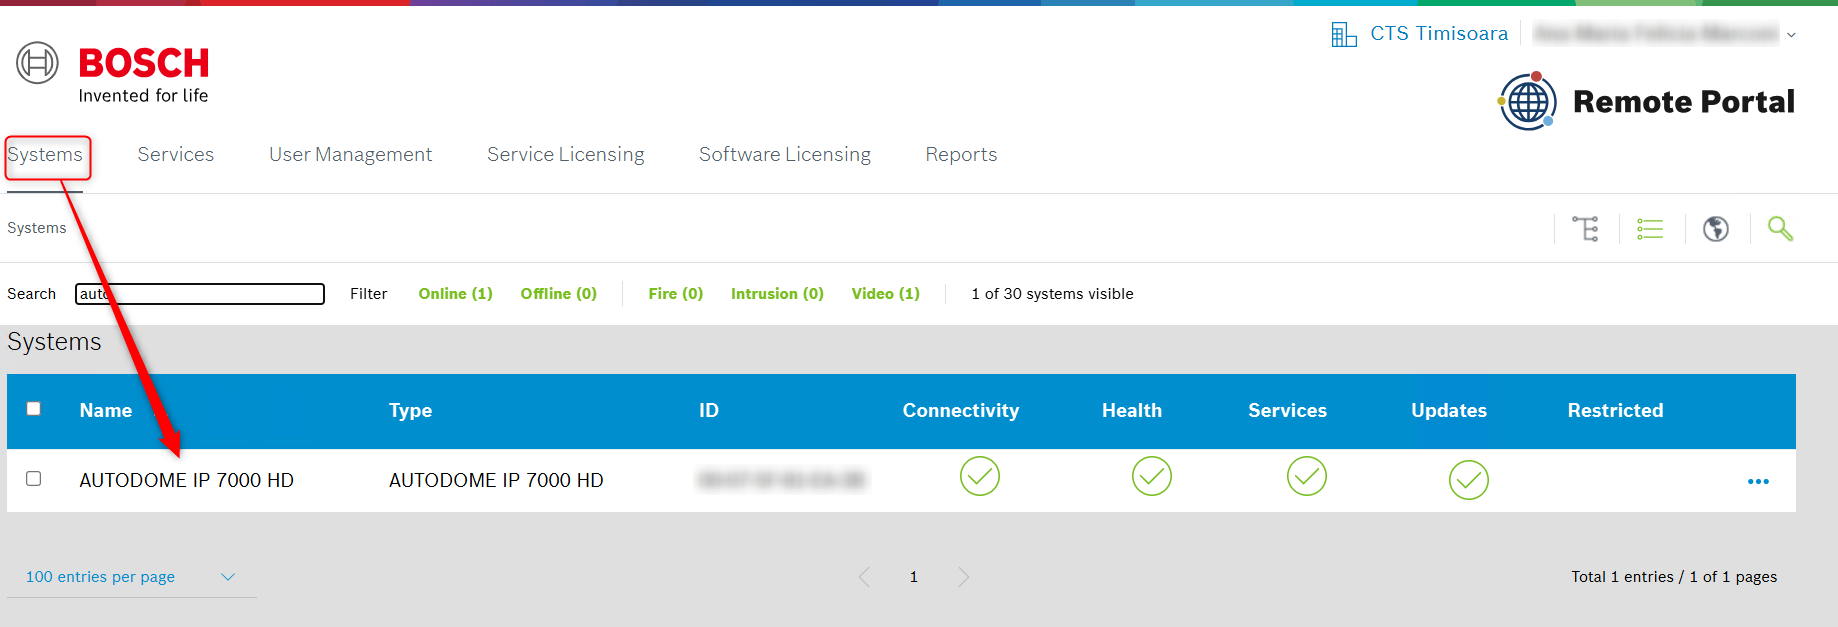
The camera will appear in your account in Remote Portal.
Notes:
If an Administrator or Technician belongs to more than one (1) account in Remote Portal, he cannot register devices to Remote Portal, unless he configures the Default Commissioning Company in Remote Portal > User Settings > My Companies.
The Default Commissioning Company gets activated for 12 hours, but another Default Commissioning Company can be selected earlier.
Option 2: Register your cameras through Configuration Manager (bulk commissioning)
1. Start Configuration Manager in the local network
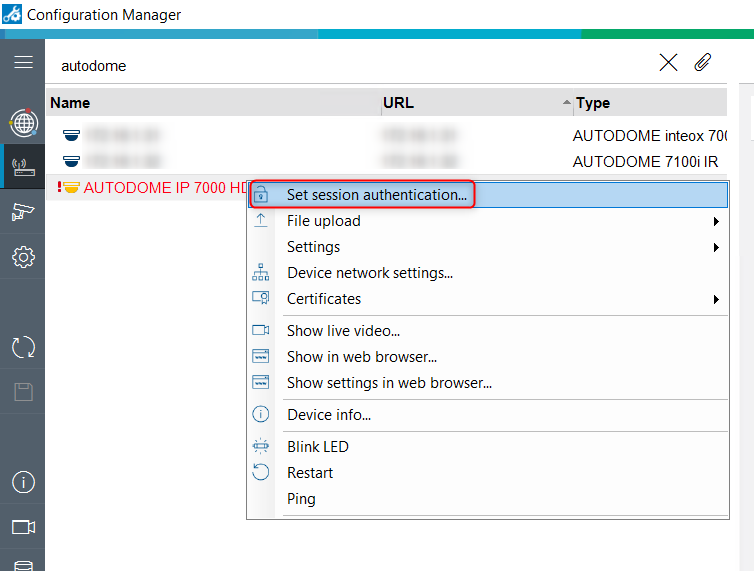
2. Authenticate the camera(s) to be added to Remote Portal in "Devices" or "My Devices" list:
> Right click > click Set Session Authentication > enter service level user and password > click OK
3. (Multi-)Select the cameras to be registered to Remote Portal in "Devices" or "My Devices" tree
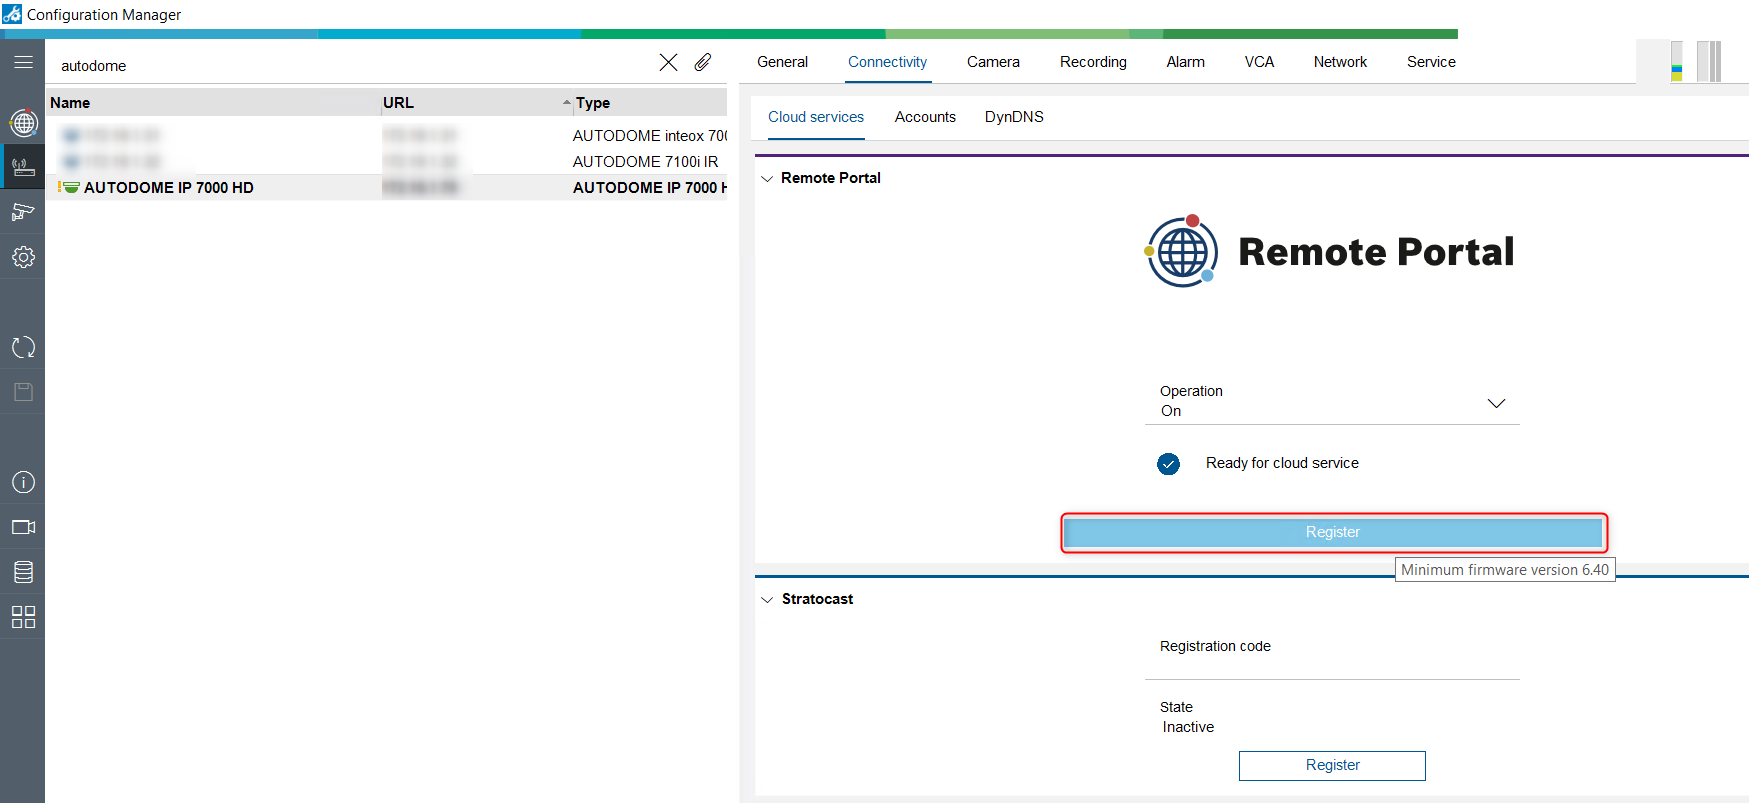
4. Select Connectivity tab and Cloud services sub tab
5. Switch Operation to On and click Save
6. Click Register button
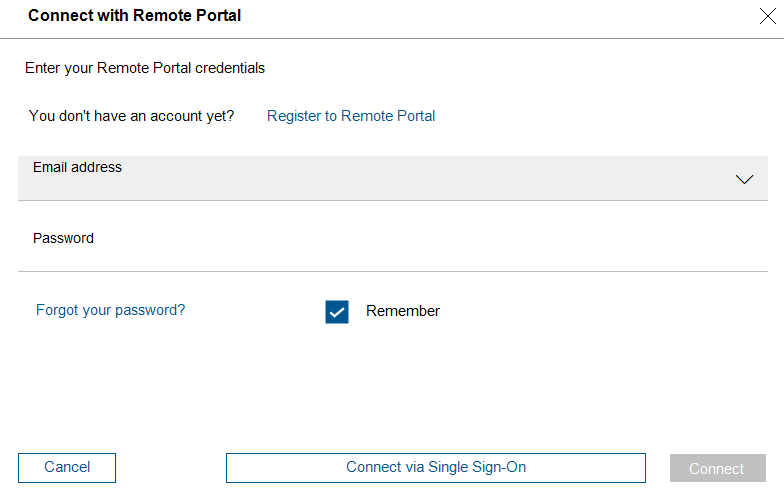
7. Enter your user name and password of Remote Portal (Admin or Technician) and click Connect button
Note: If you converted your Remote Portal account to Single Sign-On ID (SSO: KeenfinityID - KFID), click on the Connect via Single Sign-On button and fill in the credentials.
Nice to know:
-
How to set up password for Keenfinity ID in Alarm Management?
-
How to convert the Remote Portal account to Single Sign-On ID (SSO: KeenfinityID - KFID)?
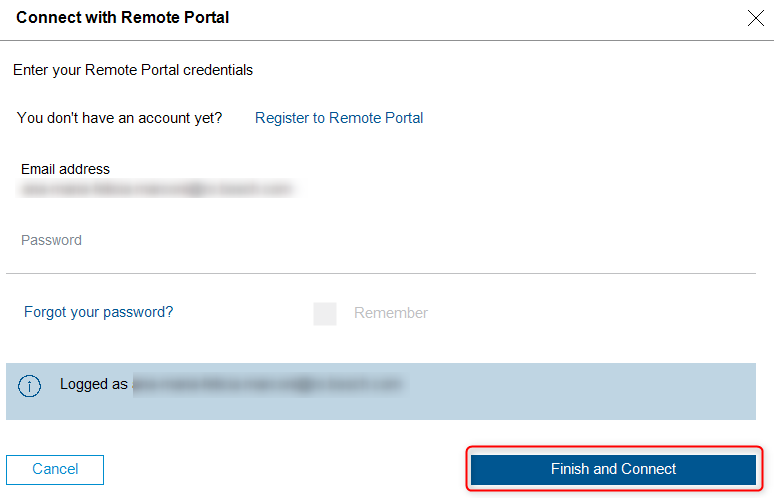
If you connect via Single Sign-On, click Finish and Connect button:
8. The cameras show ‘Registered’ and appear in your account in Remote Portal.
Note:
If an Administrator or Technician belongs to more than one (1) account in Remote Portal, he cannot register devices to Remote Portal, unless he configures the Default Commissioning Company in Remote Portal > User Settings > My Companies.
The Default Commissioning Company gets activated for 12 hours, but another Default Commissioning Company can be selected earlier.
Note: If the cameras fails to become registered to Remote Portal, please visit the article Troubleshooting Camera Connectivity & Remote Portal.

-
Do I need a license for the remote live stream of my camera in Remote Portal (Remote Connect)?
-
Does the Advanced Video View+ license work at site level or per camera?
For a better understanding of using the security, safety and communications products, we encourage you to join our free online Training from KEENFINITY Academy!
You can also refer to the following YouTube video where you will find the new features of the Project Assistant App (version 1.4), DNS configuration, camera overview page and the Remote Portal configuration.