
1. Create a day model.
-
Go to “System Data” and then “Calendar”
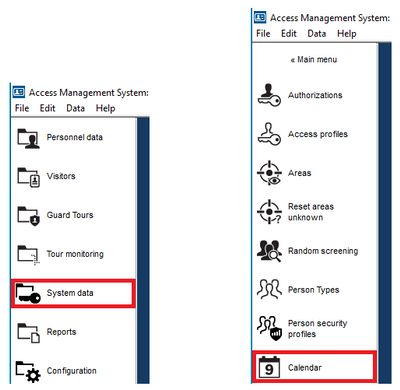
Figure 1.
-
Click on “Day Models”
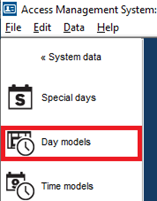
Figure 2.
-
Click the “Create new” button
-
Assign a name to the Day Model. Add a description and fill the intervals as needed
-
In this example we are only creating one interval from 8 am to 5 pm. If needed, up to three intervals can be created in the same Day Model
-
Click Save
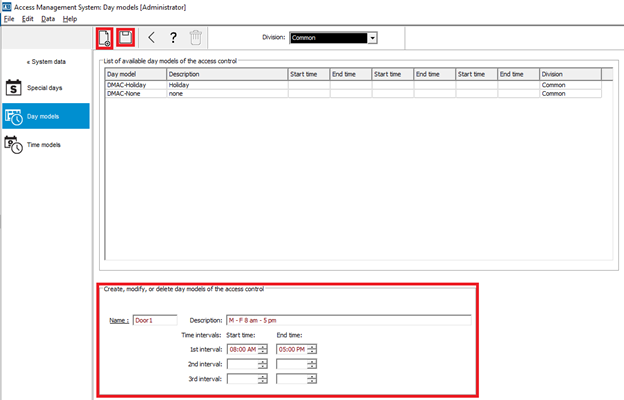
Figure 3.
2. Create a Time Model.
-
Click “Time Models”
-
Click the “Create new” button
-
Assign a name to the Time Model. Add a description
-
Select the number of days in the Period
-
Select a reference date (select a past date and not a future date).
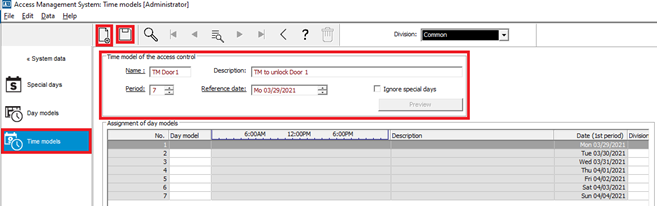
Figure 4.
-
Assign the Day Model to each day of the period as needed and click save
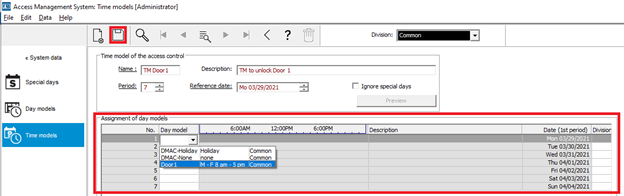
Figure 5.
Note: to verify the Time model is correct, click the preview button and confirm the dates match.
-
The predefined holidays are shown below, assign the desired Day Model to apply on those days
-
If holidays are not needed, click the “ignore special days” checkbox

Figure 6.