This guide is meant to help you adding new cameras in VRM in Configuration Client and display their images in Operator Client.
Before adding a new camera there are a few things that need to be taken into consideration:
-
You are not exceeding the maximum number of channels allowed. Each unit has a maximum number of channels. For example:
DIP 5000 AIO the maximum number of channels is 42DIP 6000/ 7000 AIO the maximum number of channels is 128 -
You have the necessary number of licenses installed on the systemThe units come with 8 channels pre-licensed. If you want to add more cameras or encoders/ decoders, you need first to make sure that licenses have been purchased.
-
The system has enough storage to cover the retention time of the cameras. If there is no storage available, there is a risk that your system will stop recording.
-
The bandwidth available of the unit is not exceeded. For example:
-
Bandwidth DIP 5000 AIO: 170 Mbit/s
-
Bandwidth 6000/ 7000 AIO: 550 Mbit/s
-
Article requirements:
-
Operator Client
-
Configuration Client
-
Camera
-
PC/ Server/ Workstation
(information) Similar steps must be followed in versions newer than BVMS v10. Only the Configuration Client interface is different in newer versions of BVMS.
Step-by-step guide
If you would like to assign a camera image to an Image pane from Operator Client and display its image you need first add the camera in VRM and in the Logical tree from Configuration Client.
A) Add camera in VRM and Logical tree from Configuration Client:
a) Open Configuration Client and select the main window Devices
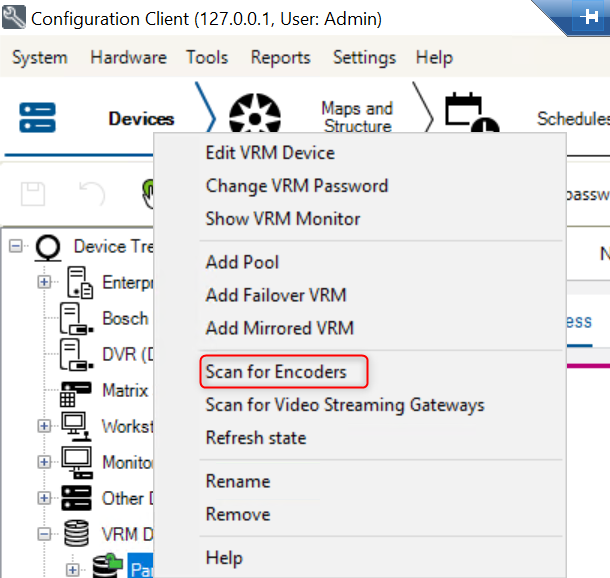
b) Expand the VRM devices > Right click on the Local VRM (Local VRM may have a different name if you have changed it; in this example is "Paris Lab") > select Scan for Encoders
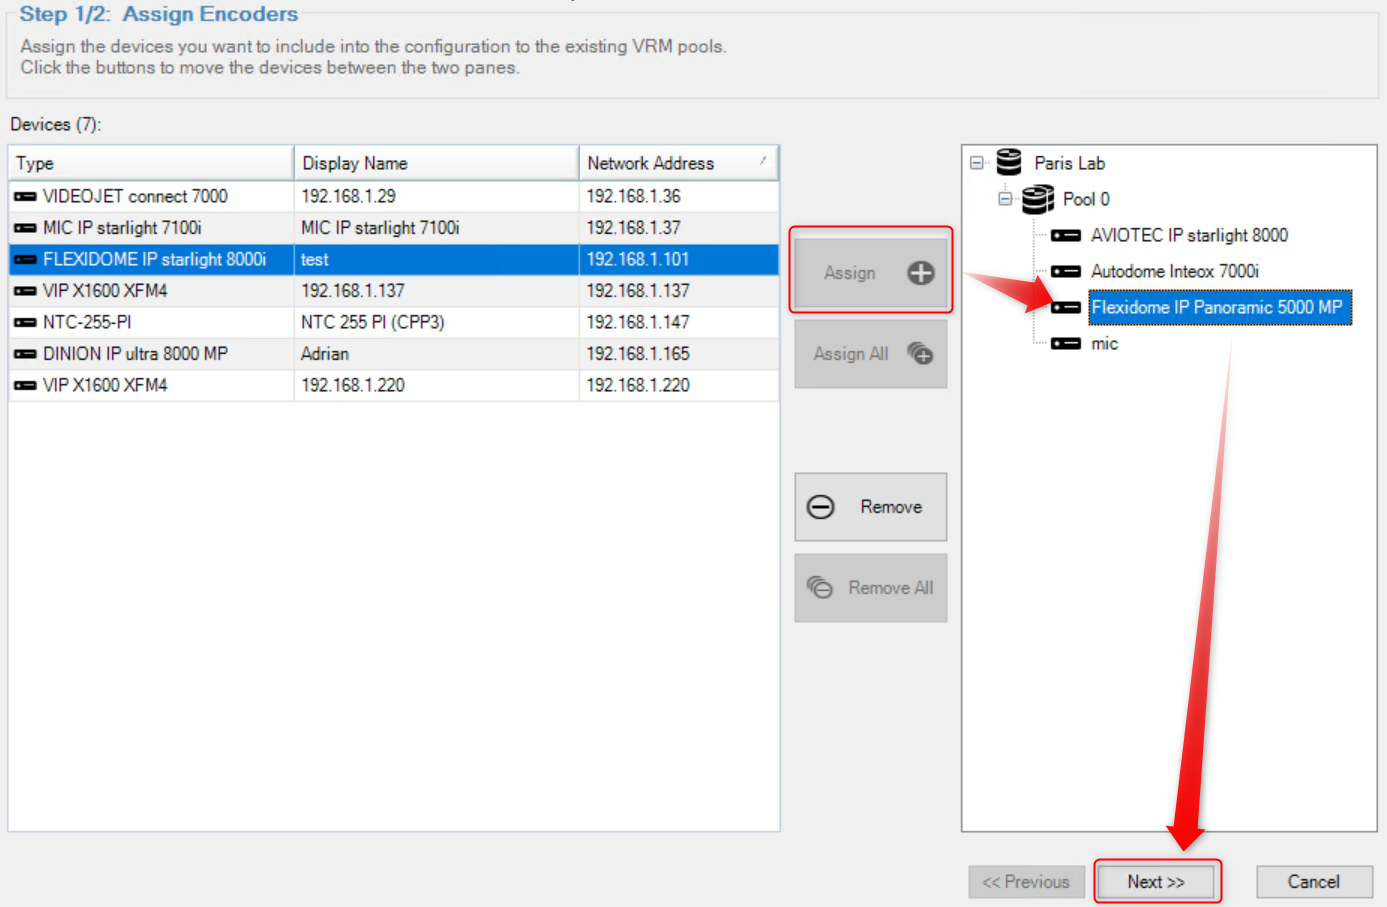
c) BVMS Scan Wizard window is going to appear and all the available encoders in the network are going to be displayed. Select the device that you want to add to the system > Assign > Next
d) Complete the password of the camera > Finish. The camera will be displayed under the VRM Pool

e) Go to "Maps and Structure" tab > Expand VRM Devices >Expand Local VRM ("Paris Lab" in this example) > Expand Pool
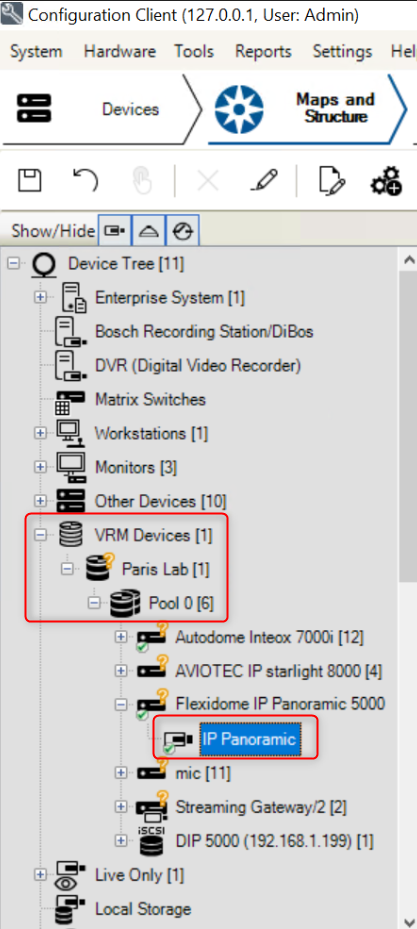
f) Drag the camera you added before and drop it in the Logical Tree
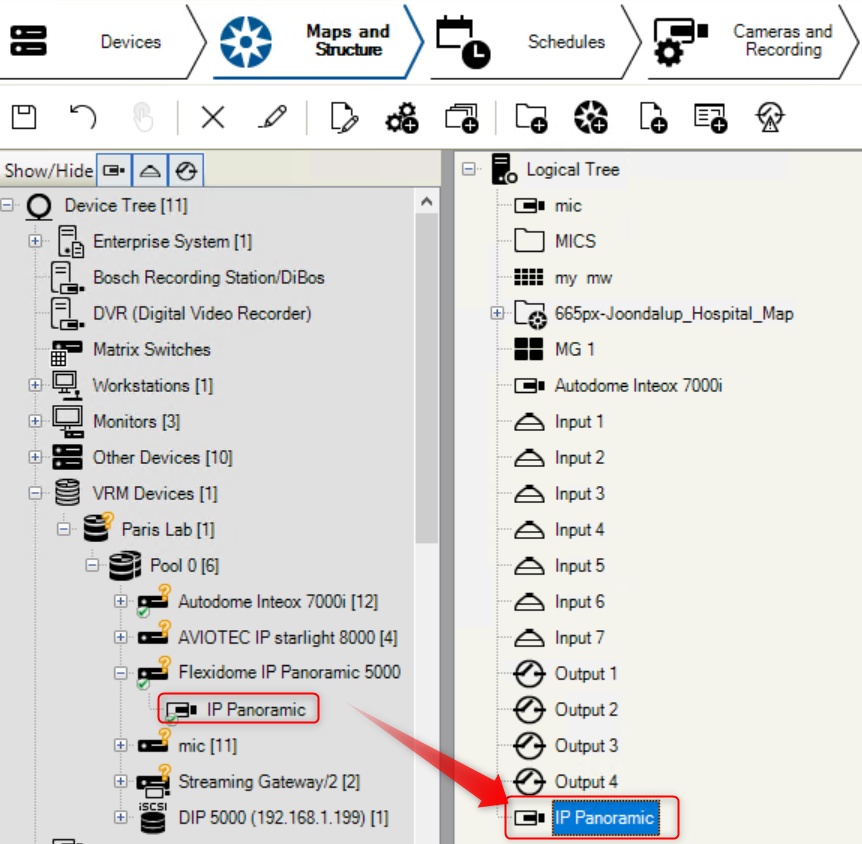
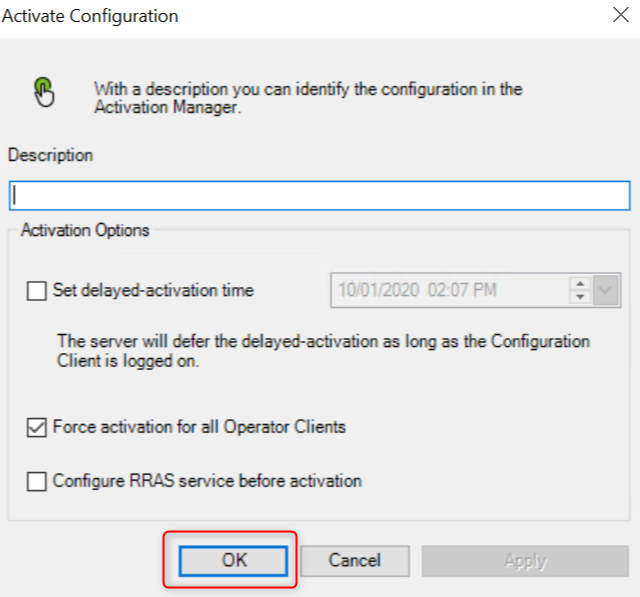
g) Save your changes 

B) Display images in Operator Client
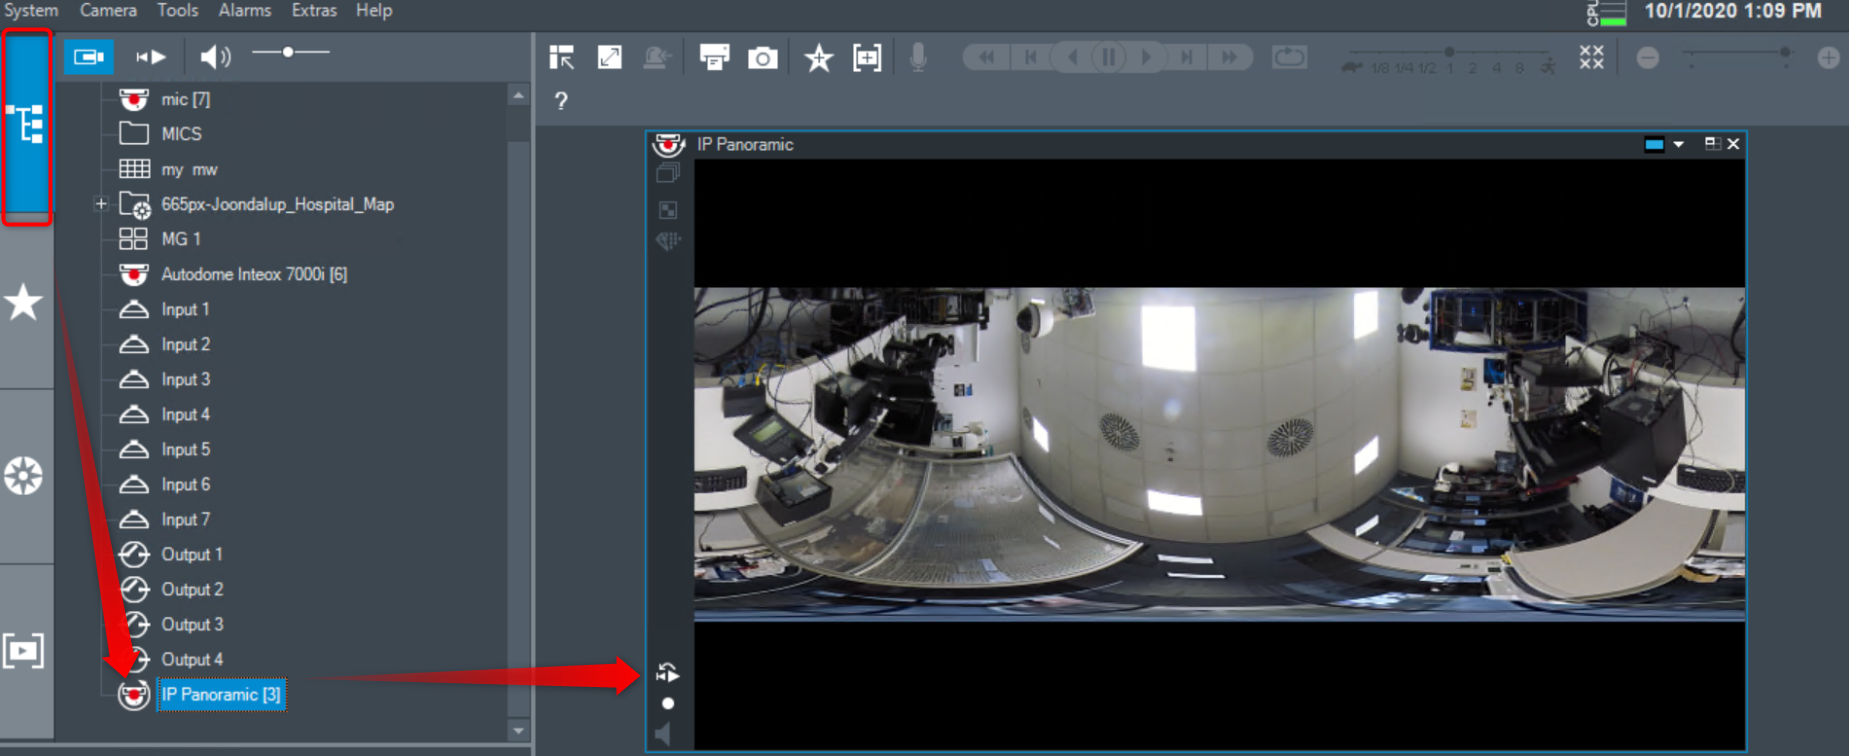
a) Open Operator Client
b) Go to the Logical Tree tab > Your camera will be visible in the logical tree from the left side
c) Drag and drop the camera in the Image pane area or right-click on the camera and click Show in next free Image pane from the Logical Tree > The camera image is displayed.
Double click on the camera image if you would like to see only the image of the camera you added before.