
Possible causes and solution(s)
-
Causes

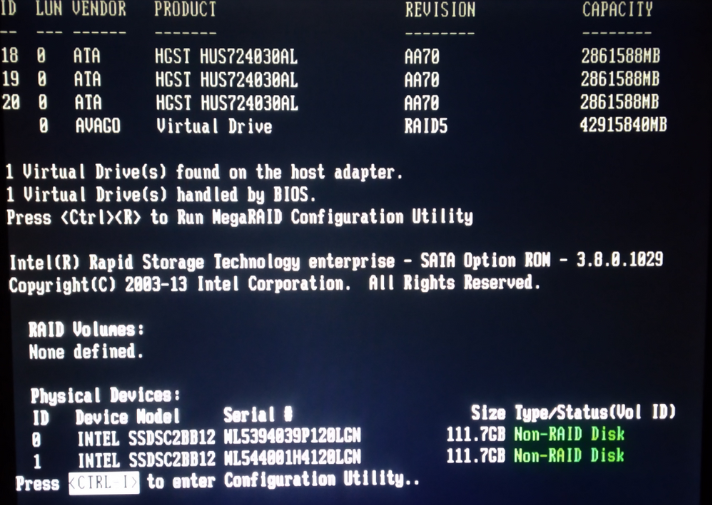
General note: Using a Bosch DIP system without video data disks is a non supported use case, its mandatory to equip the system with data disks to recover the system.
-
Solution
Step 1 - Preparation
-
Download the attachment repair.zip and unzip the content
-
Prepare an USB-stick, rename it to SCRIPT
-
Copy the repair.txt extracted of the attachment on the USB-stick
-
Insert the USB-stick into an USB-slot of your machine
-
Insert the BOSCH recovery DVD into the DVD-drive
Step 2 - Create RAiD1
-
Boot the machine and enter the Intel RAiD MENU pressing CTRL + I
-
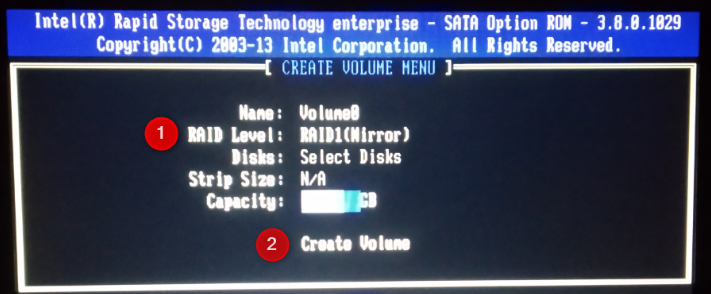
Navigate to CREATE RAiD VOLUME and hit enter

-
Set RAiD level to RAiD1(Mirror), navigate to CREATE VOLUME and hit enter
-
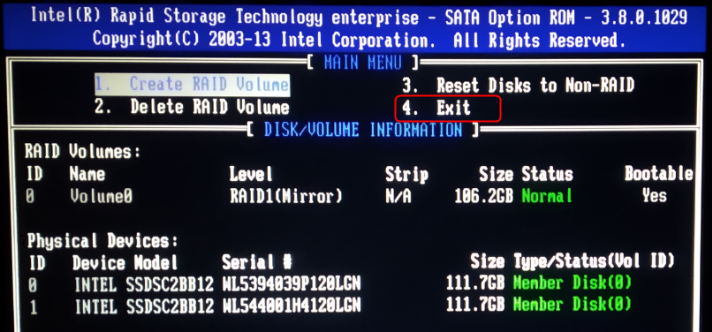
Exit the RAiD controller, navigate to EXIT and hit enter
-
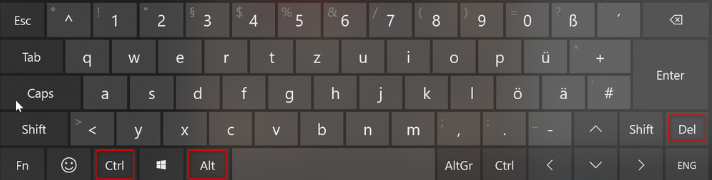
Reboot the machine (e.g. press CTRL + ALT + DEL)
Step 3 - System Recovery
-
During the reboot, boot from DVD, press ENTER as the line will displayed

-
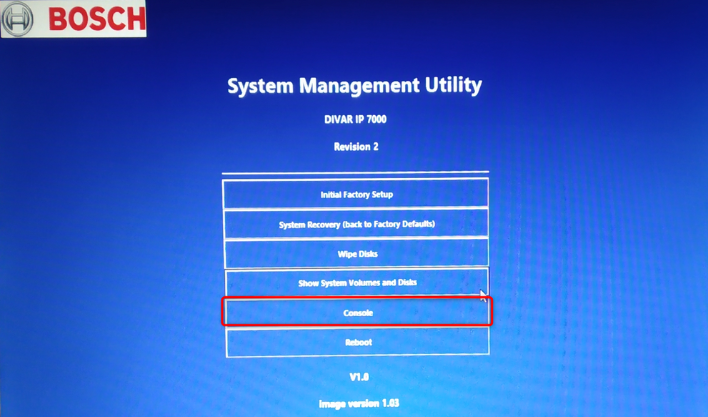
In the System Management Utility, click on CONSOLE
-
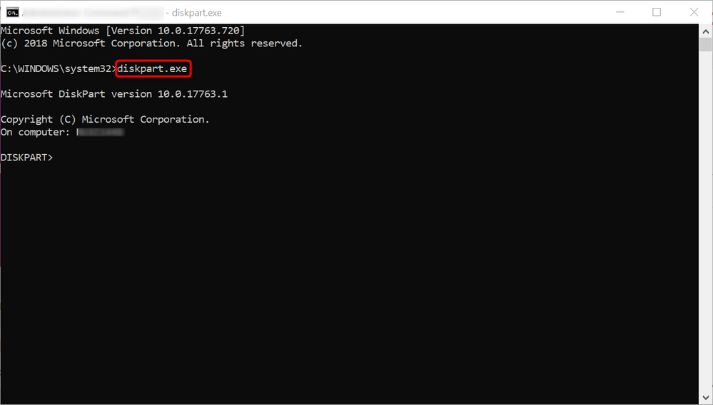
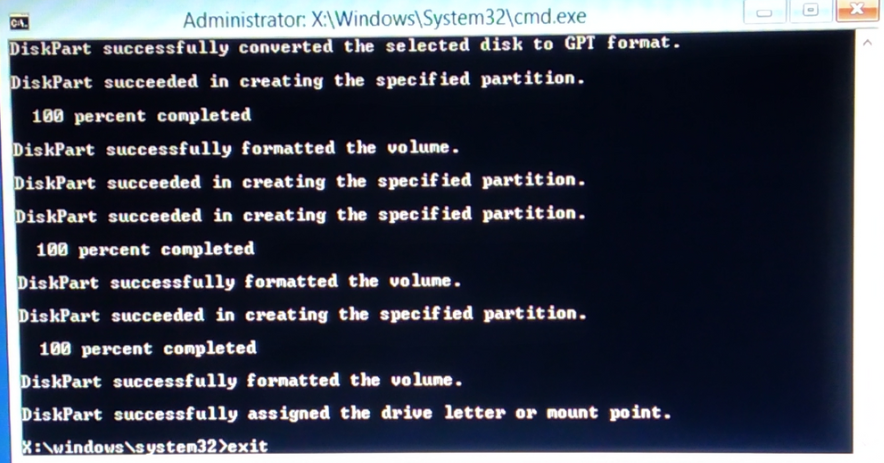
Type into command line "diskpart.exe" hit enter
-
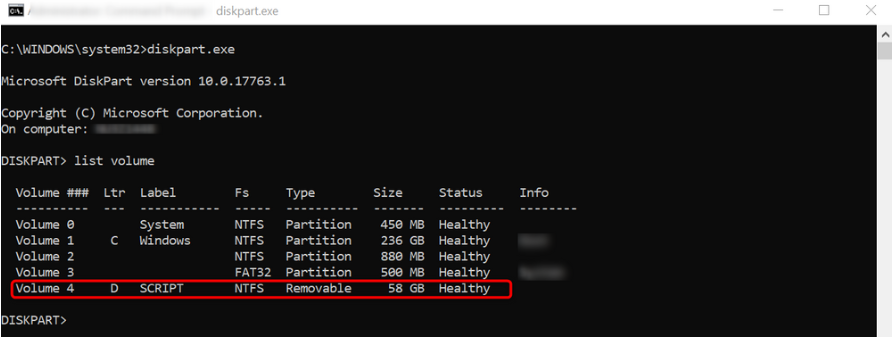
Type into command line "list volume" hit enter and search for your USB-stick called SCRIPT, note down the assigned drive letter (LTR)
-
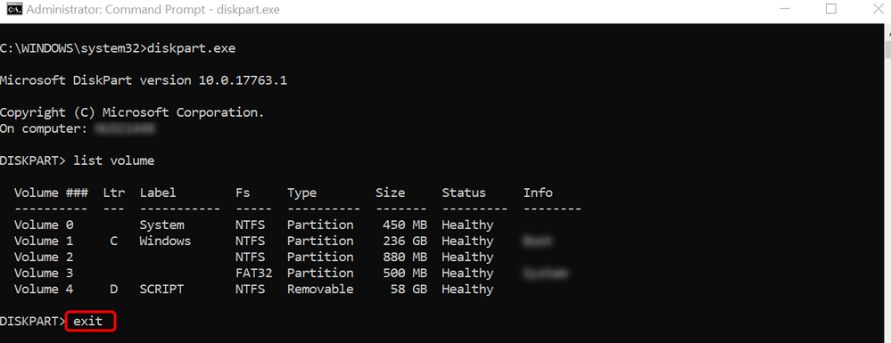
End diskpart.exe by typing on the command line "exit" hit enter
-
Type into the command line "diskpart.exe /s [YOUR_USB_DRIVE_LETTER]:\repair.txt" hit enter

-
Wait until the script has been finished and CLOSE the console
Step 4 - System Recovery
On the System Management Utility click on SYSTEM RECOVERY (back to factory default)
NOTE: Do not select Initial Factory Setup, this will wipe all existing data!
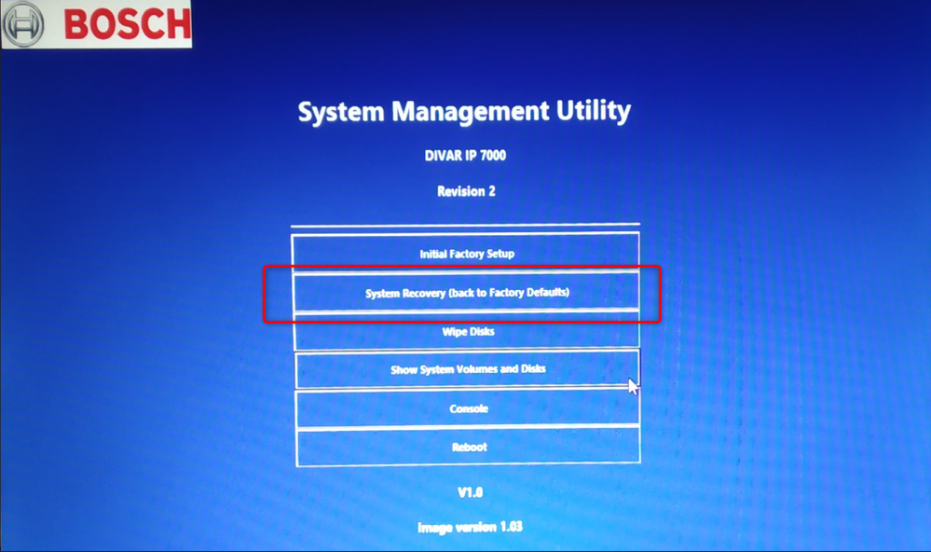
As the recovery has been completed, click on OK to confirm and reboot

Do not eject the DVD and follow the instructions on your screen to initialize the system.