
In this article we are going to show you how can you add ONVIF cameras to Configuration Manager through VSG managed by VRM.
System overview:
-
SONY camera SNC-VB630
-
Configuration Manager (CM can be downloaded from https://downloadstore.keenfinity-group.com/index.php)
We used: CM 7.41.0079 -
DIVAR IP AIO 5000
Step-by-step guide
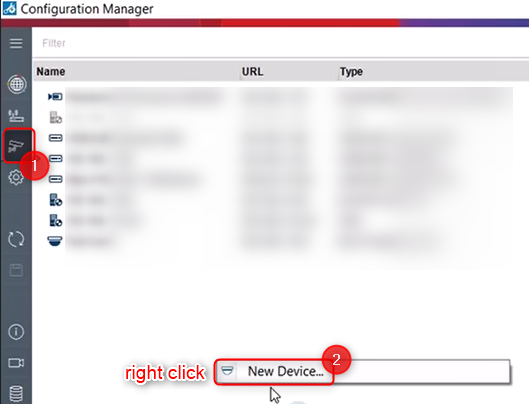
1. Open Configuration Manager and go to "My Devices" > right click on the blank list page > select "New Device..."
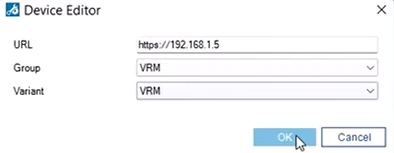
2. Add the IP address of the VRM
3. Expand the Pool and go to Devices > select New Device
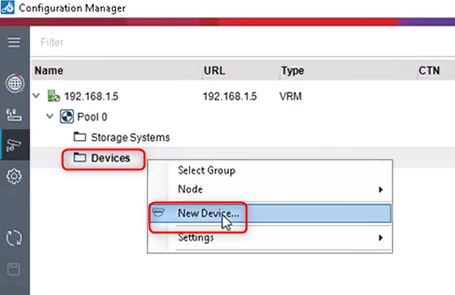
4. Add the VSG IP address with the corresponding port number (in this case we used port 8443) > click OK

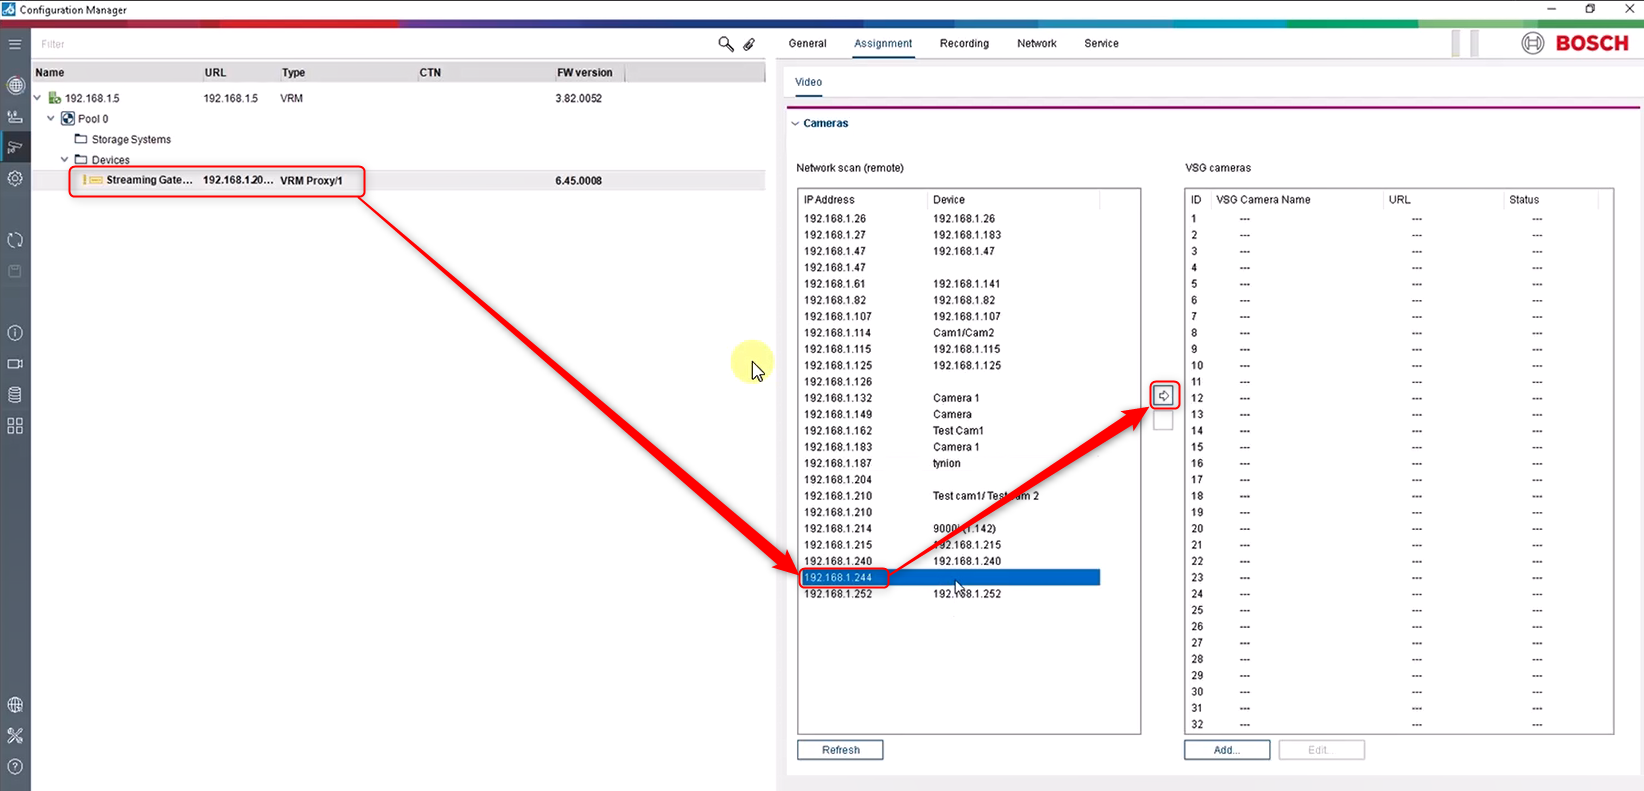
5. Now we are going to assign an ONVIF camera to VSG
Select the VSG under the Devices menu > select the camera you want to add to the VSG from the Network scan list and click on the right arrow
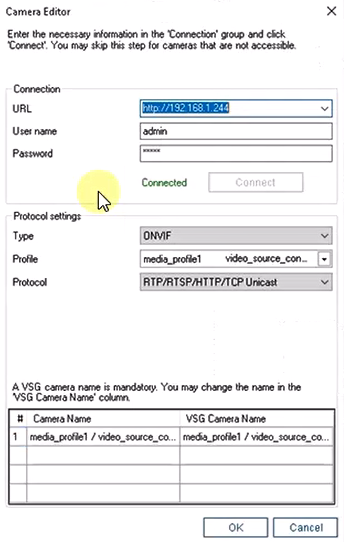
6. A new window will pop up where you have to add its credentials > click the Connect button and please make sure the camera is recognized as ONVIF with the correct stream settings
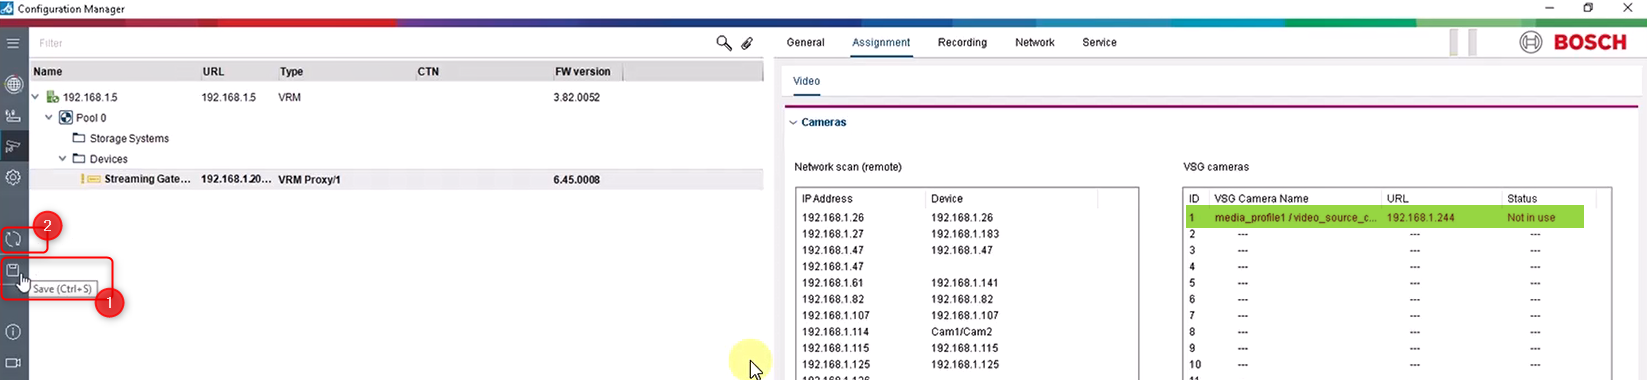
7. Save your changes and refresh the page for the camera to change its status from "Not in use" to "Online"
8. Next, you have to add the iSCSI
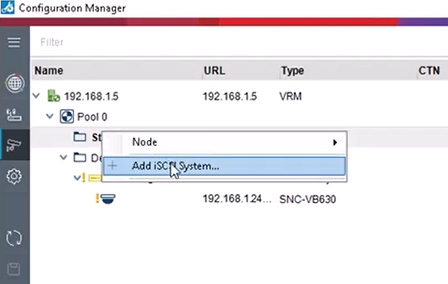
Go to Storage Systems menu and right click on it > select Add iSCS System
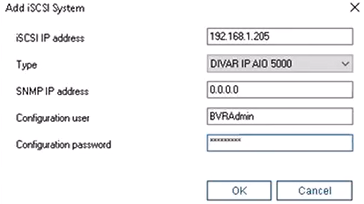
9. Type in the IP address of the iSCSi, select the unit type and login with its credentials
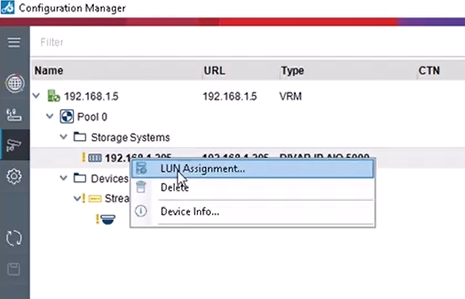
10. Select your storage unit from the list (under the Storage Systems menu - in this example DIVAR IP AIO 5000) and click on the LUN assignment...
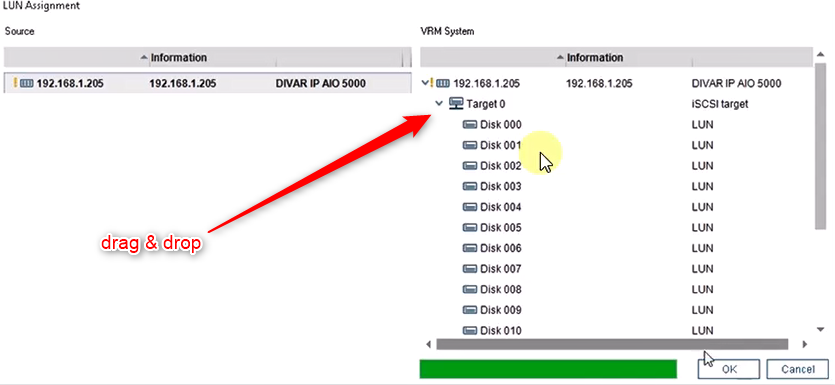
11. Drag and drop the target from the Source list to the VRM System list and click OK
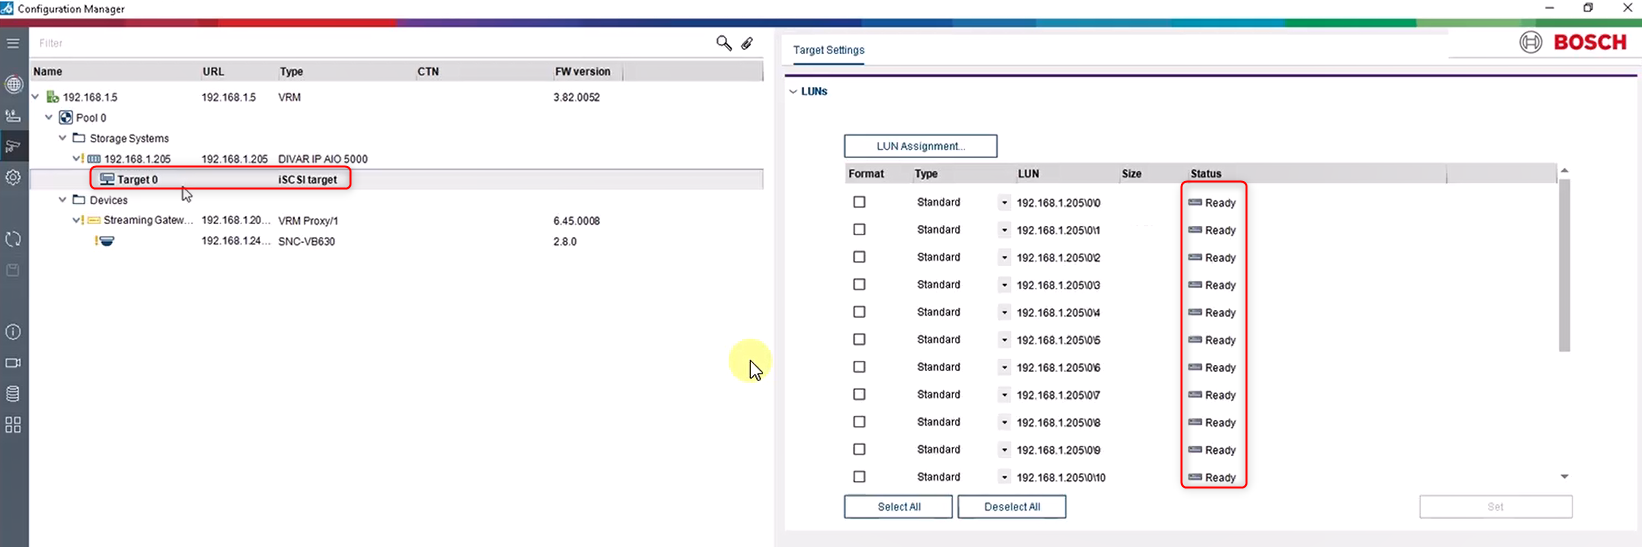
12. Now, the iSCSI target is added in the Storage System and the LUNs should be Ready
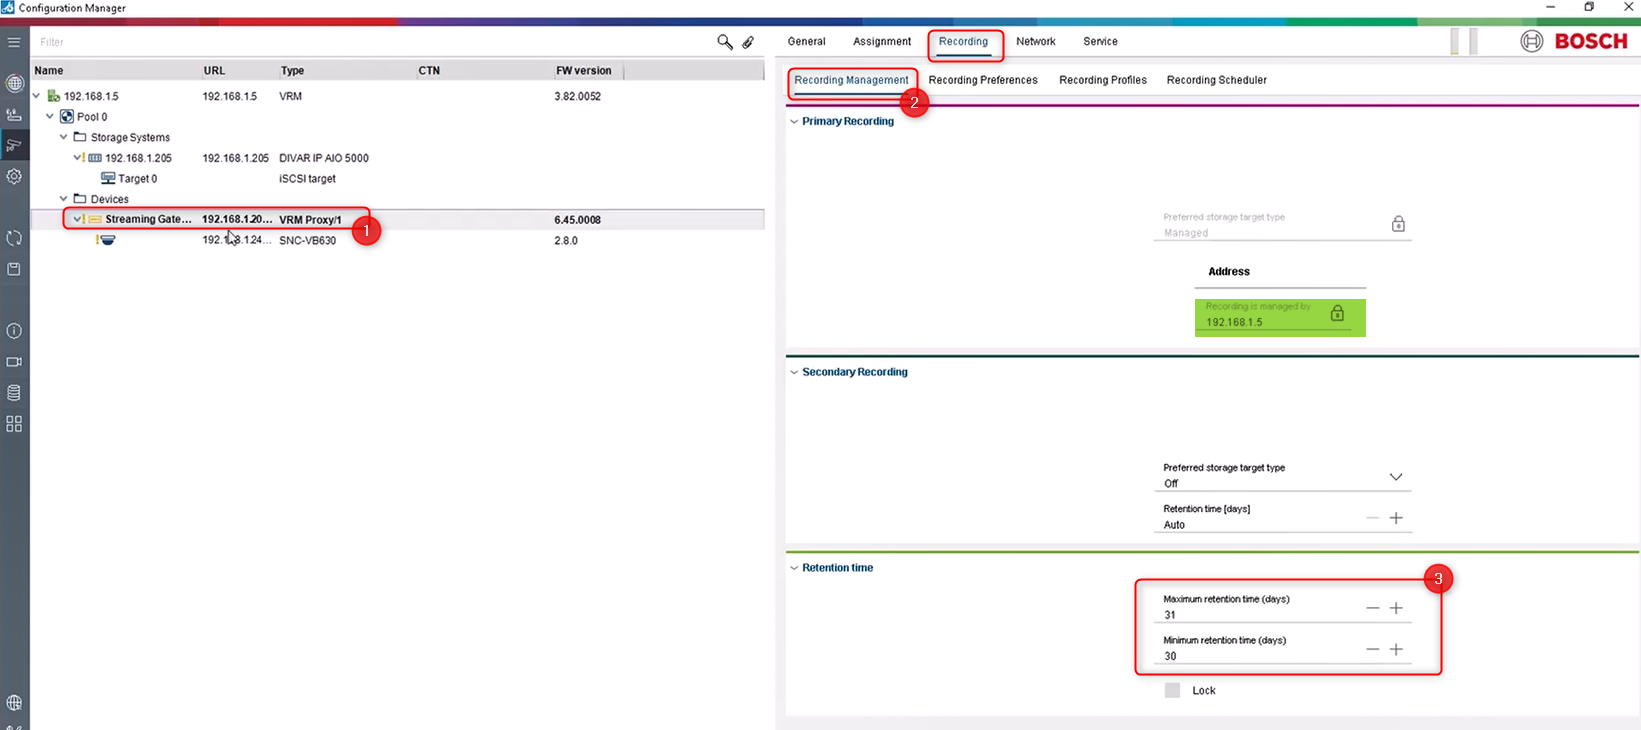
13. Setup the needed retention time for your camera
The retention time could be set by clicking the VSG under the Devices menu > Recording > Recording Management > Retention time section
In this page you should also see the VRM added in the 2nd step above that manages the recording (in this example VRM: 192.168.1.5)
Useful: Refer to the following article to learn more about retention time:
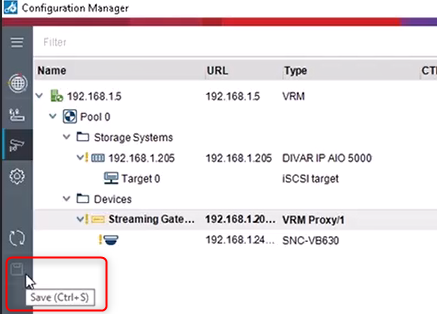
14. Don't forget to save your changes
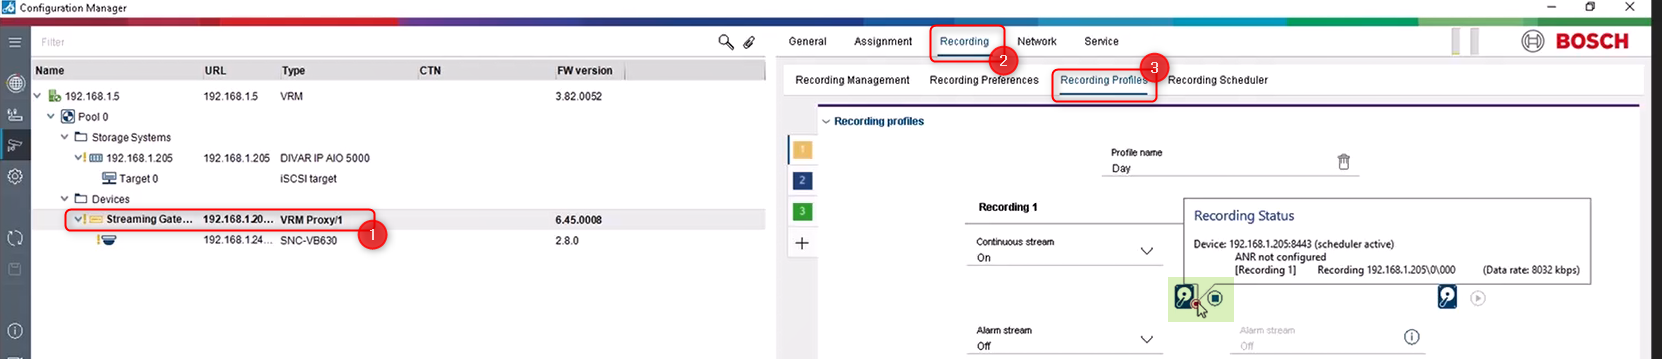
15. By clicking on the VSG > Recording > Recording Profiles → you should see that the Recording Status is active (red dot blinking)
In case the red dot is not blinking, you must click on the play button, next to the Recording Status icon
Now, your ONVIF camera is added in Configuration Manager through VSG and managed by VRM.

-
ONVIF camera. Please refer to BVMS - ONVIF Device compatibility for additional information.
-
How to determine the Video Streaming Gateway (VSG) throughput and performance?