
Preconditions for local storage playback to work:
-
Secure Connection must be disabled for the camera.
-
With that the UDP encryption in the camera is also turned off.
-
-
Video should not be stored encrypted
-
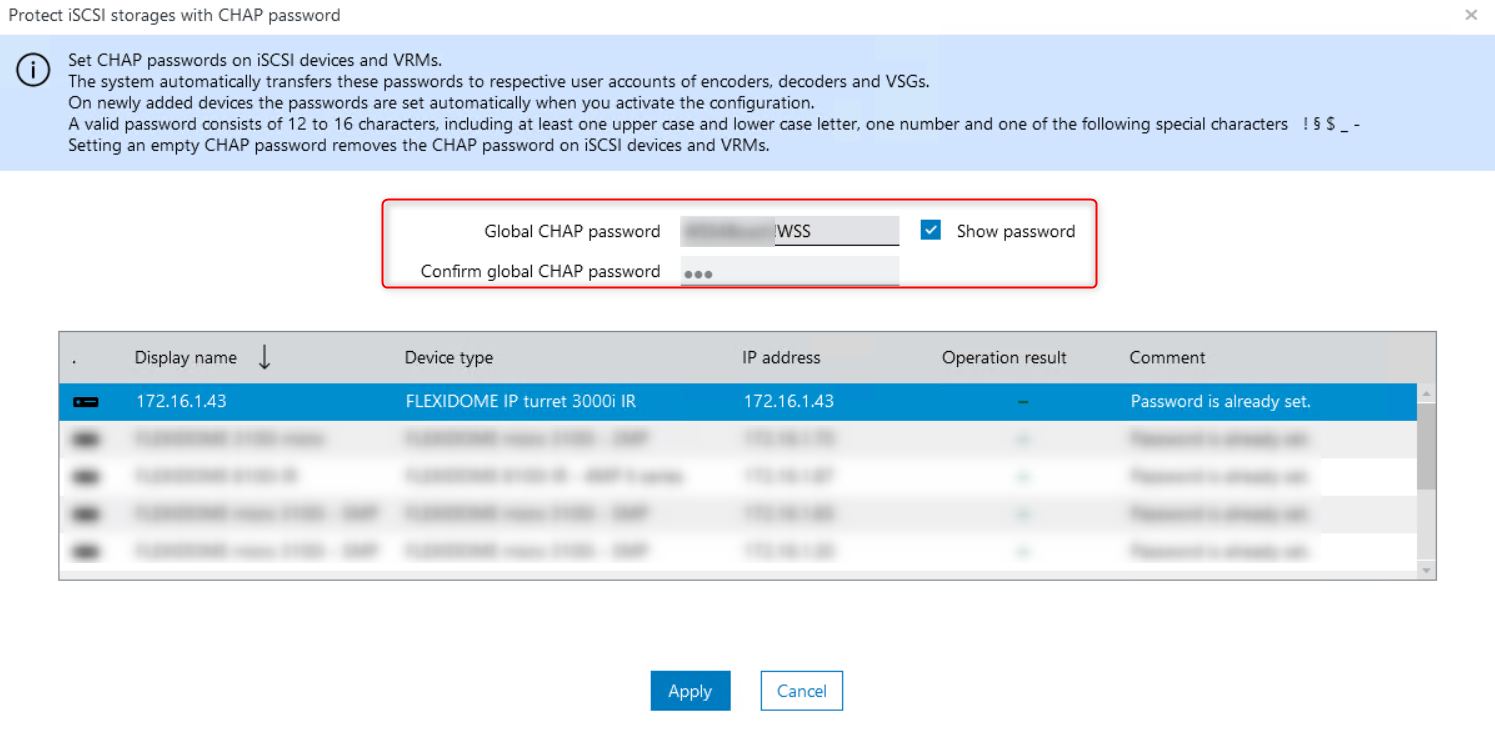
global CHAP password must be configured in BVMS.
-
If there is an existing User level password set on the camera the same password needs to be configured for the CHAP password.
-
The background is that with setting that password on the camera, a CHAP password is also set on the SD card.
-
-
Network services - HTTP and iSCSI needs to be active in the camera
Note
Please avoid using "%' character when assigning passwords. By using the "%" character could result in no recording on the SD card.
Step-by-step guide
-
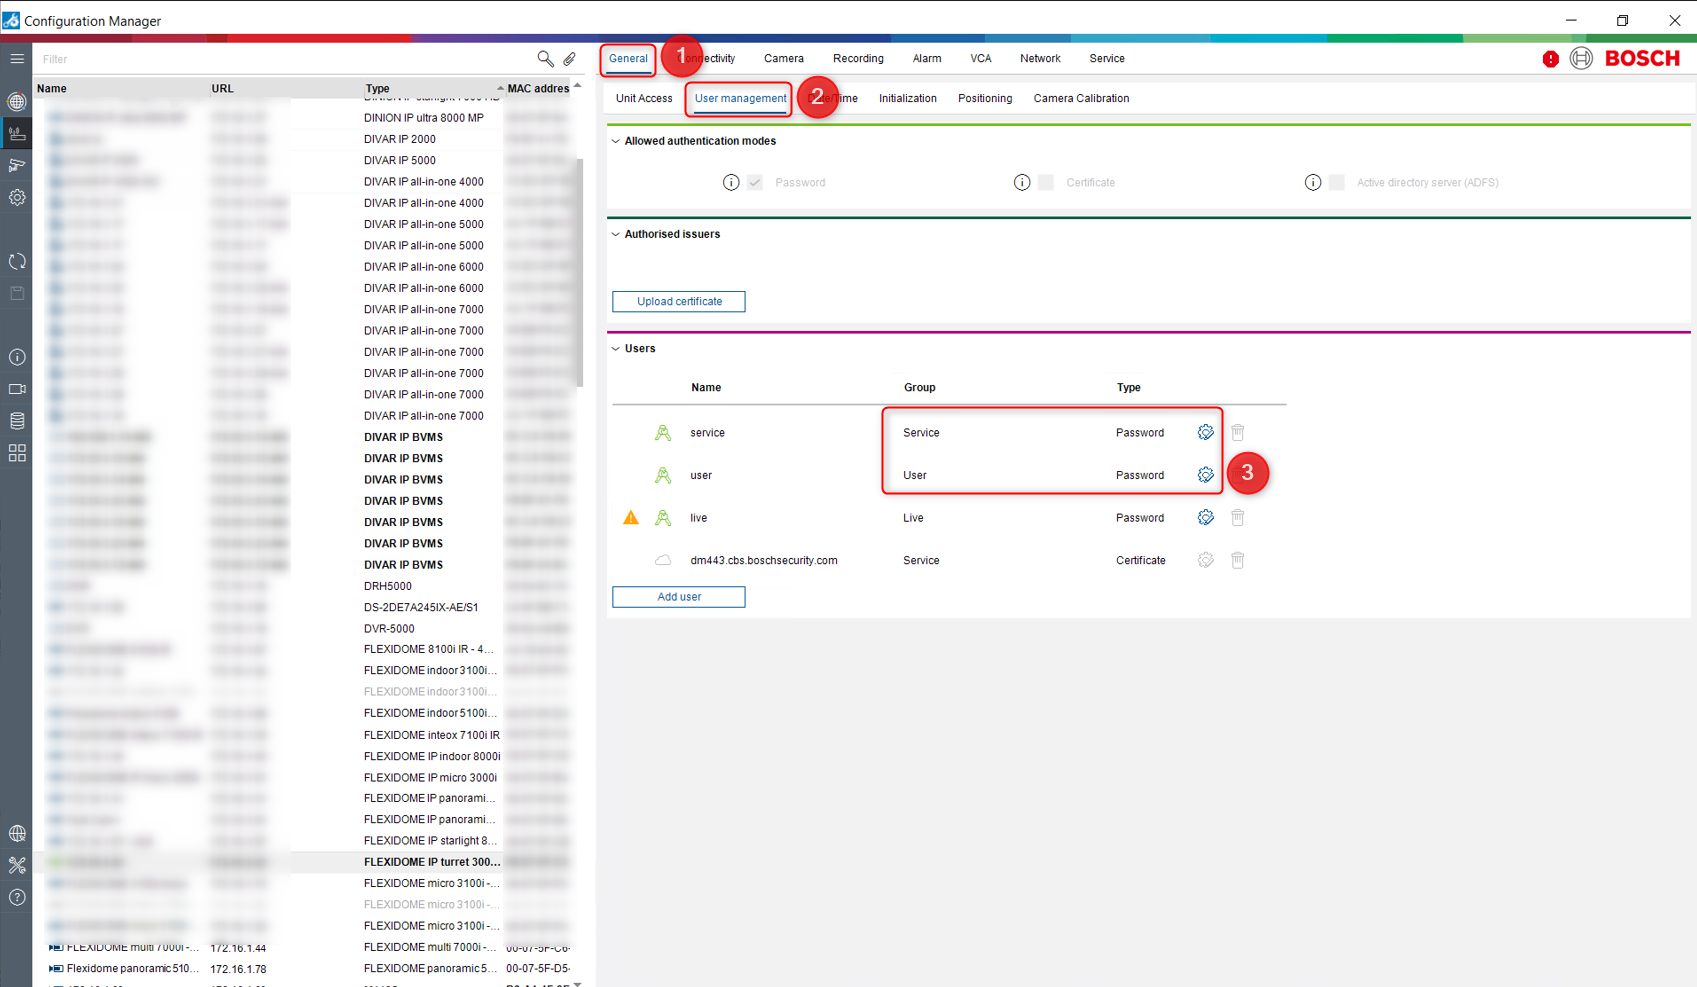
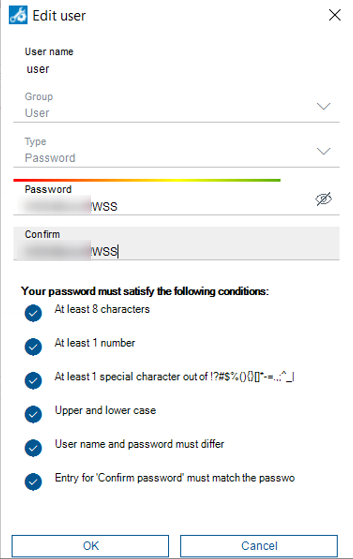
You can set the same password for "service" and "user" from Configuration Manager by accessing the camera > General > User Management > click on the settings wheel icon for both users: "service" and "user"
-
Set the same password for both users: "service" and "user"
-
Save these changes
-
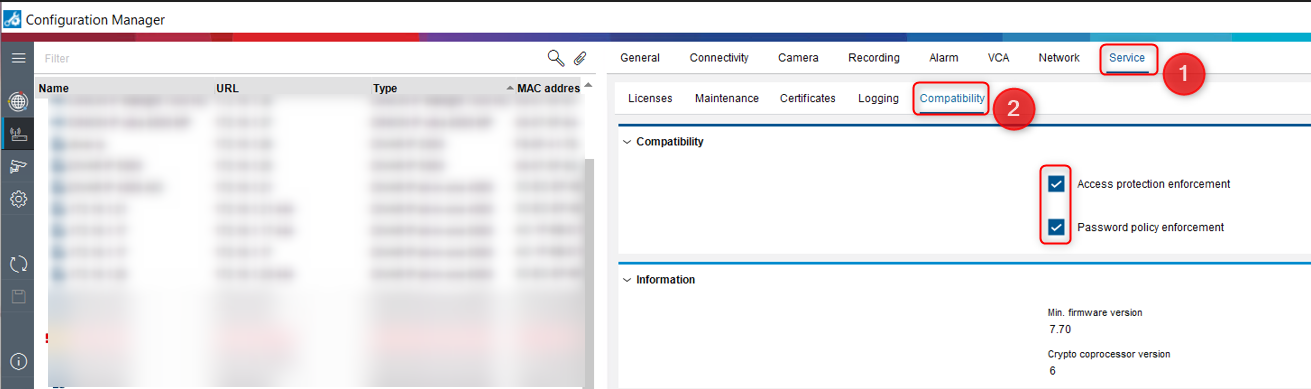
Be sure that the "Access protection enforcement" and "Password policy enforcement" are enabled. Go to Service > Compatibility > Tick the boxes if they have not already been ticked
-
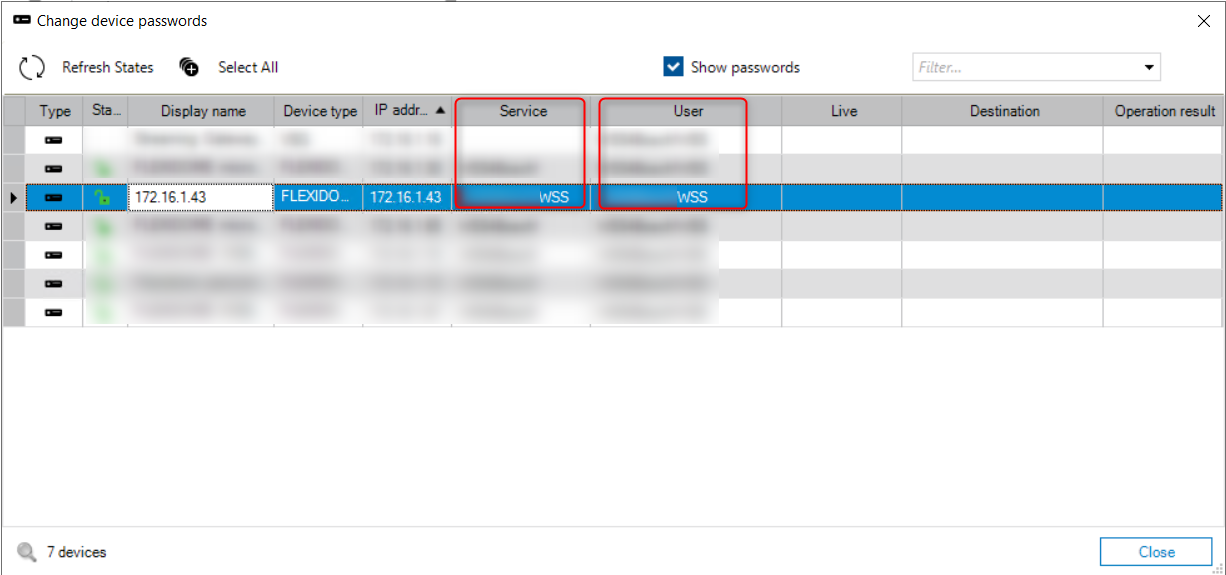
Open Configuration Client > Add your camera in the Local Storage if it hasn't already been added > Go to Hardware > Change device passwords
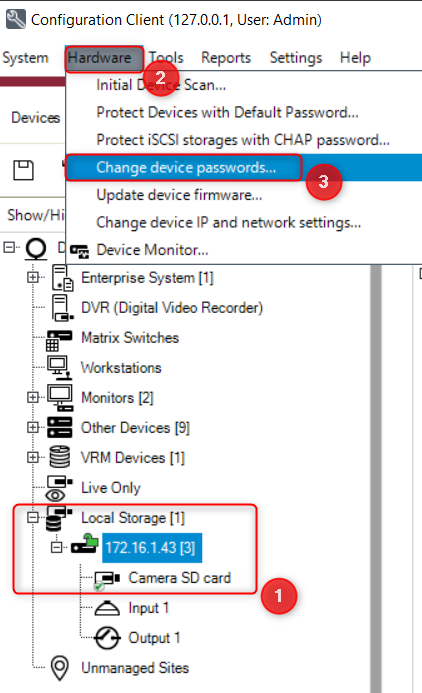
-
Here you have to add the same password for both users "service" and "user", same password as you added before in Configuration Manager.
-
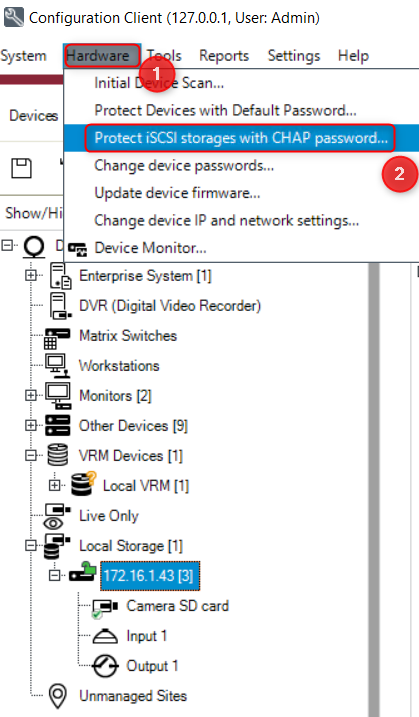
Now, go to Hardware > Protect iSCSI storages with CHAP password and add the same password in the CHAP password field and click Apply.
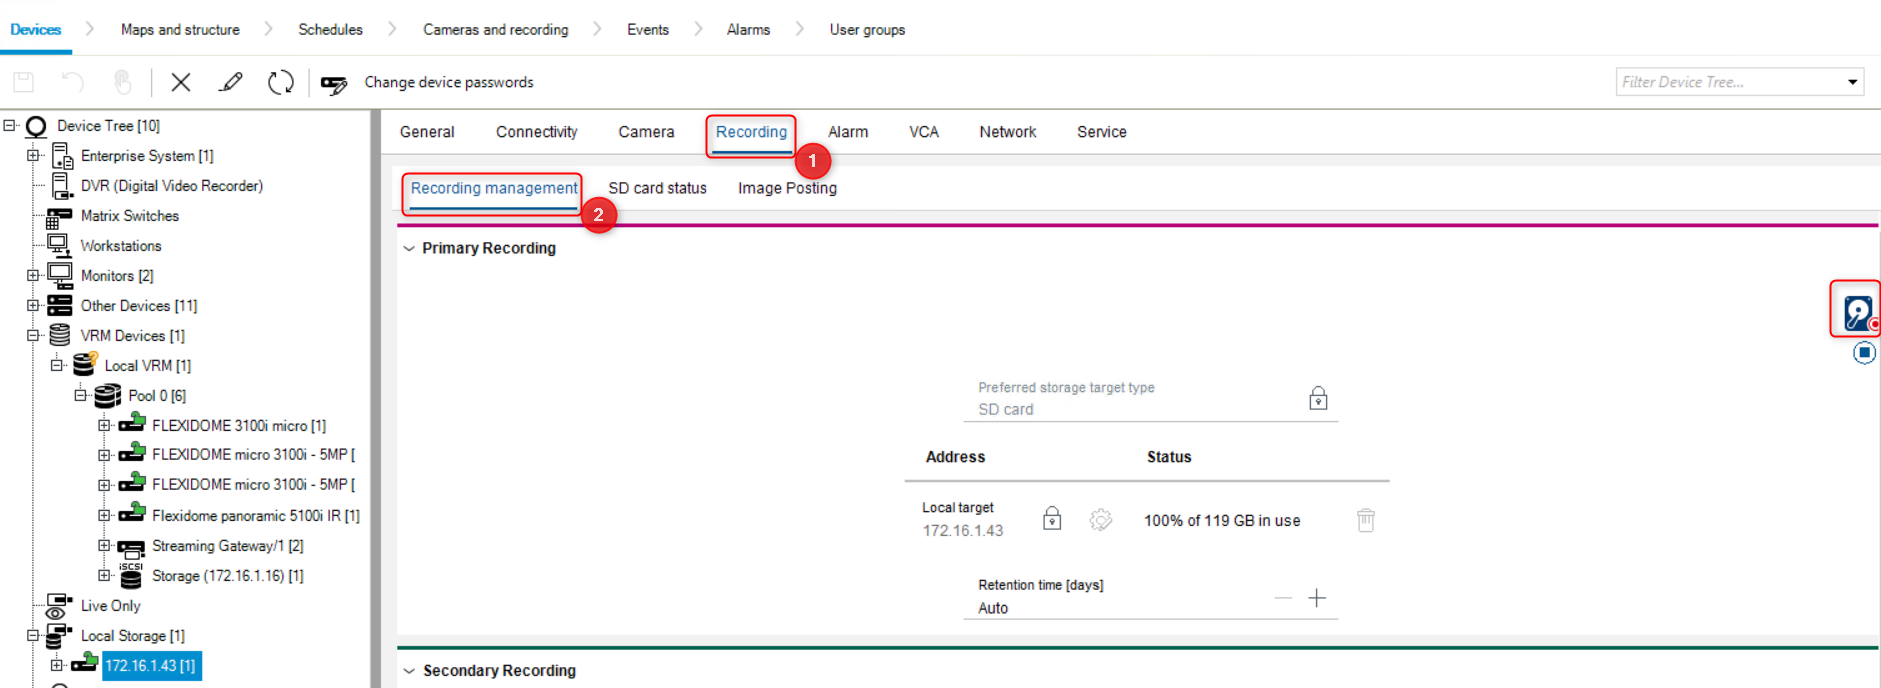
Note: Be sure that the recording is activated on your camera → the red dot button has to blink → In Configuration Client select your camera > Recording > Recording Management:
-
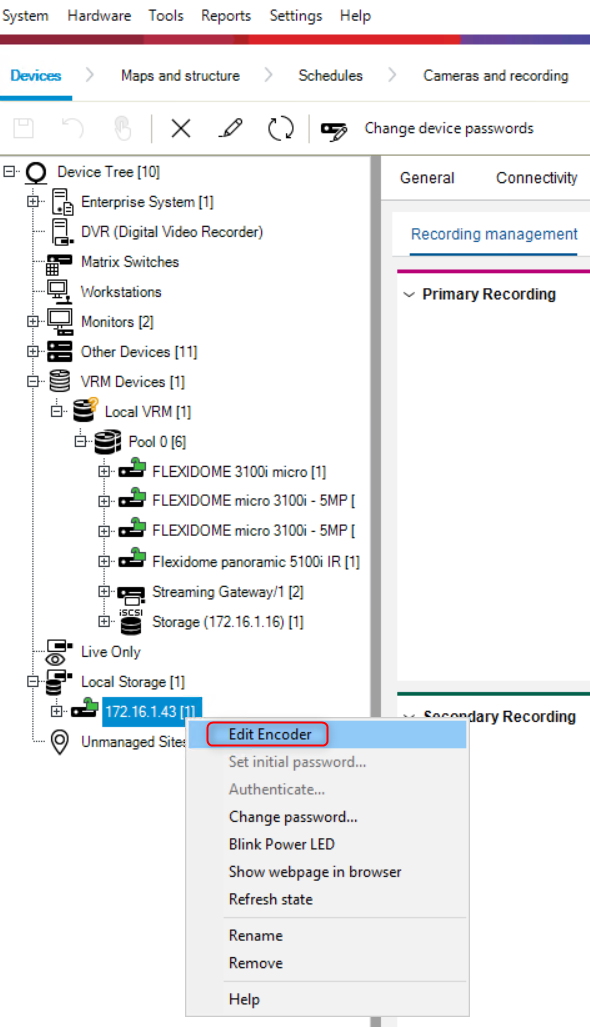
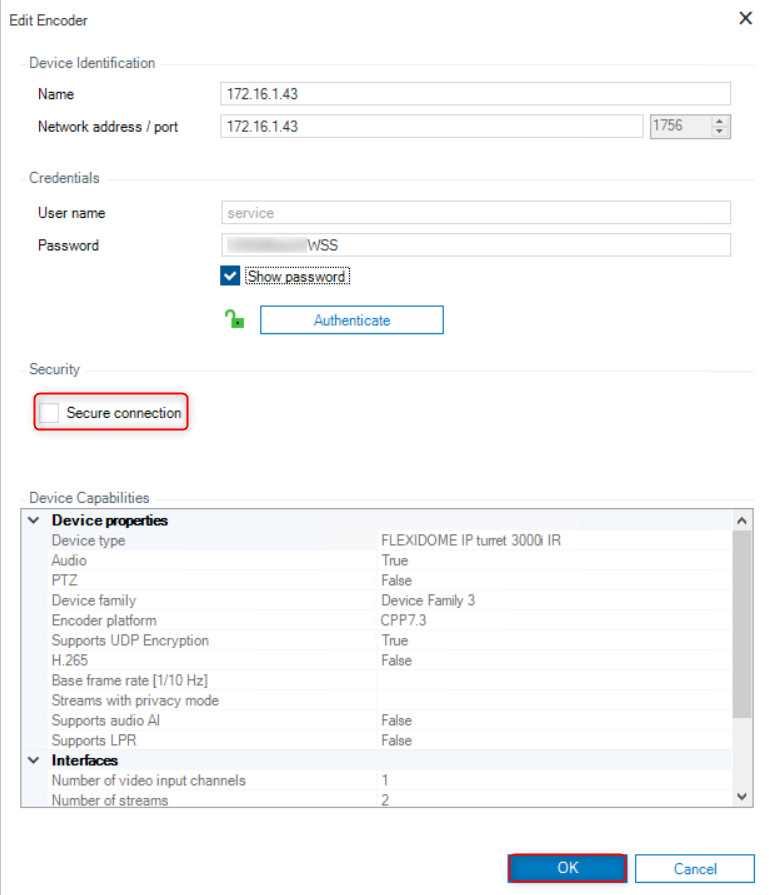
Now, disable the Secure Connection on the camera. Right click on your camera > select Edit Encoder
-
Ensure that HTTP & iSCSI service is enabled for the cameras
Note: CPP14 devices, HTTP & iSCSI is disabled by default.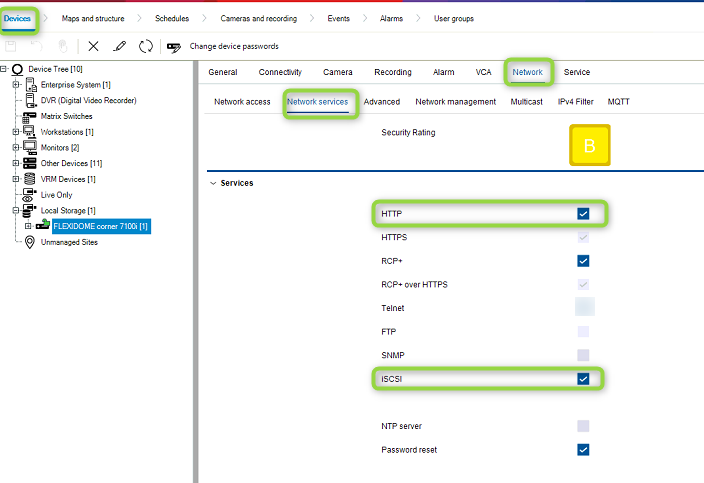
-
Uncheck the box next to the "Secure Connection" > click OK
-
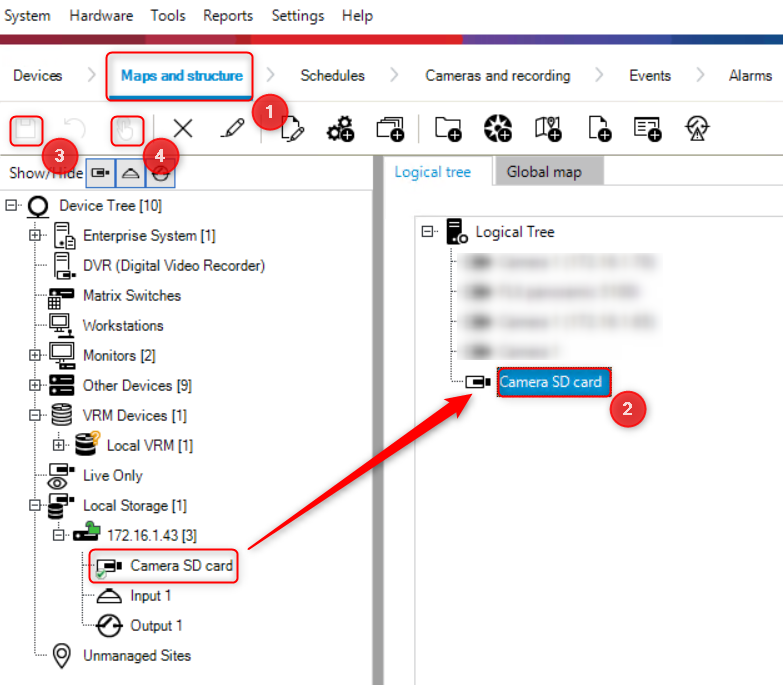
Do not forget to Add the cameras in the “Logical Tree” from “Maps and Structure”.
Drag and drop the camera from Device Tree to Logical Tree:
-
Save and Activate the changes.

-
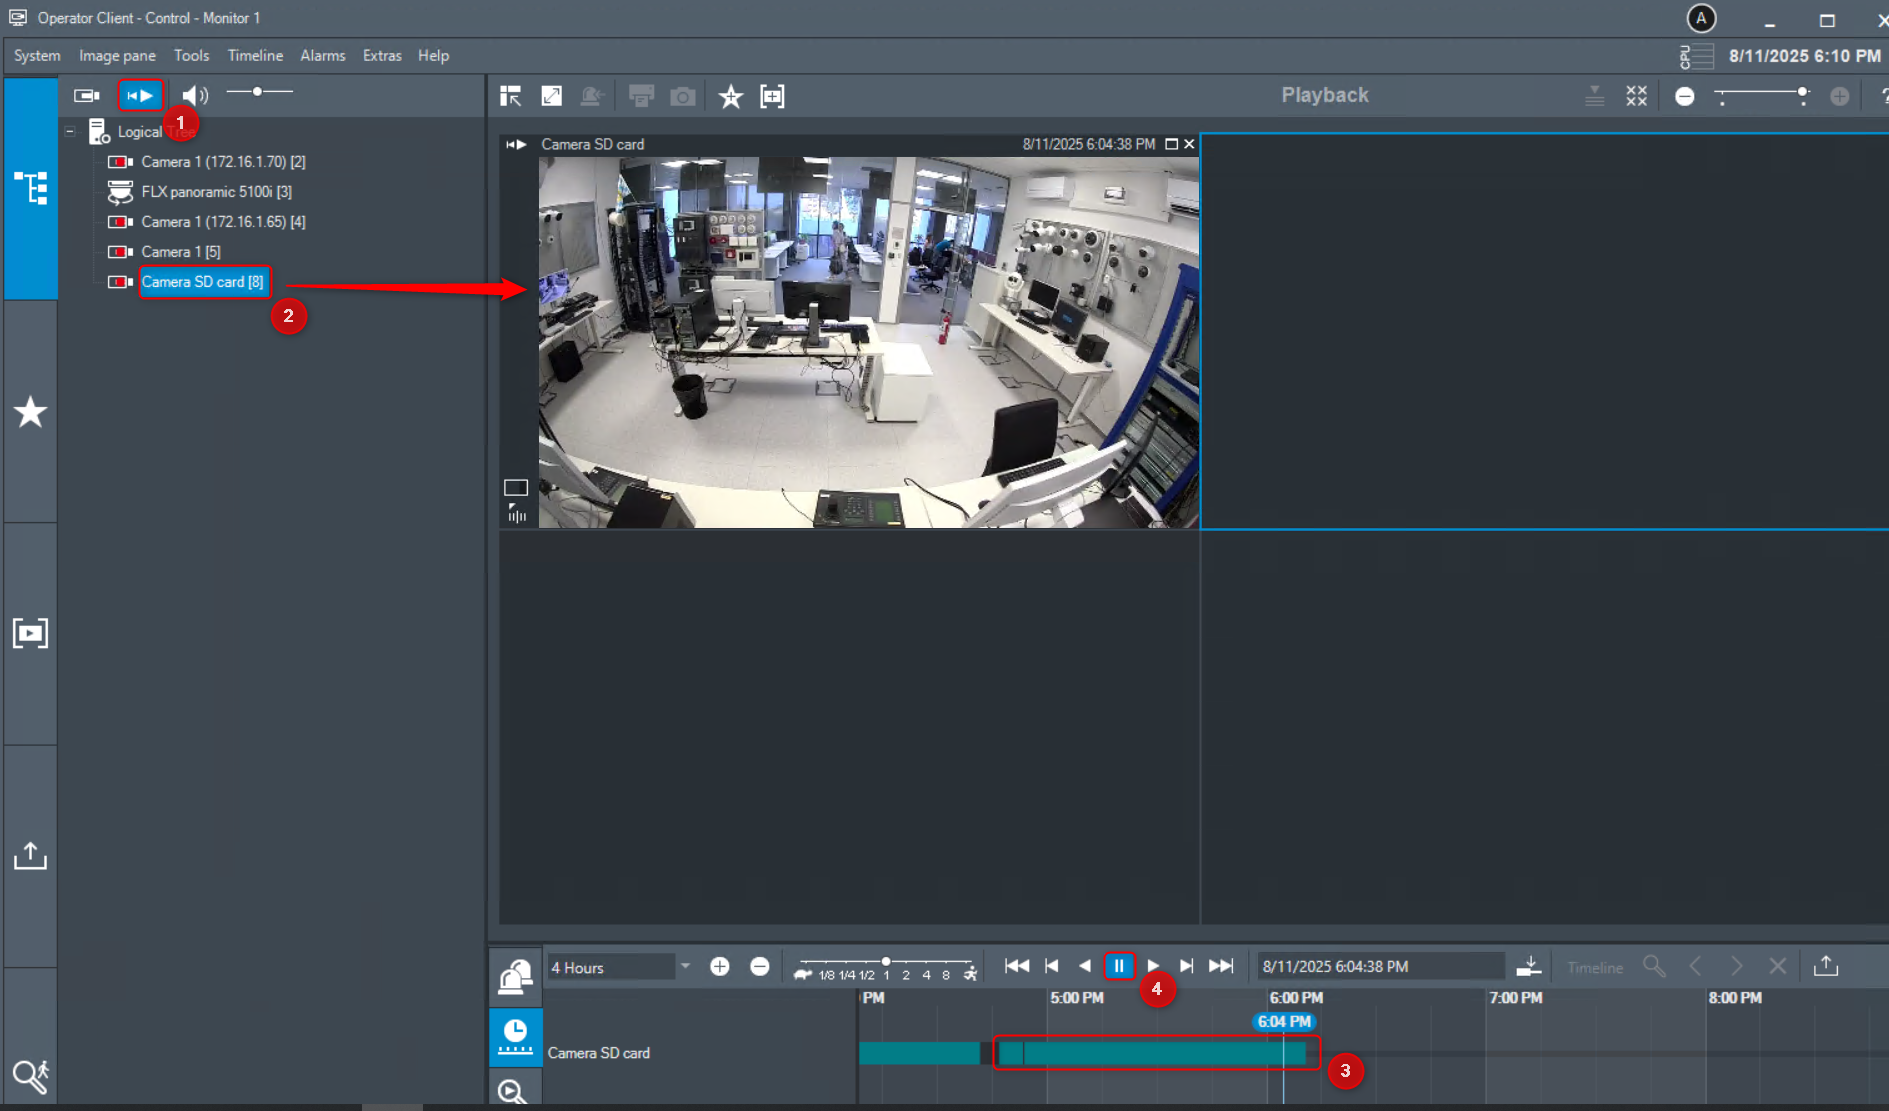
Open Operator Client > select Playback Mode (1) > drag and drop the camera from Logical Tree to the Image Pane area (2) > you will see the SD card recordings (3) > click Play forward (4) and see the recorded video from your camera
![]()