
Remote Connect service allows the Customer users to display cameras on Remote Portal Viewer on Video Security App and Video Security Client.
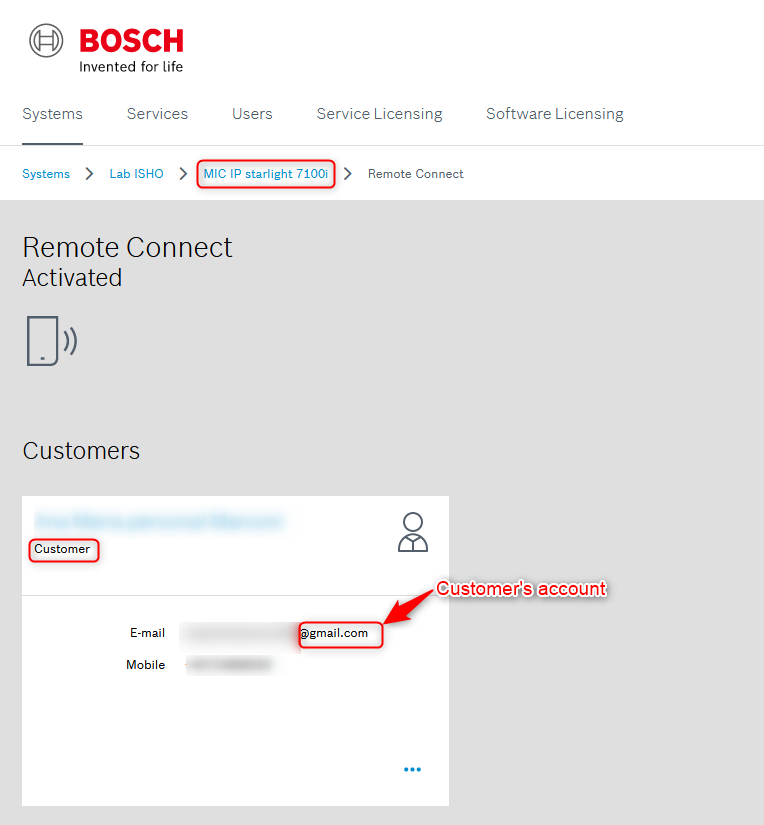
First, please make sure that the Admin added the Customer's user account in Remote Connect service for all cameras for which the customer will have access to see image (in this example MIC IP starlight 7100i)
Step-by-step guide
1. Logon Bosch Remote Portal as Customer
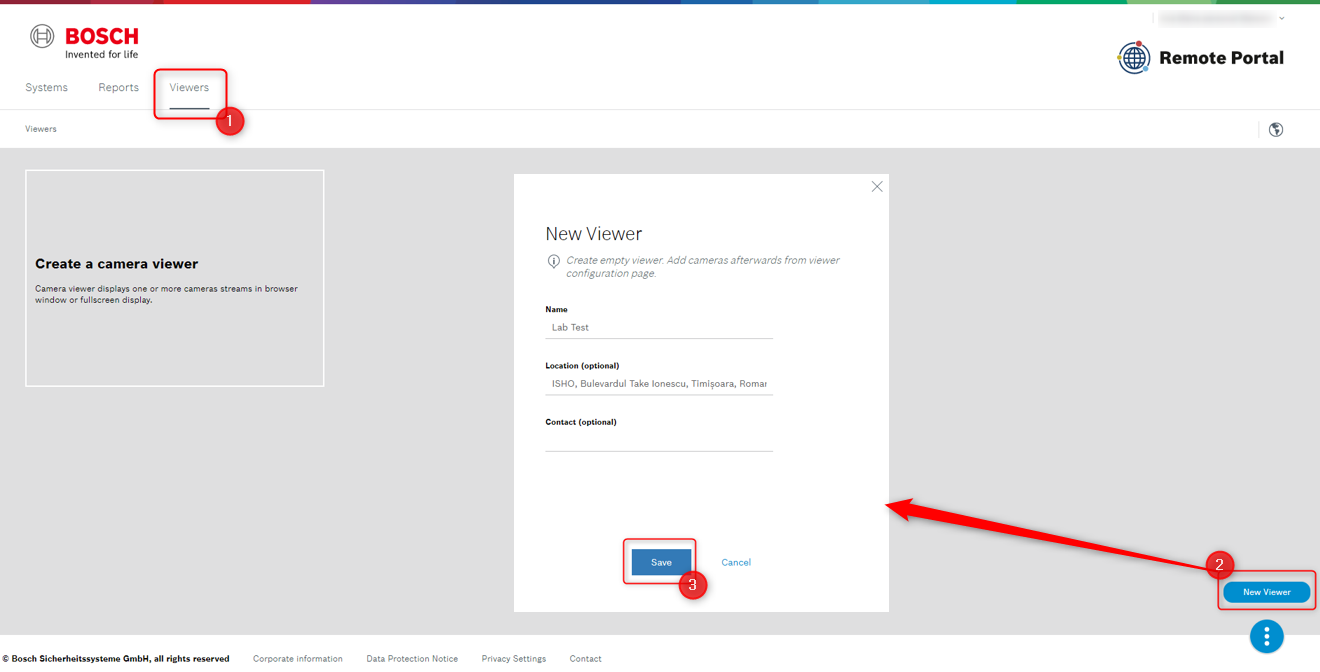
2. Add a Viewer to Remote Portal
a. Navigate to Viewers tab.
b. Click the 
c. Enter the Viewer Name > click Save
3. Add cameras to Remote Portal Viewer
a. Click the 
b. Select the related camera and video quality
c. Click Save
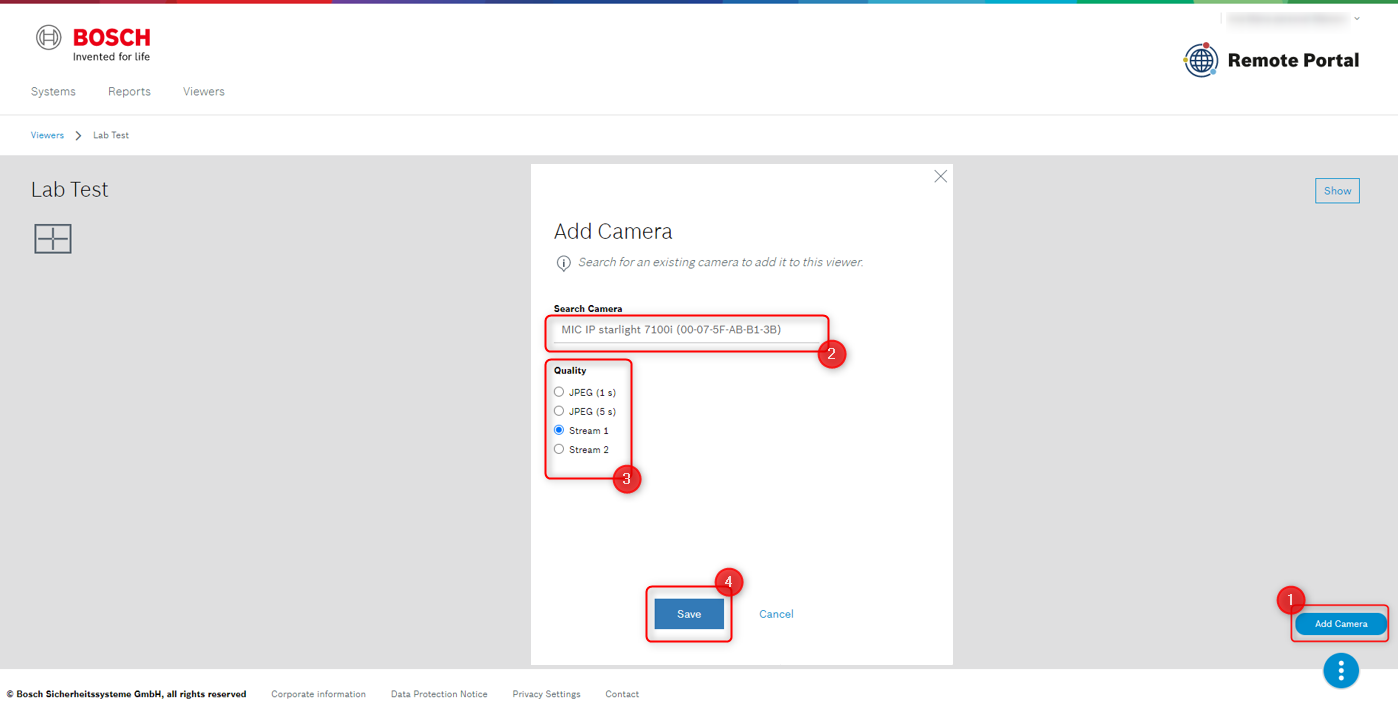
Note: The Customer can add all cameras to the Viewer where he is added to the related Remote Connect service.
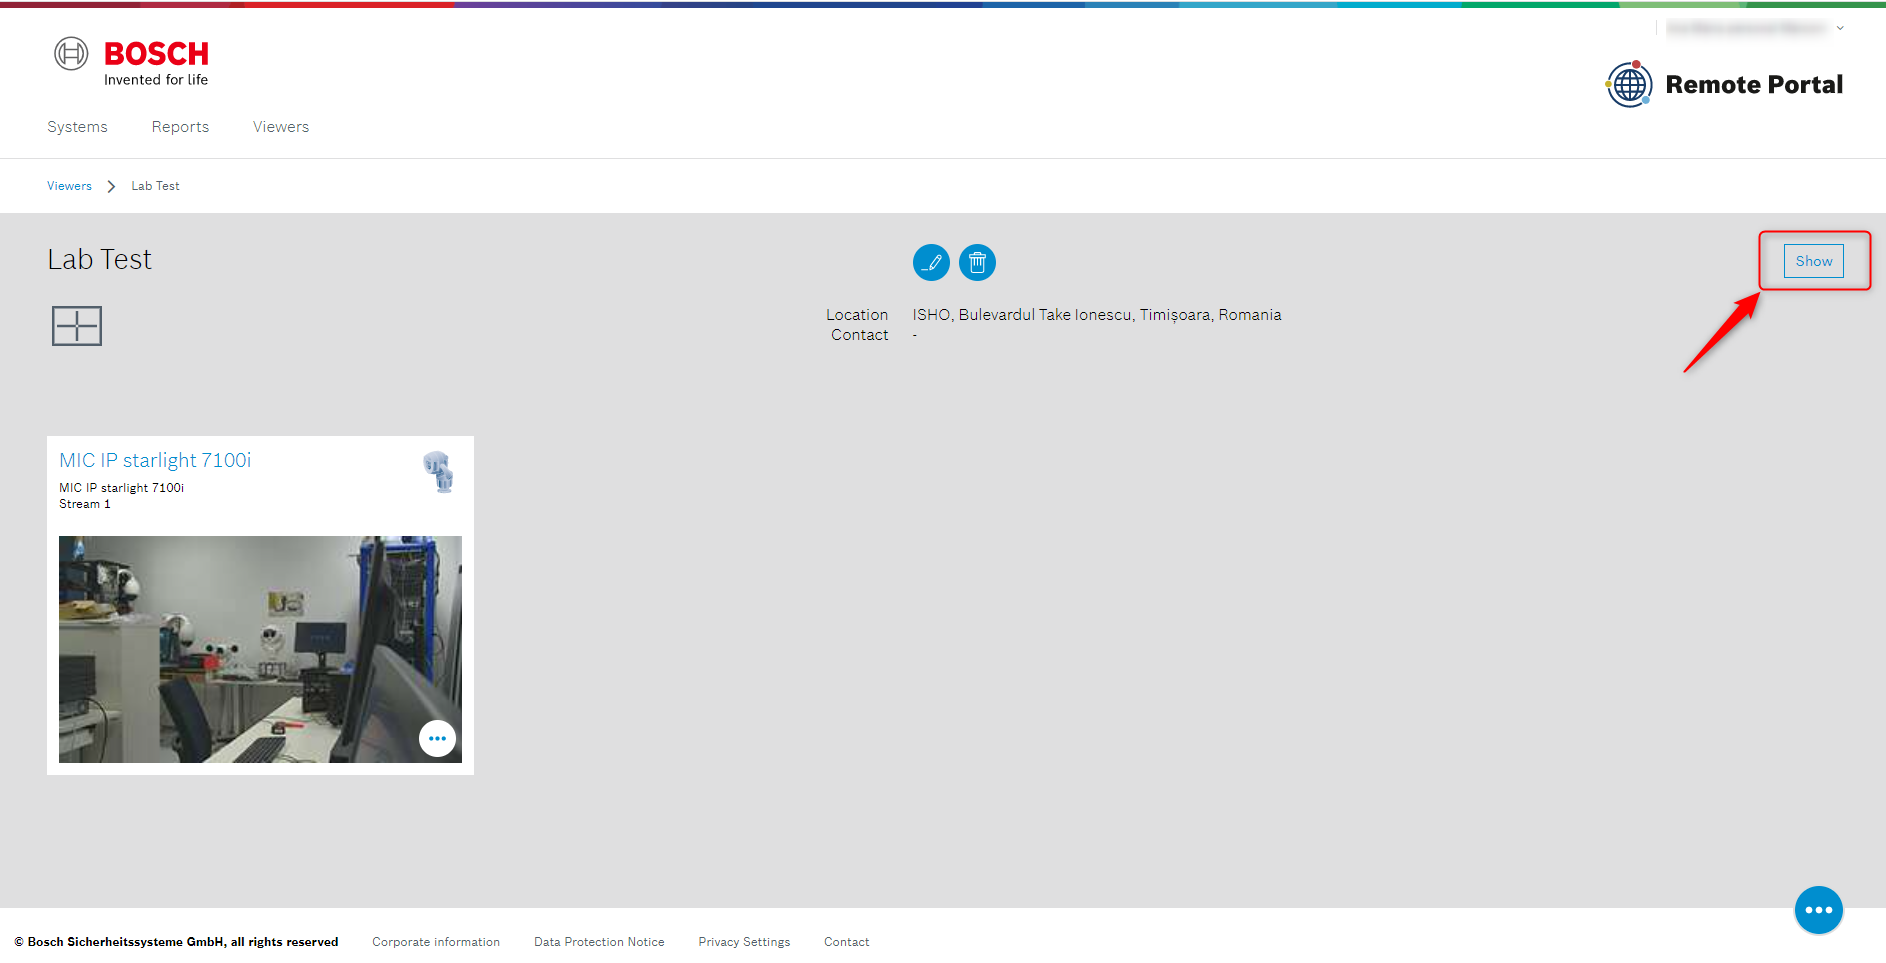
4. All added cameras are displayed in the viewer’s detail page.
5. Click Show icon to display the Viewer.
6. Change the view with the related icon:

Note: If the customer wants to display more than one camera in the Viewer, we recommend to set the video quality JPEG 1s.
Useful:
-
Click

-
Click

-
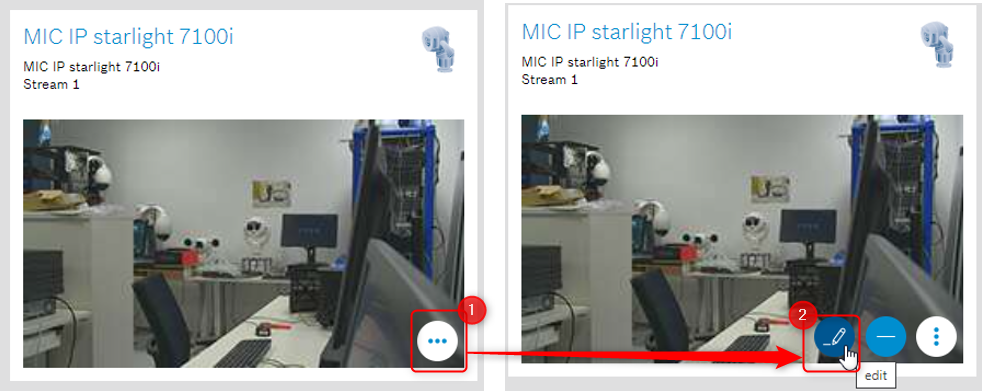
To change video quality settings click:
![]()
-
What are the ports and domains of cameras to reach the Remote Portal for remote viewing?
-
How can you View camera image via Video Security App
-
How to connect to your cameras with Video Security Client through Remote Portal?