
🕒 This procedure takes in average ~ 15 min to complete
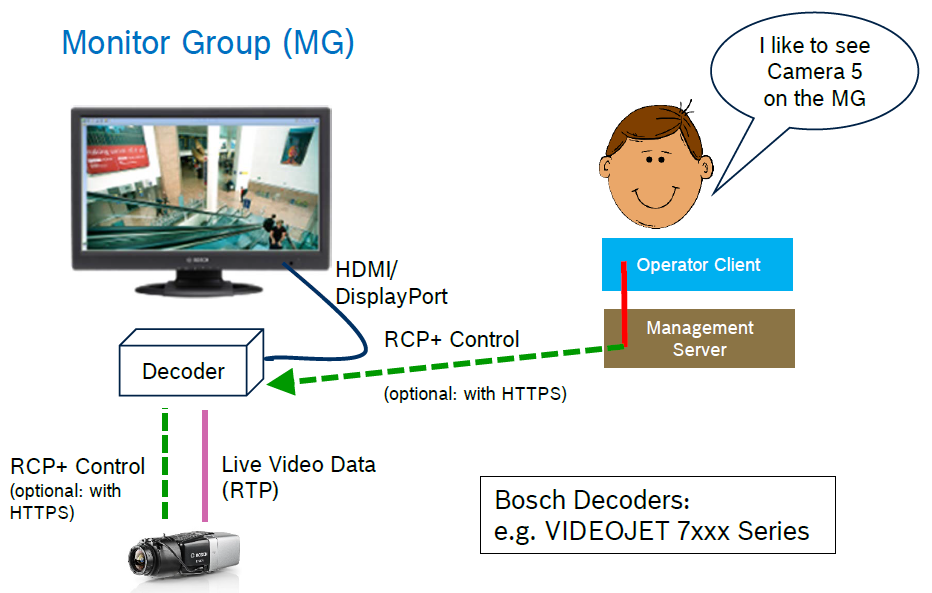
In this article you will see how you can display the video stream on a Monitor which is decoded from a VIDEOJET 7000 decoder integrated in BVMS 11.1.1
Before starting to do the configuration in BVMS 11.1.1, please make sure that the setup is correctly prepared.
-
The monitor is connected to the VIDEOJET 7000 decoder
-
The cameras are connected
Note:
-
Number of monitors depends on each decoder’s capability
-
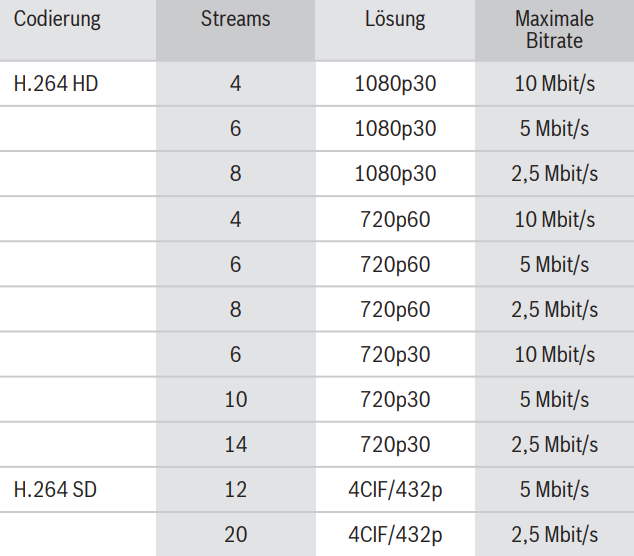
You should take into consideration the decoding performance (resolution and bitrate) according to the datasheet of the decoder.
Step-by-step guide
When the physical setup is well prepared, you can open BVMS 11.1.1 Configuration Client
-
Add your cameras in Configuration Client (Devices tab)
In this setup we have added 4 Bosch cameras that we will display the video stream of them on a Monitor

-
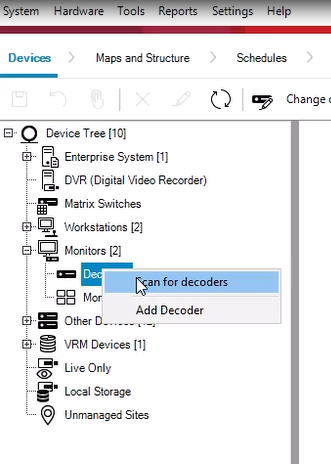
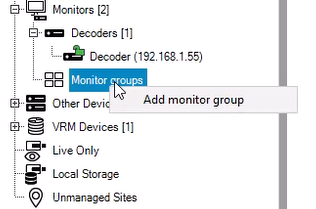
Add the decoder and monitor group in Configuration Client (Devices tab)
→ right click on Decoders and scan for decoders
→ right click on Monitor groups and add monitor group
-
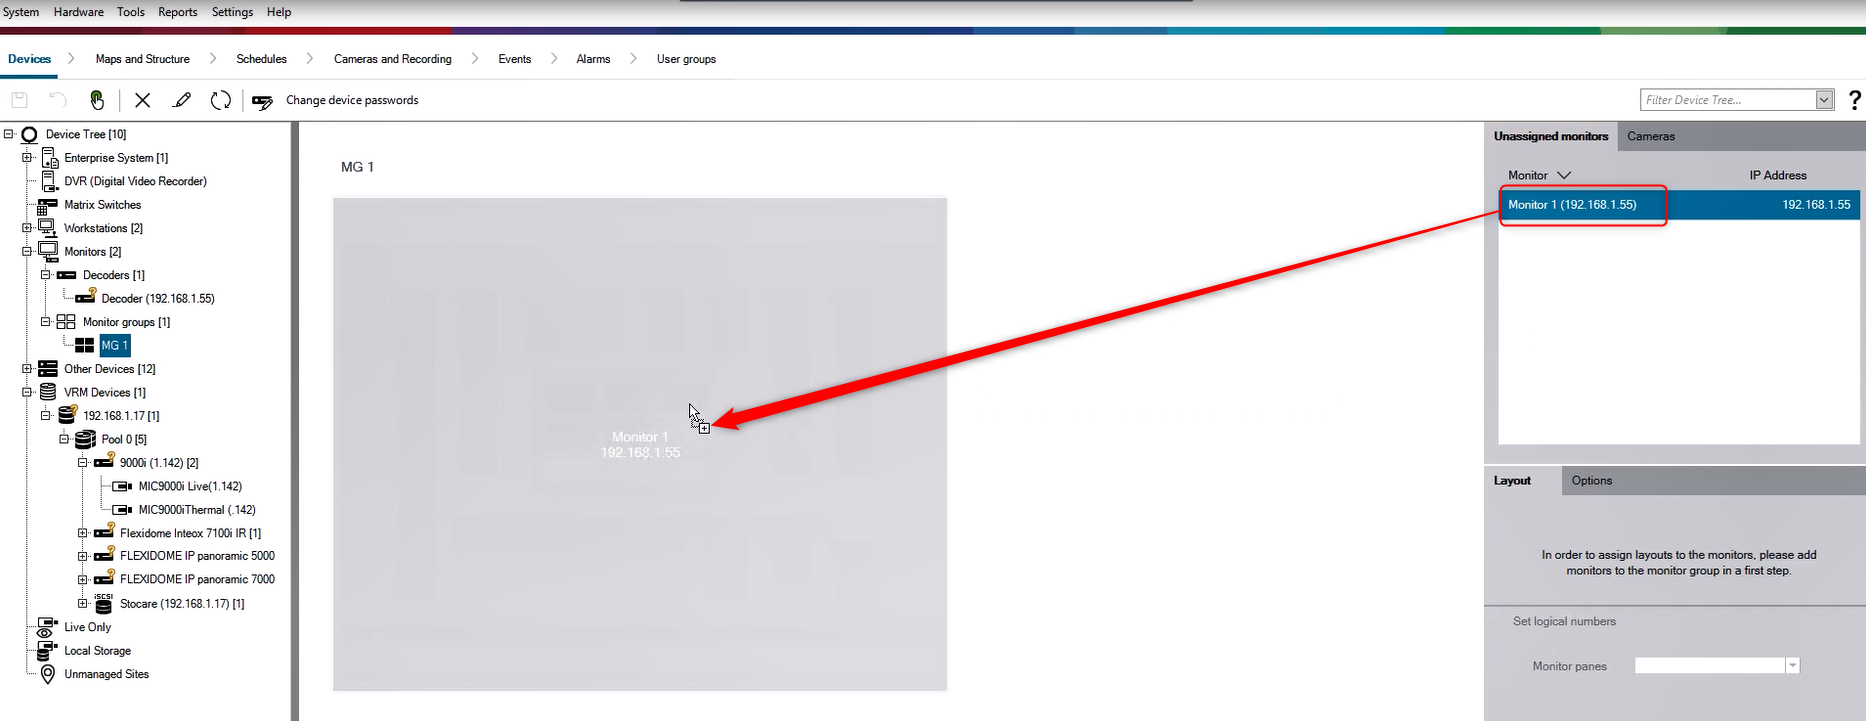
Drag & drop the Monitor to the Monitor Group
-
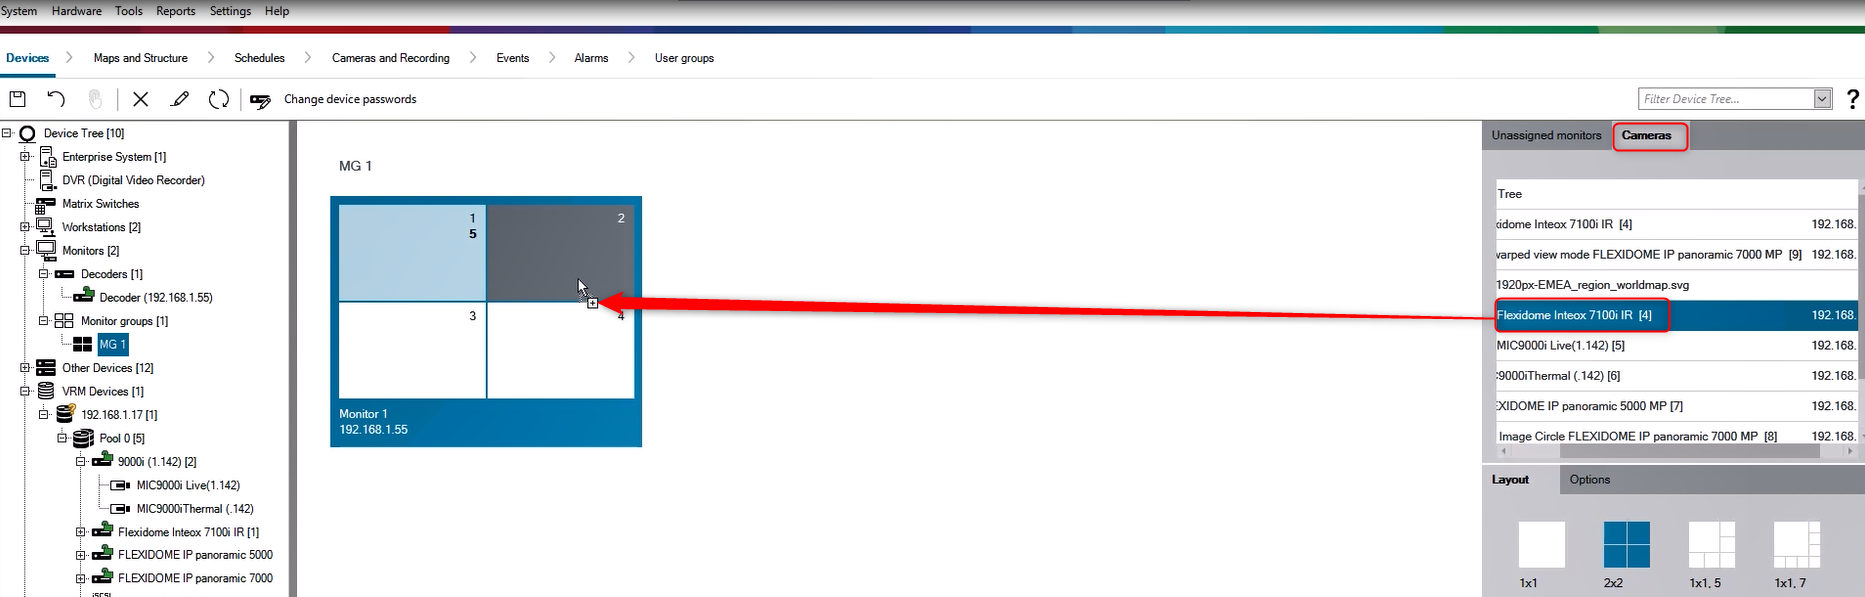
Go to Cameras and drag & Drop the cameras you would like to add into the Monitor Group.
-
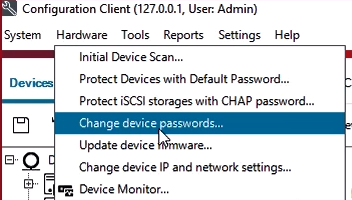
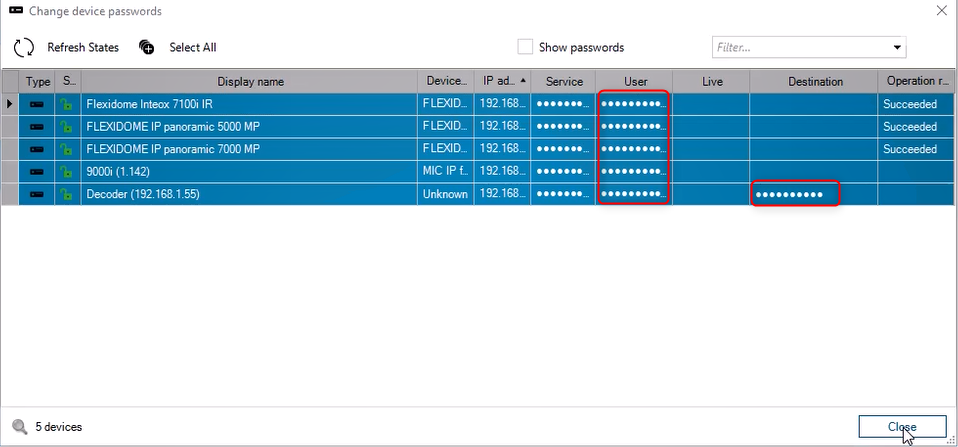
Make sure that all cameras have the same "user" password as it is set for decoder "user" and Destination password to get the live view
Note: The special characters used in the passwords have to meet the requirements of all components: BVMS, camera, decoder. For example, special characters such as: <> are not allowed and might not work

-
Now, you have to be sure that you follow the rules from the Connection Scenario Table.
For example, in this setup we'll meet the requirements as per the following rule:
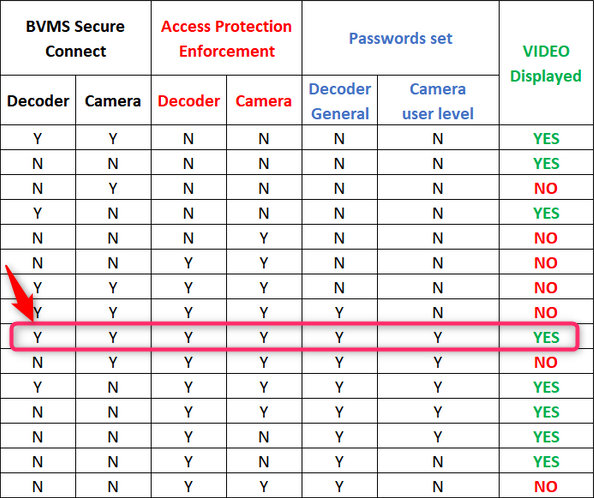
The secure connection can be checked by right clicking on the decoder and cameras → Edit Decoder/ Encoder → thick the box next to the "Secure connection" → OK. Do the same for all cameras that you added before into the Monitor Group.
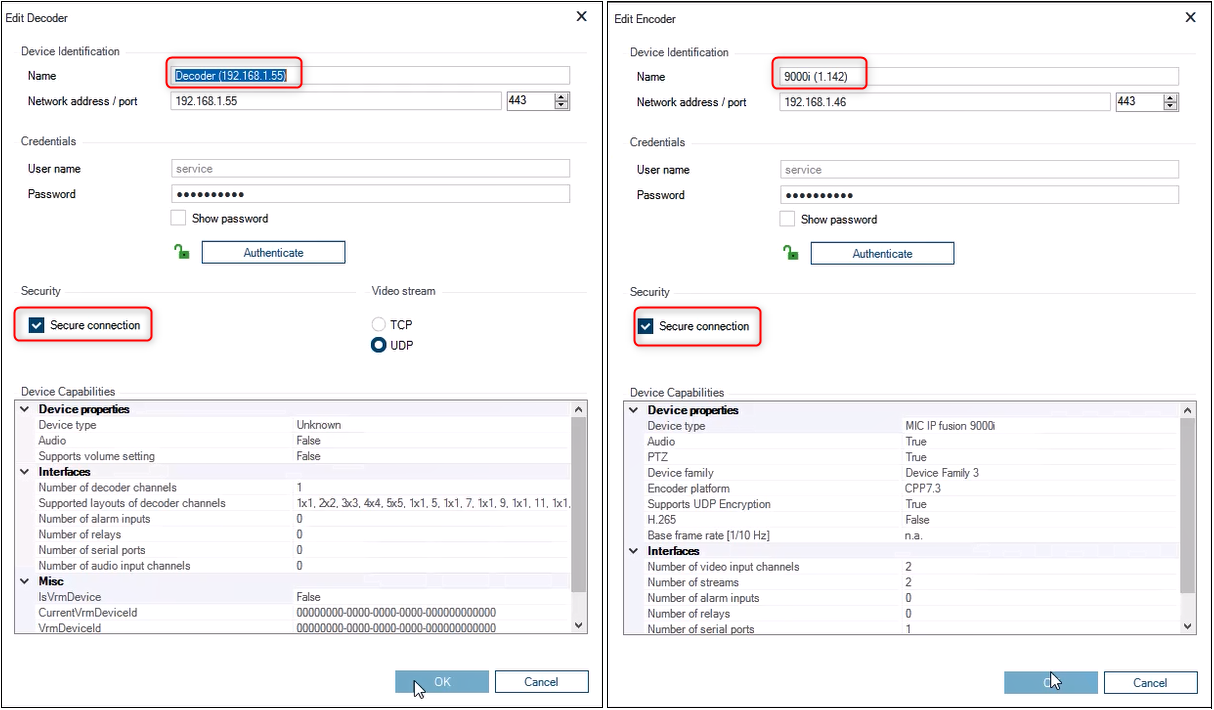
When the secure connection is disabled on the decoder, the cameras that are configured for a secure connection will be displayed on the monitor wall with a black image.
-
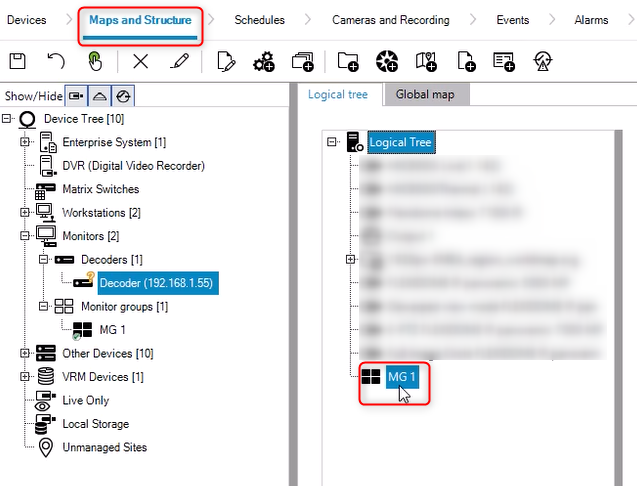
Next step is to add the Monitor Group in the Logical Tree from Maps and Structure tab (drag & drop)
-
Save & Activate your configuration
-
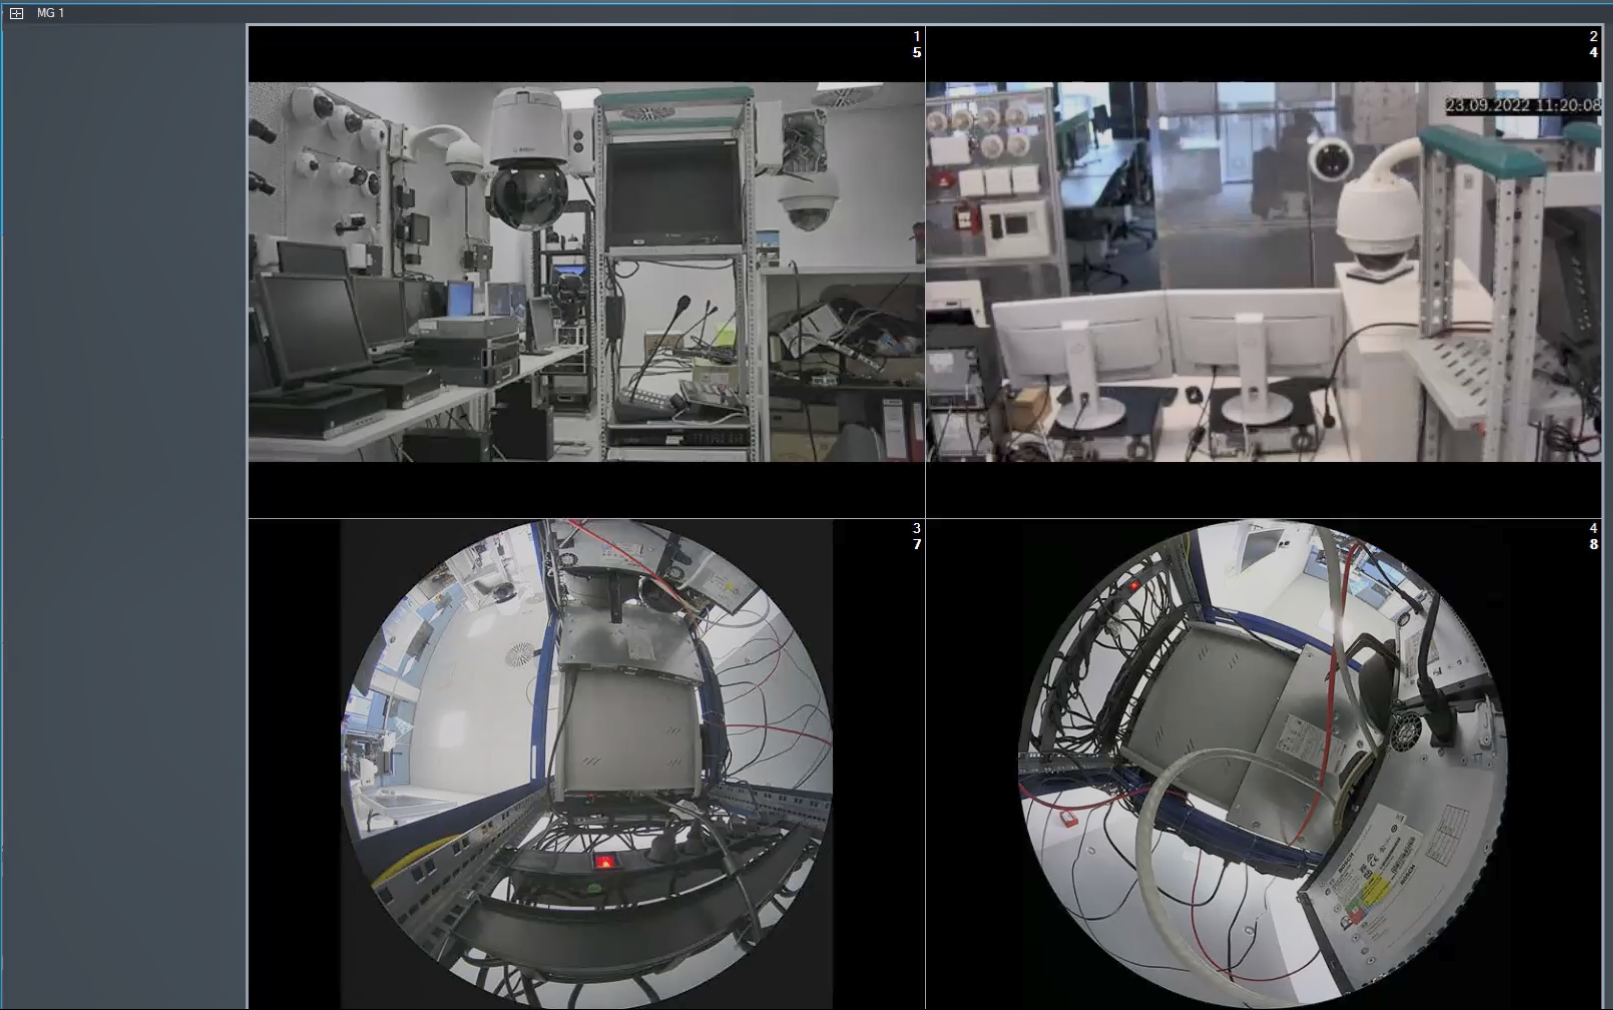
Open Operator Client and drag & drop the MG in Image Pane section
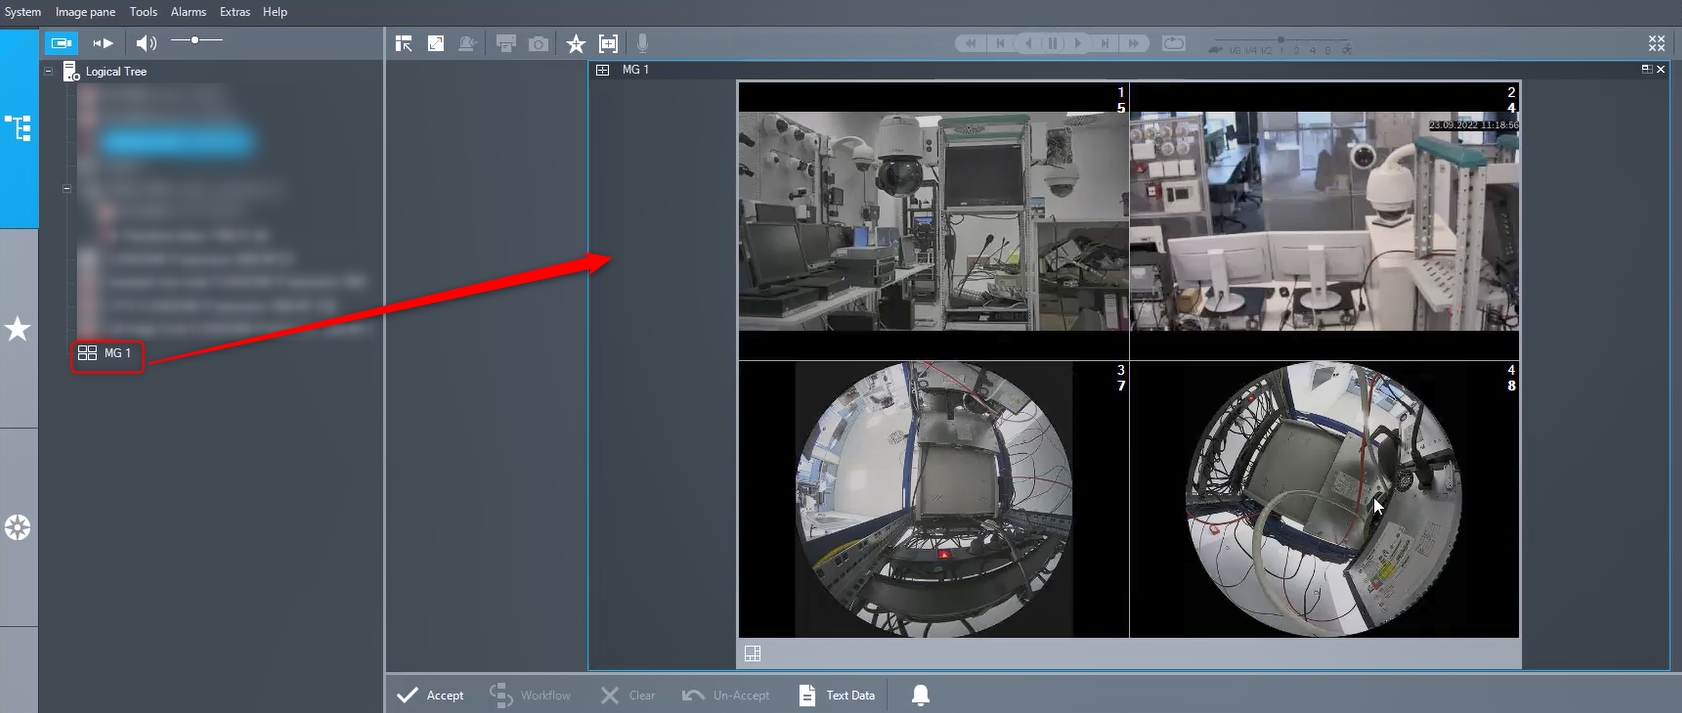
Full Screen:
If you want to assign permission to the user group, you can also refer to this article (point 7) where you have to verify or set the decoder permission settings in the User groups to define which group is authorized to use the Monitor Group