Since Project Assistant 2.5.0, support has been added for WLAN Dongle.
How to connect the Project Assistant App to a camera via USB-C WLAN Dongle?
Simply plug in the wireless installation dongle in supported camera models (with USB-C connector).
-
NCA-WLAN-EU Wireless installation dongle EU
Wireless installation dongle for wireless commissioning for Europe
-
NCA-WLAN-NA Wireless installation dongle NA
Wireless installation dongle for wireless commissioning for North America
Step-by-step guide
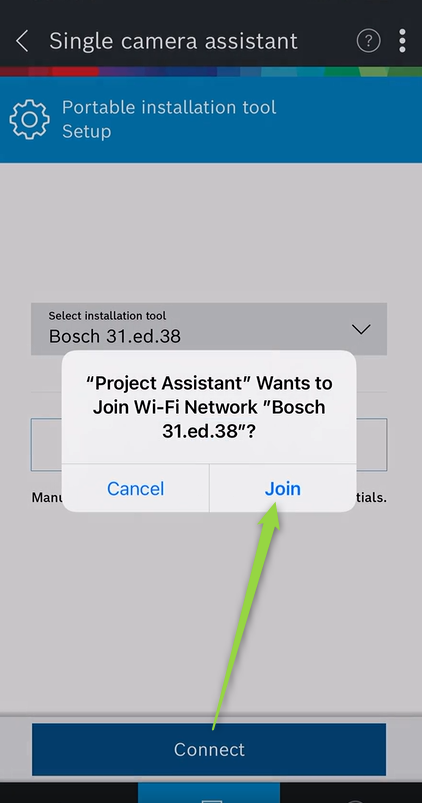
The suggested way for iOS is to make the WLAN dongle known to the Project Assistant App 1 time, then connect to it from within the app when needed.
-
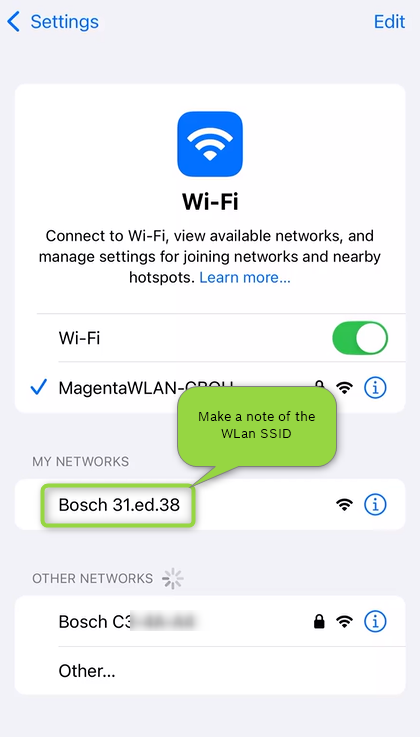
User should note down the SSID of the dongle as seen in iOS WLAN settings - but do NOT connect to it!
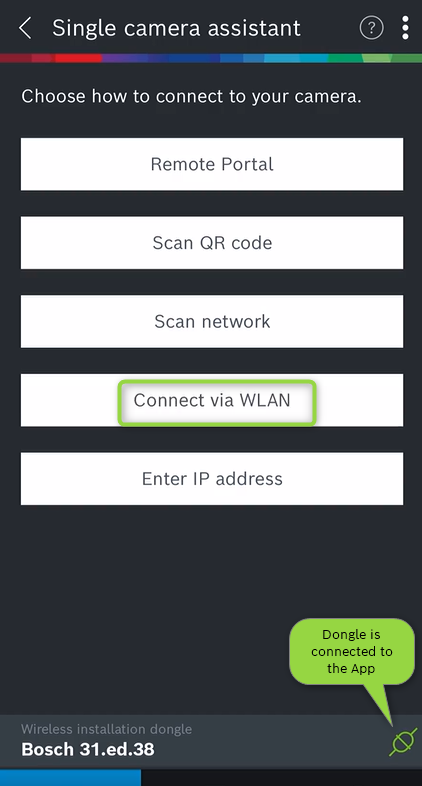
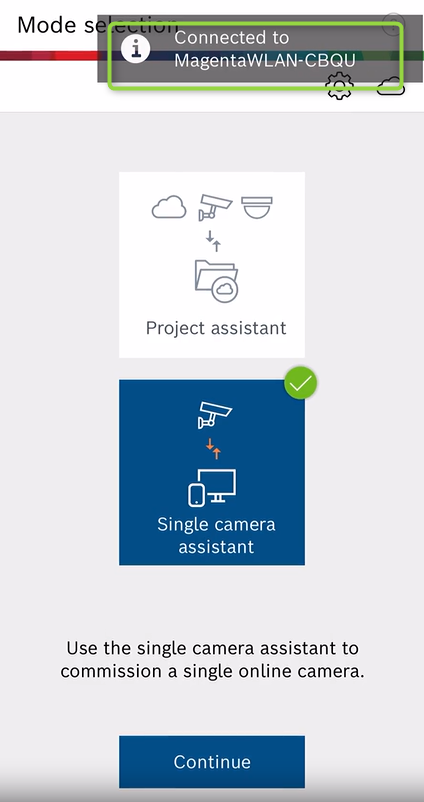
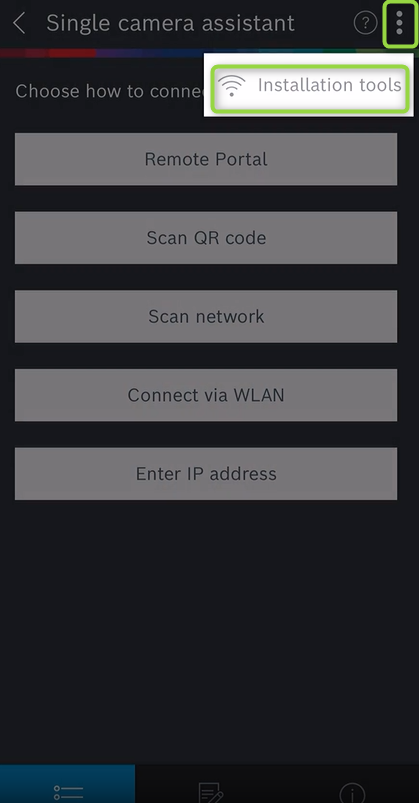
2. Open Project Assistant, choose either Project Assistant or Single Camera Assistant mode.
3. Tap on the 3 dots in the upper area and select "installation tools".
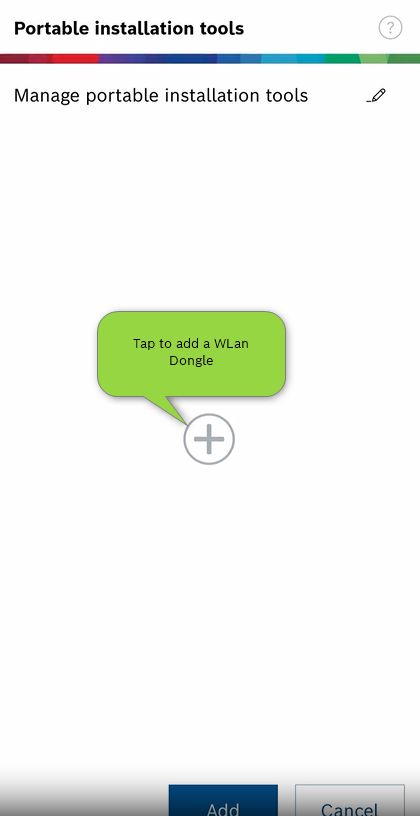
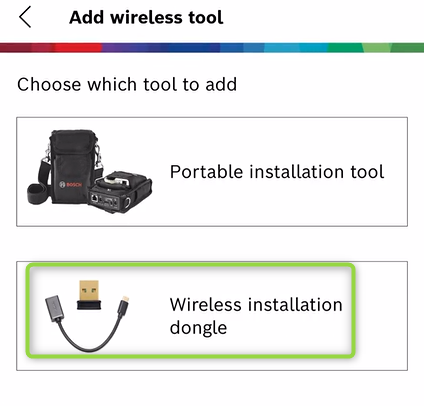
4. Add WLAN dongle and enter the SSID noted before in Step 1.

5. After that a small view will be present on the bottom area that allows to directly connect to the dongle from within the app.
-
The "Scan QR code" only works for CPP7.3 cameras e.g. Flexidome 8000i
-
Not needed for CPP14 cameras e.g. FLEXIDOME indoor 5100i
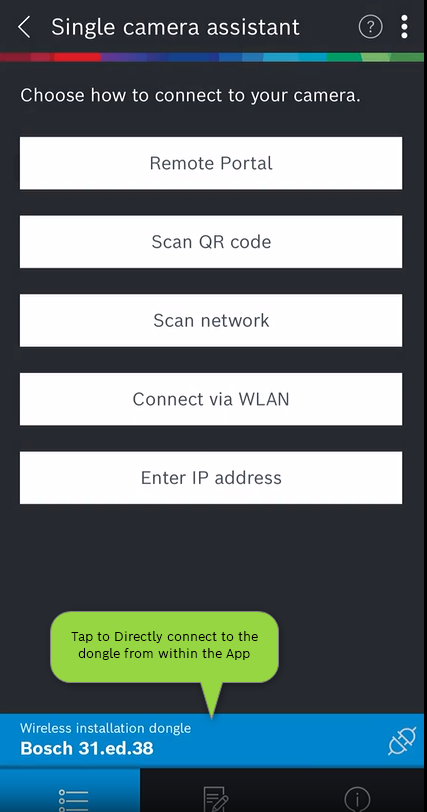
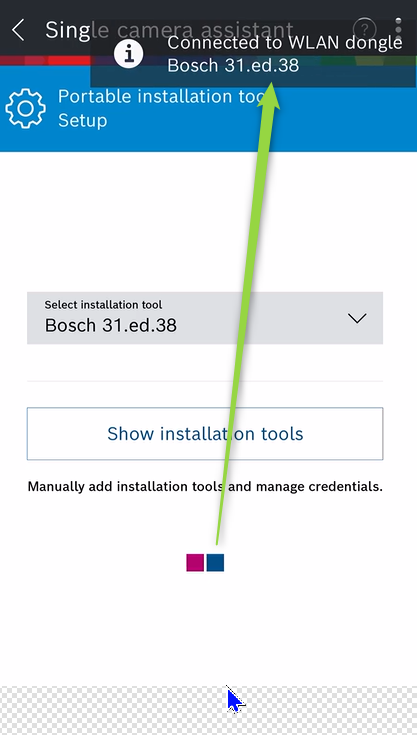
6. Then connect to the camera using the "Connect via WLAN" option and choose "Select Camera" the dialog should correctly show the detected camera.