
Please note that this procedure applies only to BVMS versions lower than 9.0.
Starting with version 9.0 of BVMS, new features and functionality are introduced, such as ID 163693: "Replace a camera without loosing recording". Please find more details in the BVMS - Release notes (Chaper 2.1 New functionality from BVMS Version 9.0)
If you are still using BVMS version <9.0 and you want to replace a faulty device without loosing recording, please follow the steps below.
Requirments:
-
New/ Replacement IP-Camera/ Encoder must be Factory Defaulted.
-
Firmware must be in accordance with used BVMS version — please refer to Release notes.Minimum FW =>5.90
-
Licenses to cover the retention time of the old device.
-
30 Days temporary coverage will require 1 x Emergency license.
-
Step-by-step guide
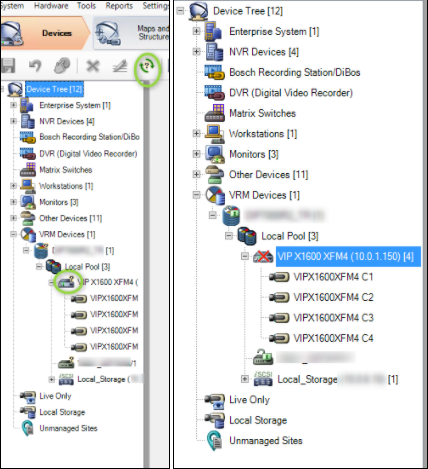
1. Check the device status in BVMS Configuration Client
-
When you open the ConfigClient all devices will display an icon with ?
-
Clicking on the Menu Bar item ?, will display offline items with a X
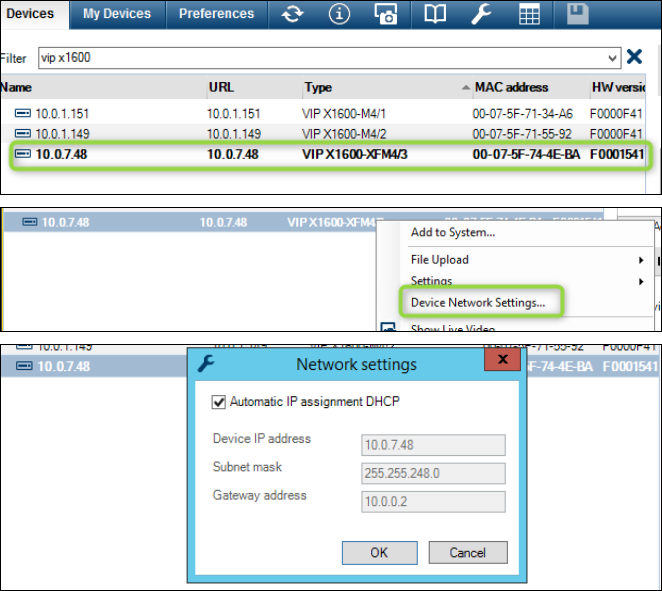
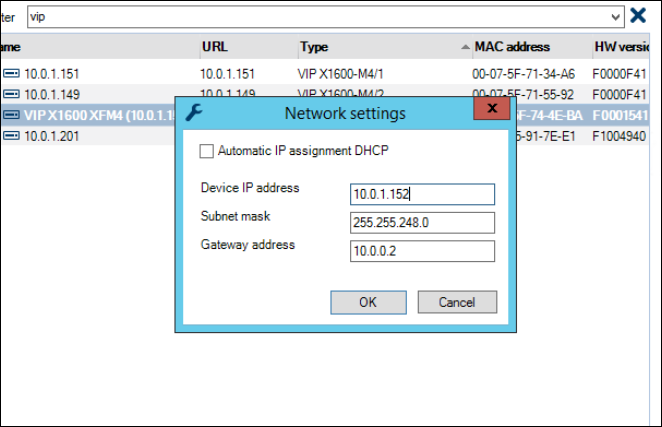
2. Use Configuration Manager to configure the new replacement device with a New IP address.
-
Pre-requisite: The new device should be Factory Defaulted.
-
If there is a DHCP server in the network the device will be allocated an IP address from the DHCP pool.
-
Right click on the device and remove the DHCP checkbox, and set an unused fixed IP address, Subnet mask and Gateway if needed.
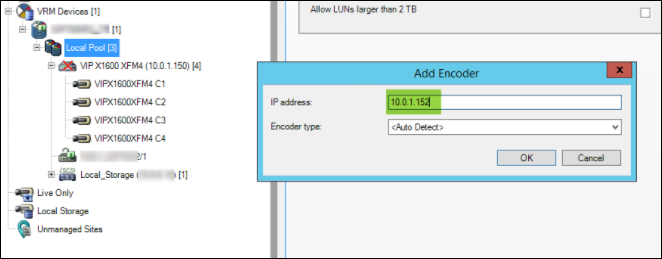
3. Add New Device to BVMS via the CC, do not remove the old faulty device.
-
Right click on the VRM Pool and choose Add Encoder.
-
Enter the IP Address of the new device, modify the Camera name/s, add to the Logical Tree.
4. Go to the Cameras and recording Tab and setup the camera profiles.
-
Advised - Ensure all settings are equal to old device settings
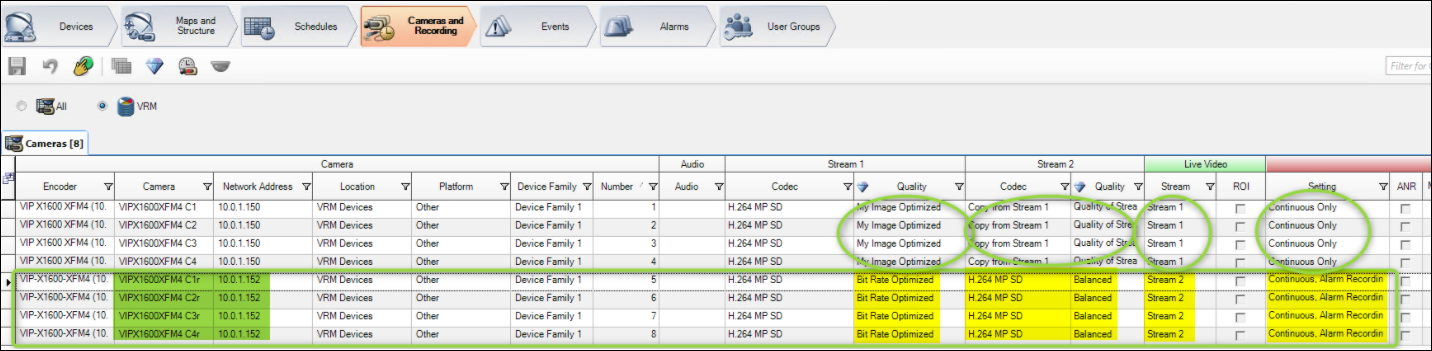
This can be achieved by right Clicking on a Cell and copying it to Column etc.
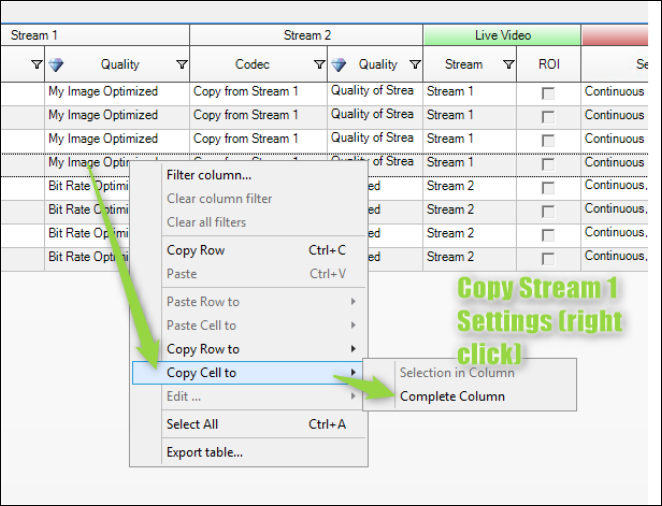
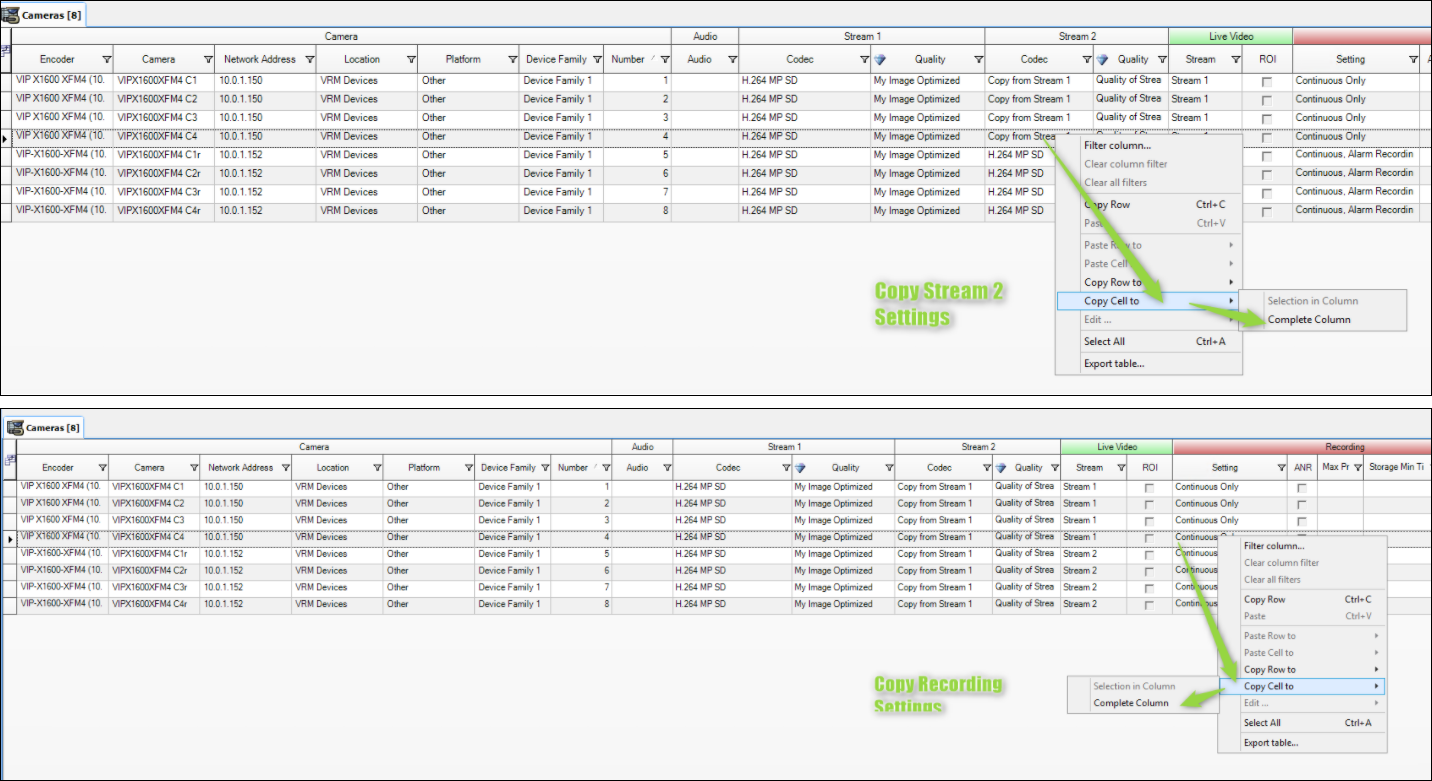
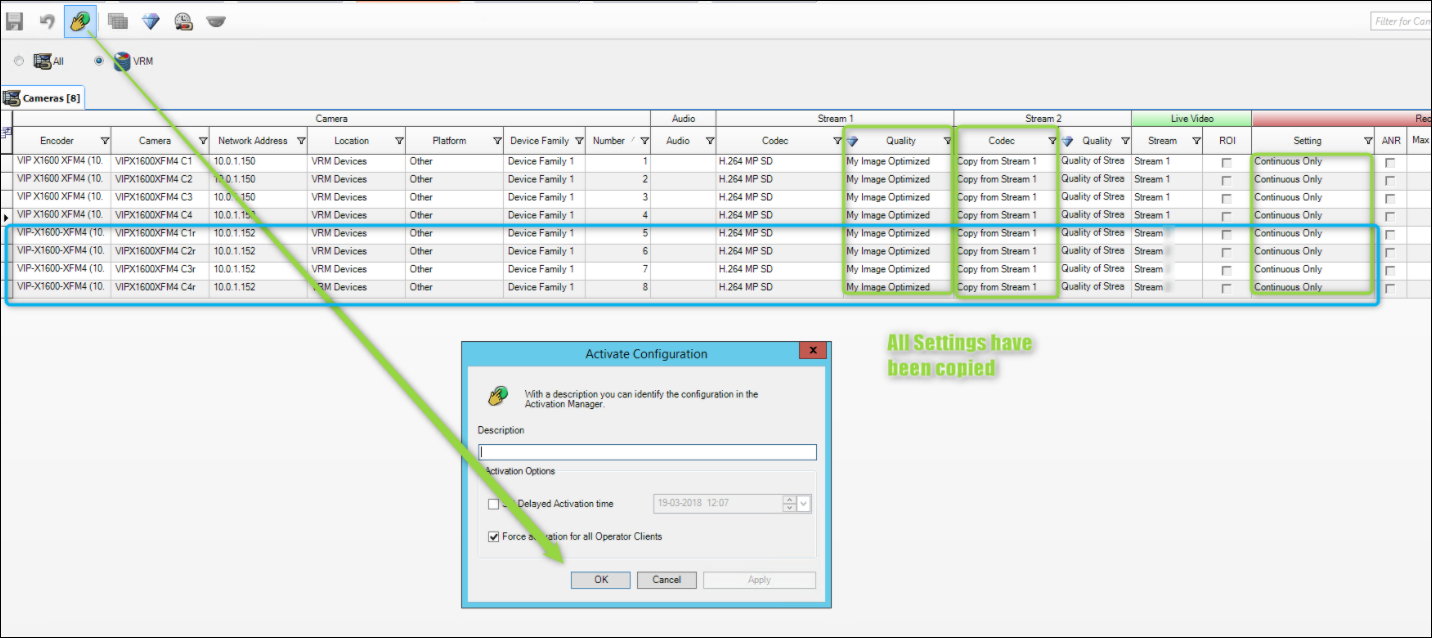
Then Save and activate all settings when you are finished.
5. You can now check that recording is active for the new device.
-
Selecting the Device tab in BVMS CC, choose Advanced Settings – Recording ManagementYou will see the Device is Managed and the IP of the VRM Server plus a Blinking Red dot indicating the device is recording.
-
You can also use the VRM Monitor to check that the new device is recording.
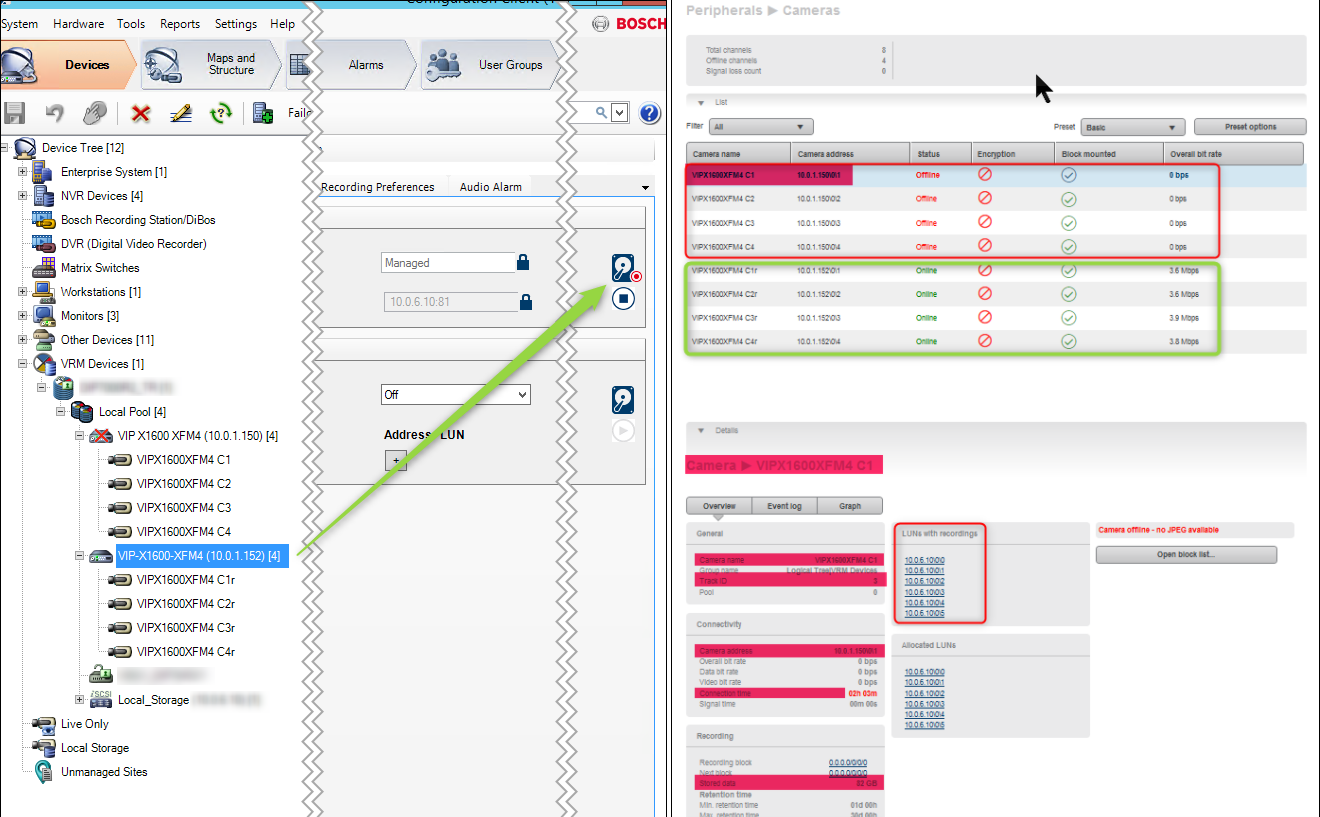
6. In the BVMS OC (Op-Client) you will see both the old device and the new device.
-
The Old device/s will need a license for as long as the retention period.
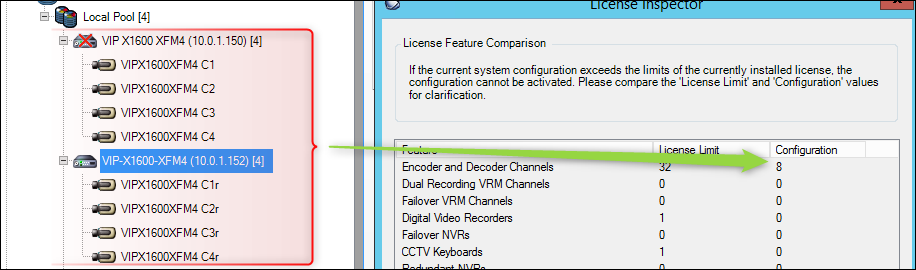
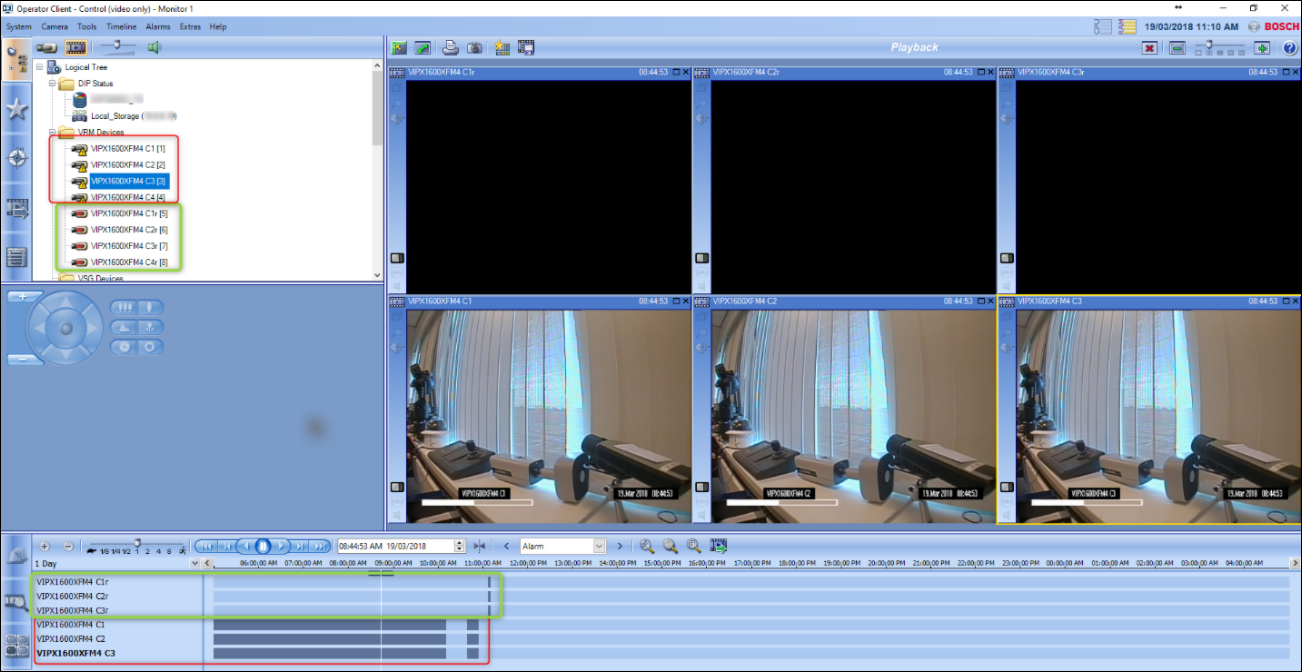
❗ After the retention period has passed, you can remove the old device from the configuration.

-
How to replace a faulty device in VRM standalone system (v.3.10 onwards) without losing recording? → External
-
Short explanation about the Configuration Manager features: "Back-up", "Replace", "Transfer" and "Restore" → Internal only