
System Manager 3.0 introduces a new Setup Wizard that guides users through the initial configuration of a DIVAR IP system.
This wizard replaces the previous scattered setup flow with a guided 4-step configuration journey, ensuring that:
-
The system is properly connected to the network
-
Time settings are correct
-
System Manager is updated
-
An operation mode is installed
This article explains in detail how the wizard works, what the user sees, and how the system behaves in different scenarios.
When does the Setup Wizard appear?
The Setup Wizard automatically starts when:
-
A DIVAR IP system is first initialized
-
The system has been reset
-
No operation mode is installed
Once the wizard is completed successfully, it does not appear again, unless the system is factory reset
Wizard Structure Overview
The wizard contains four mandatory steps:
-
Step 1 — Network Settings: Configure hostname and network connectivity.
-
Step 2 — Time Settings: Configure system time and synchronization.
-
Step 3 — System Manager Update: Install the latest System Manager software.
-
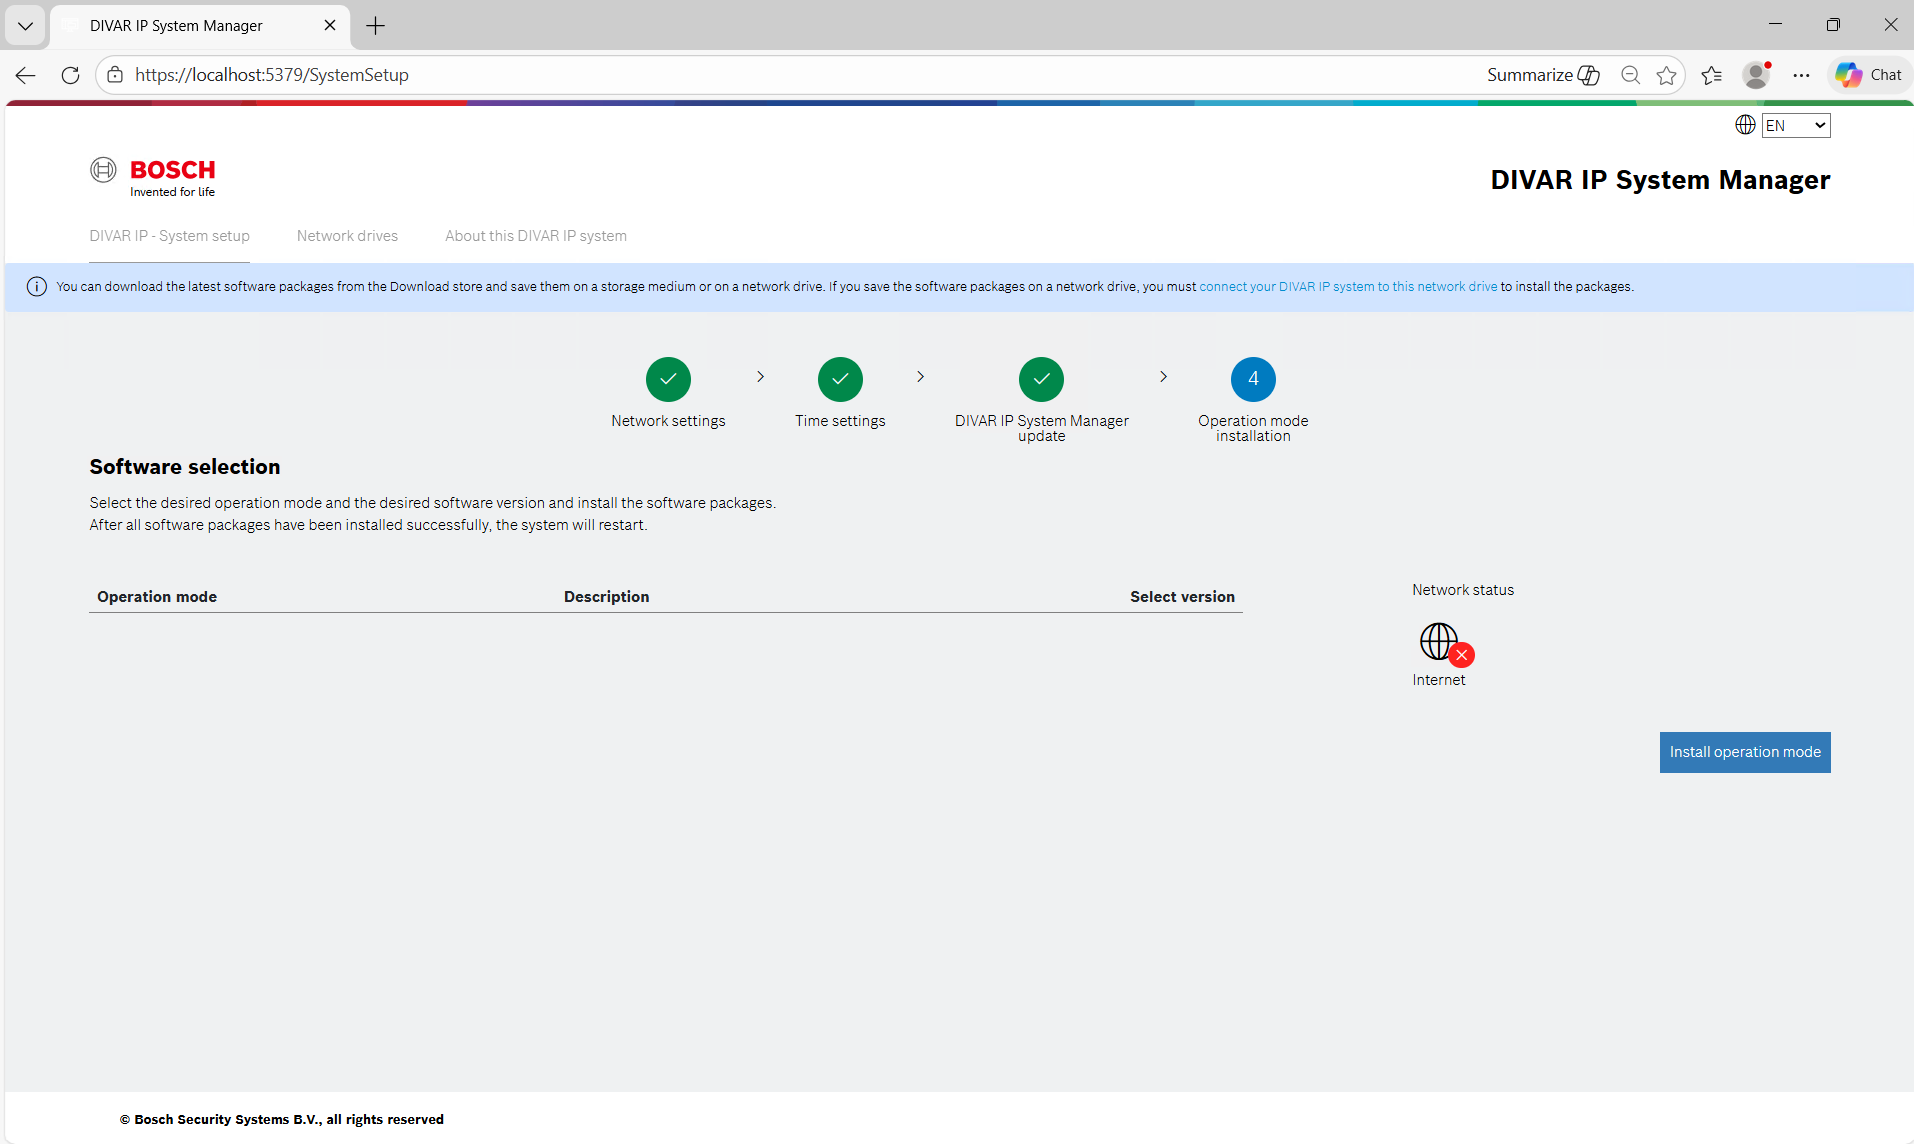
Step 4 — Operation Mode Installation: Install BVMS, VRM, or iSCSI.
Stepper Navigation System
At the top of every wizard page, a stepper bar is displayed.
This stepper:
-
Shows all four steps
-
Highlights the current step in blue
-
Marks completed steps in green with a checkmark
-
Prevents skipping required steps
Users cannot proceed until required validations are met.
Step-by-step guide
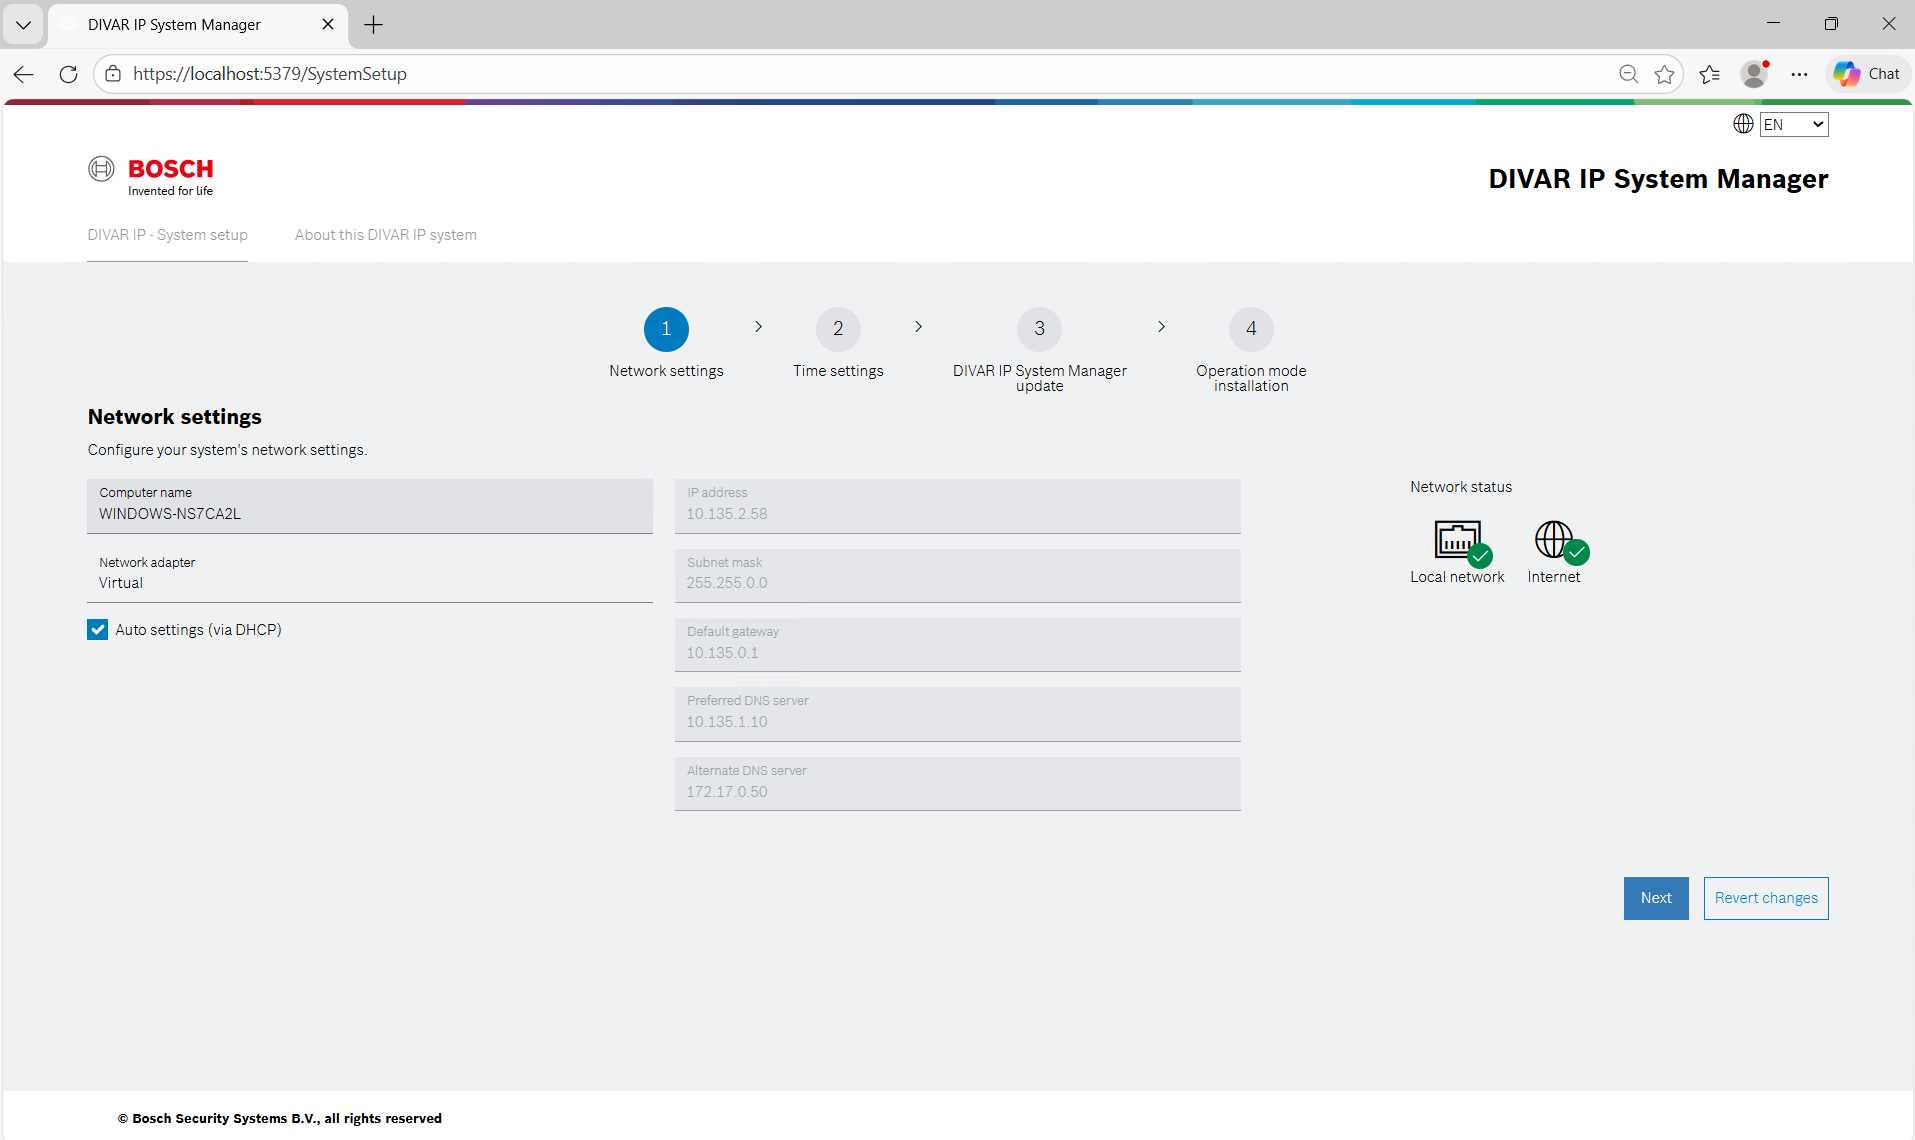
Step 1 — Network Settings
This step ensures the system is reachable on the network and optionally connected to the internet.
This is critical because later steps may require downloading updates.
1.1. What the User Sees
Hostname Section
-
Text field showing the current computer name
-
Maximum 15 characters
-
Editing displays a notice that a reboot is required
Network Configuration Section
Users can choose:
-
Automatic configuration (DHCP)
-
Manual IP configuration
-
Manual fields include:
-
IP address
-
Subnet mask
-
Gateway
-
Preferred DNS
-
Optional alternate DNS
Connectivity Indicators
Two status icons show:
-
Local network connection
-
Internet availability
1.2. Buttons
1. Save and Test
This button:
-
Applies the network configuration
-
Runs a connectivity test
-
Displays a spinner during testing
If successful:
-
A success message appears
If failed:
-
An error message is shown
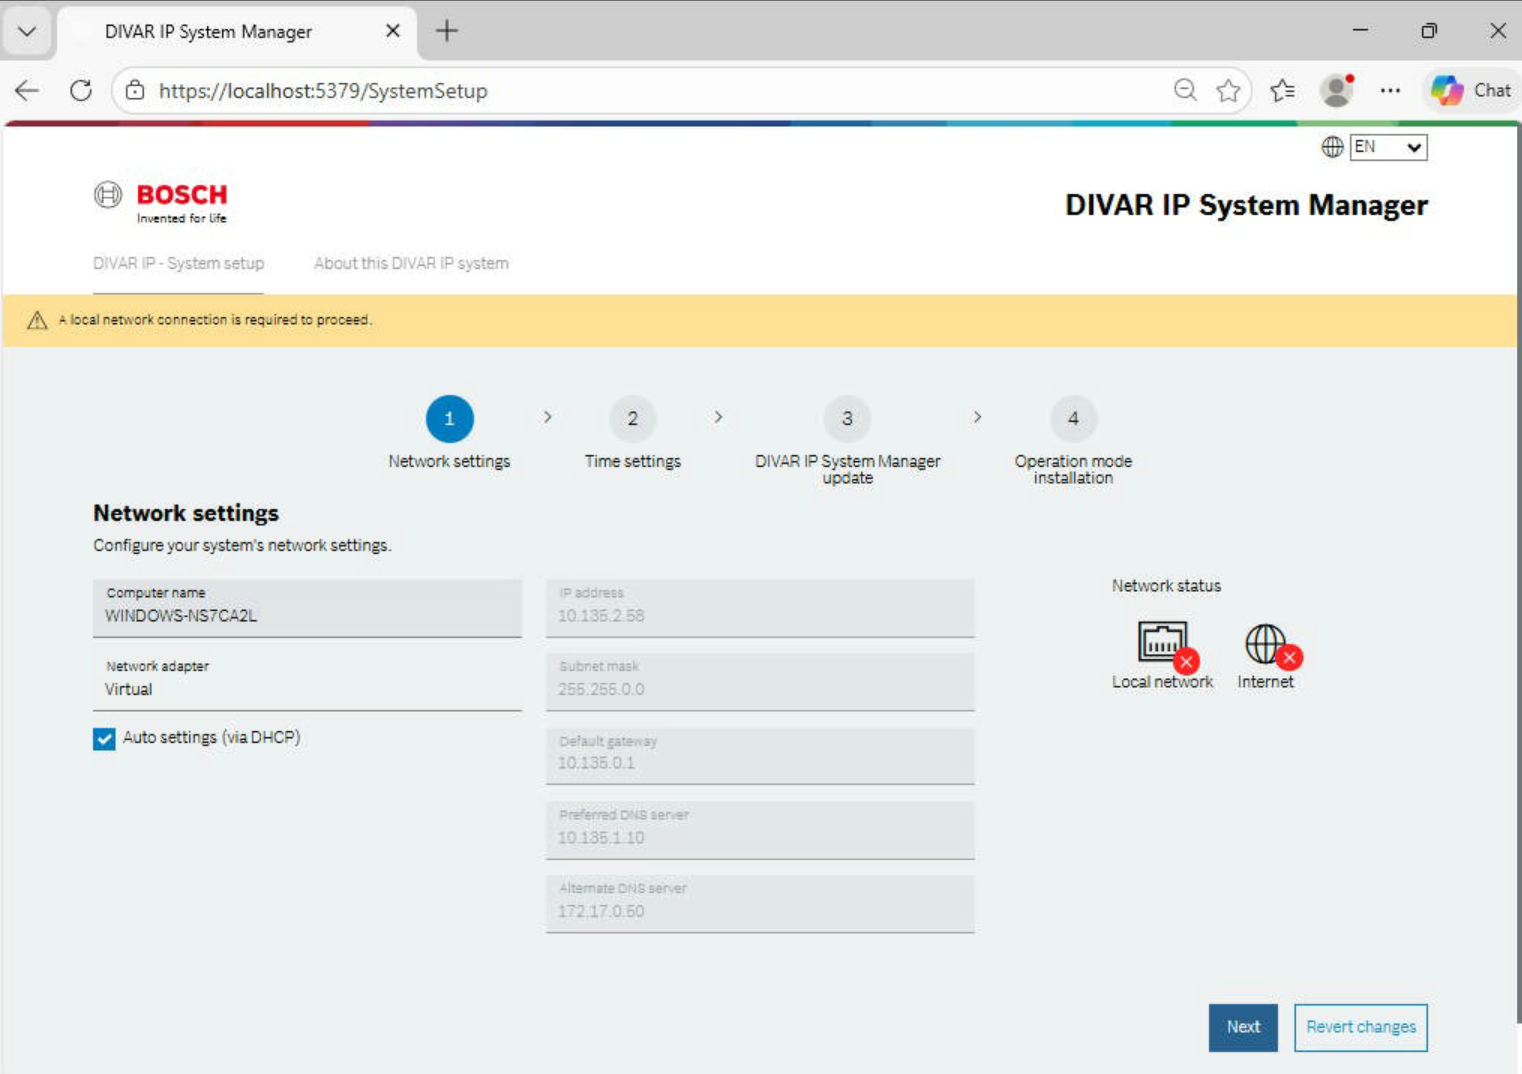
2. Revert Changes: Reverts all edits to previous values.
3. Next: Allows navigation only if a valid local network is detected.
If no network is detected, warning message appears: “Local network connection is required to proceed.”
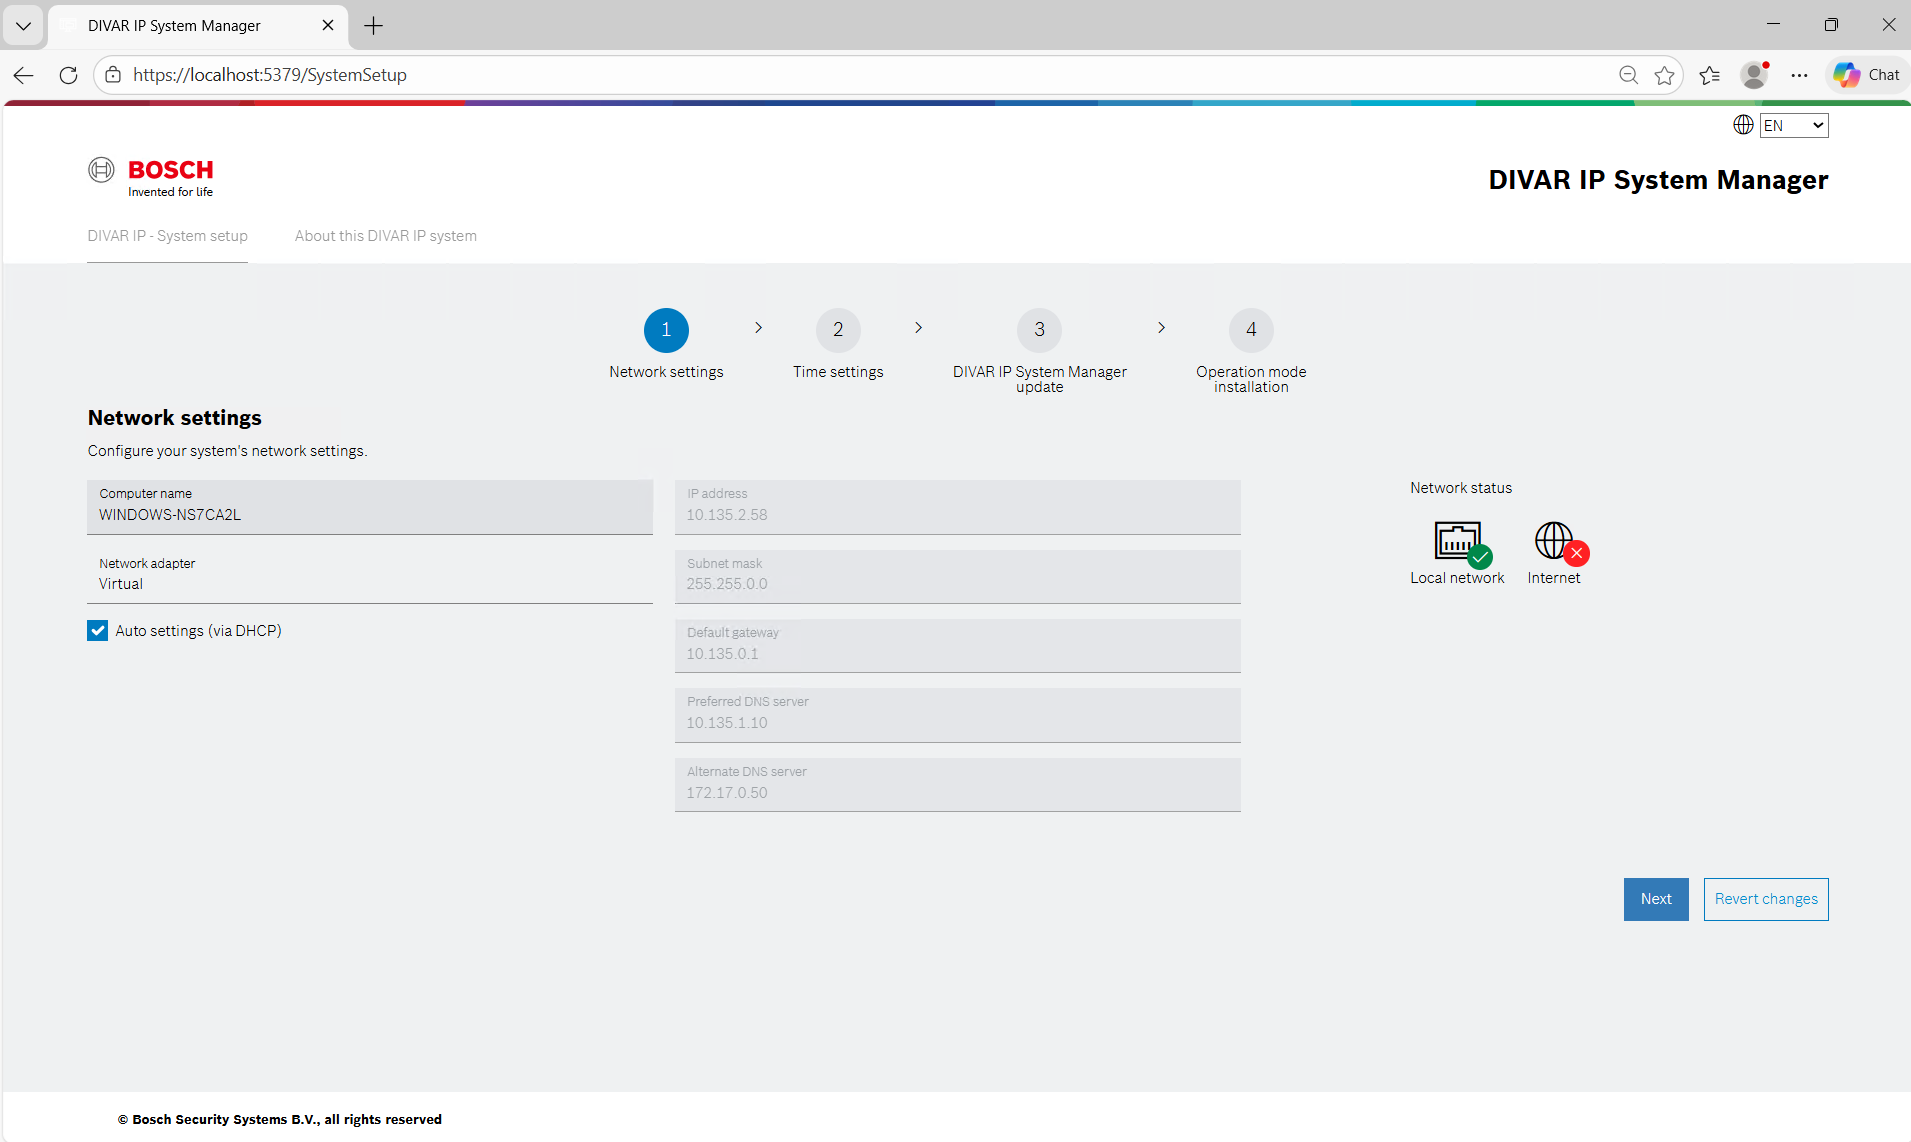
1.3. Connectivity Testing
The system checks internet availability by sending a lightweight request to: http://google.com/generate_204
If successful:
-
Internet icon turns green
If failed:
-
Internet icon turns red
Users may continue without internet, but online packages will not be available in step 3 and 4.
Step 2 — Time Settings
Ensures the system clock is correctly configured.
Accurate time is required for:
-
Logging
-
Updates
-
Network communication
-
Security certificates
2.1. What the User Sees
Time Zone Selection
Dropdown with standard time zones.
Changes apply immediately.
Daylight Saving Option
Optional checkbox for automatic DST adjustment.
Automatic Time Synchronization
Checkbox labeled:
“Set time automatically”
When enabled:
-
Manual date/time is disabled
-
Time server field becomes active
Time Server Field
Users can enter:
-
Hostname
-
IP address

2.2. Sync Now Button
Attempts immediate synchronization.
Displays:
-
Success message if sync works
-
Error message if it fails
Sync failure does not block navigation.
2.3. Manual Date & Time
If automatic sync is disabled:
-
User may manually enter date and time
-
Changes apply immediately
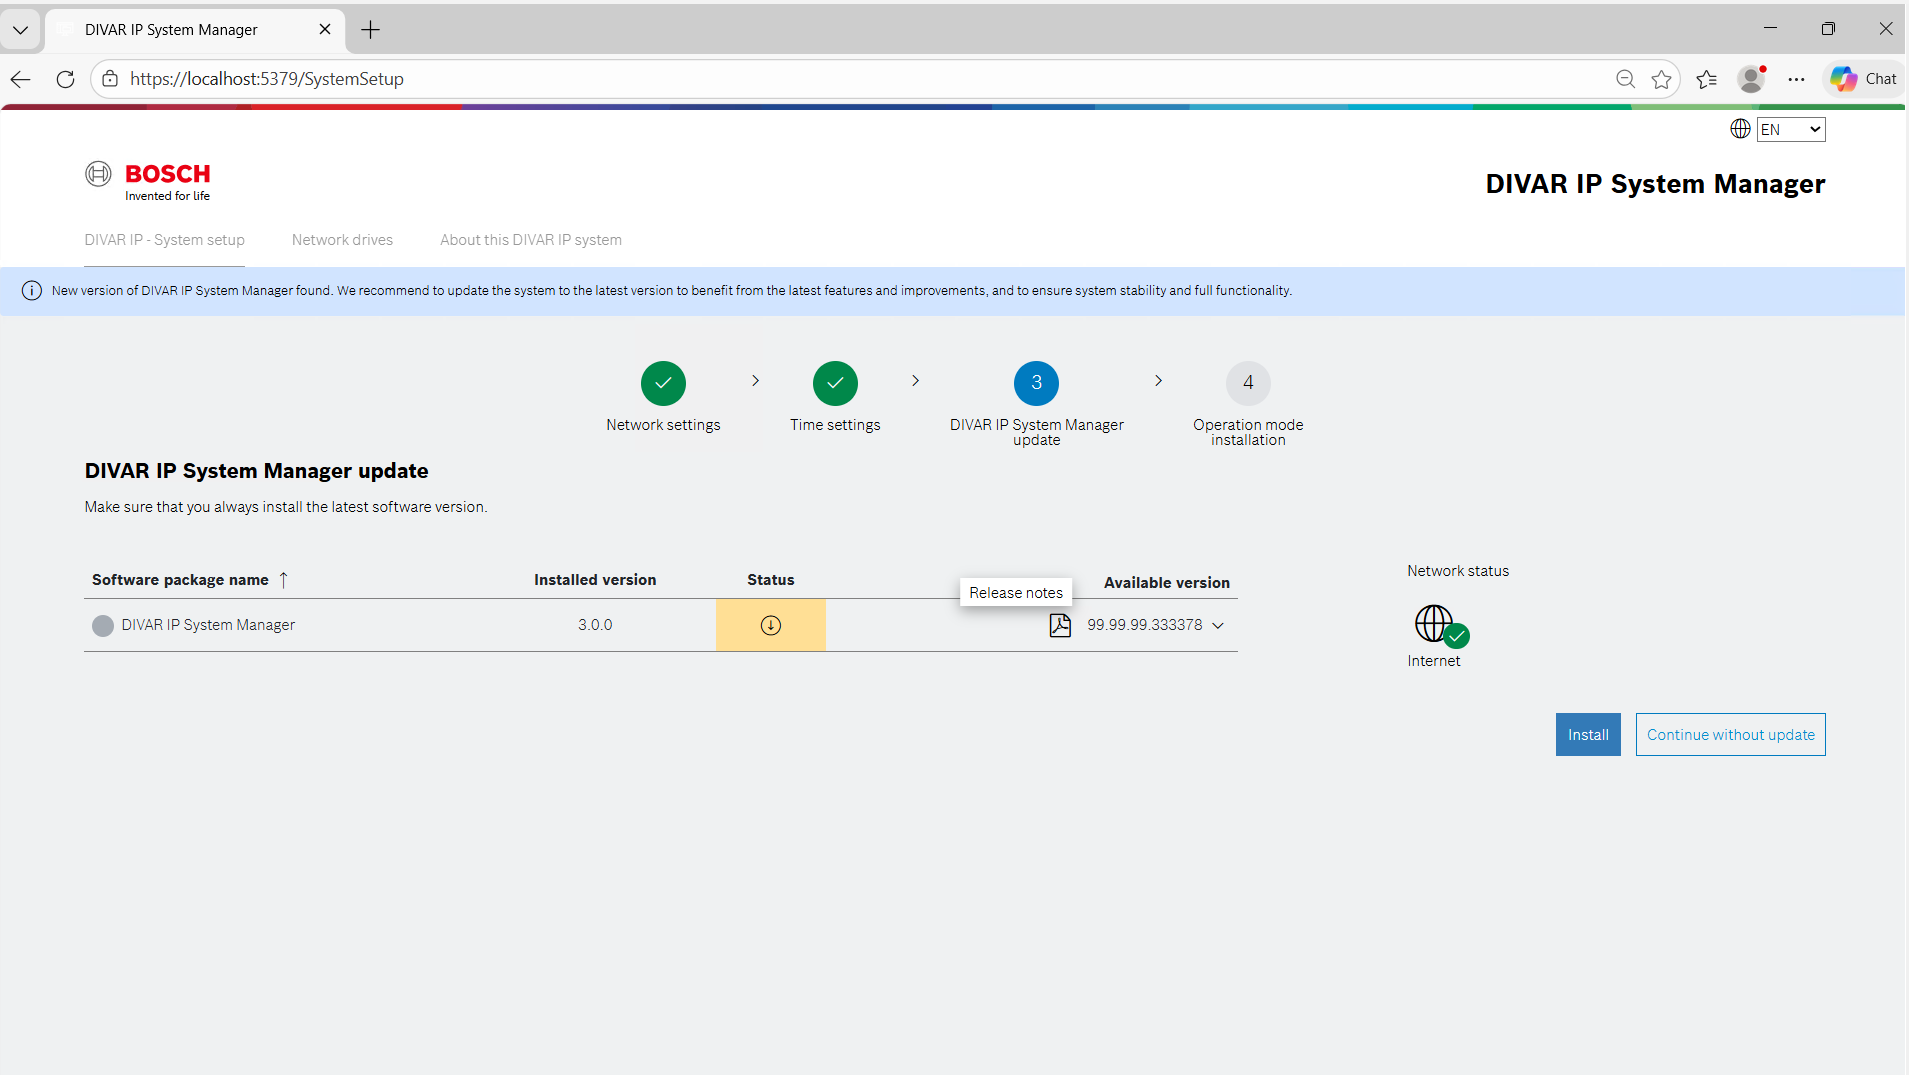
Step 3 — System Manager Update
Ensures the system runs the latest System Manager version.
3.1. Package Sources
Updates may come from:
-
Online S3 repository
-
Local packages
3.2. What the User Sees
A table showing:
-
Software name
-
Installed version
-
Status
-
Available versions
Status can be:
-
Up to date
-
Update available
-
Updating
-
Update failed
Network Status Indicator shows:
-
Green icon when internet is available
-
Red icon when offline
Available Version Dropdown
If updates are found:
-
Dropdown lists versions
-
Online packages are labeled “Online Repository”
If no updates are found:
-
Only installed version is shown
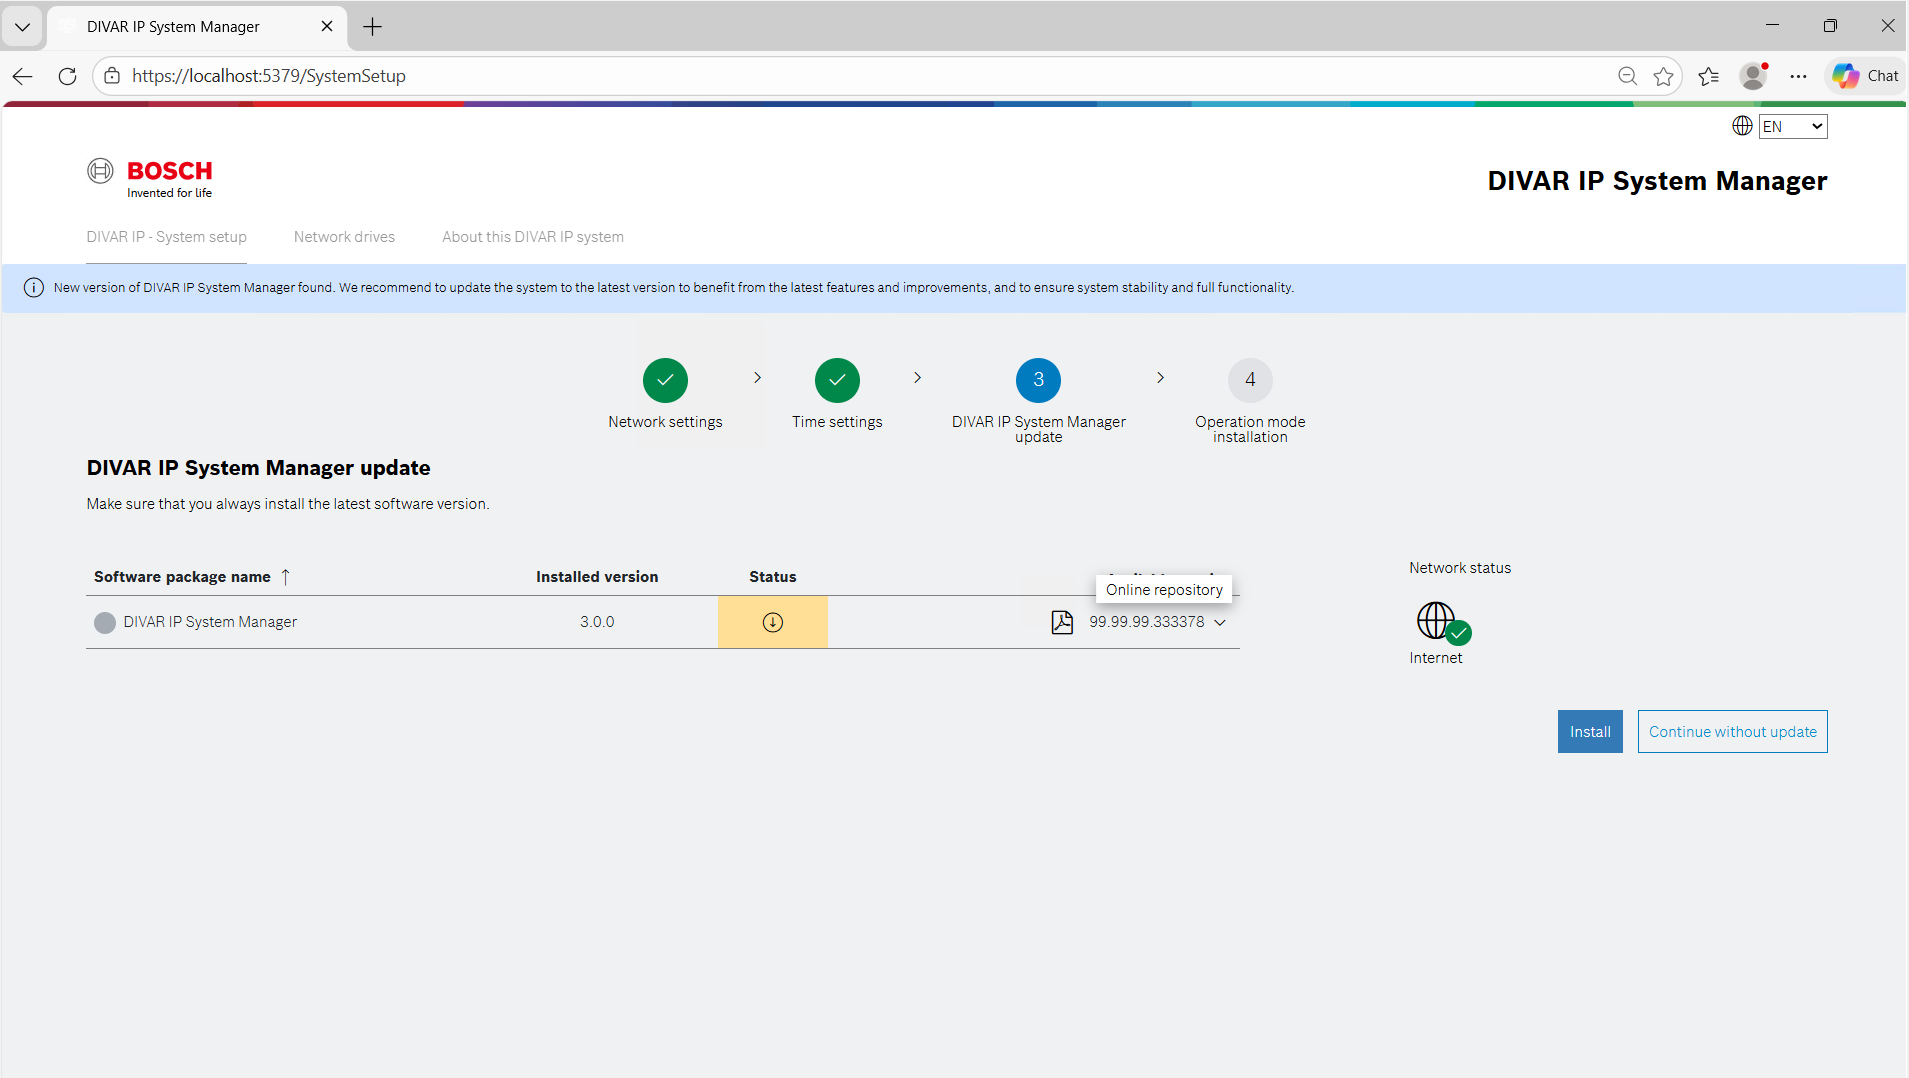
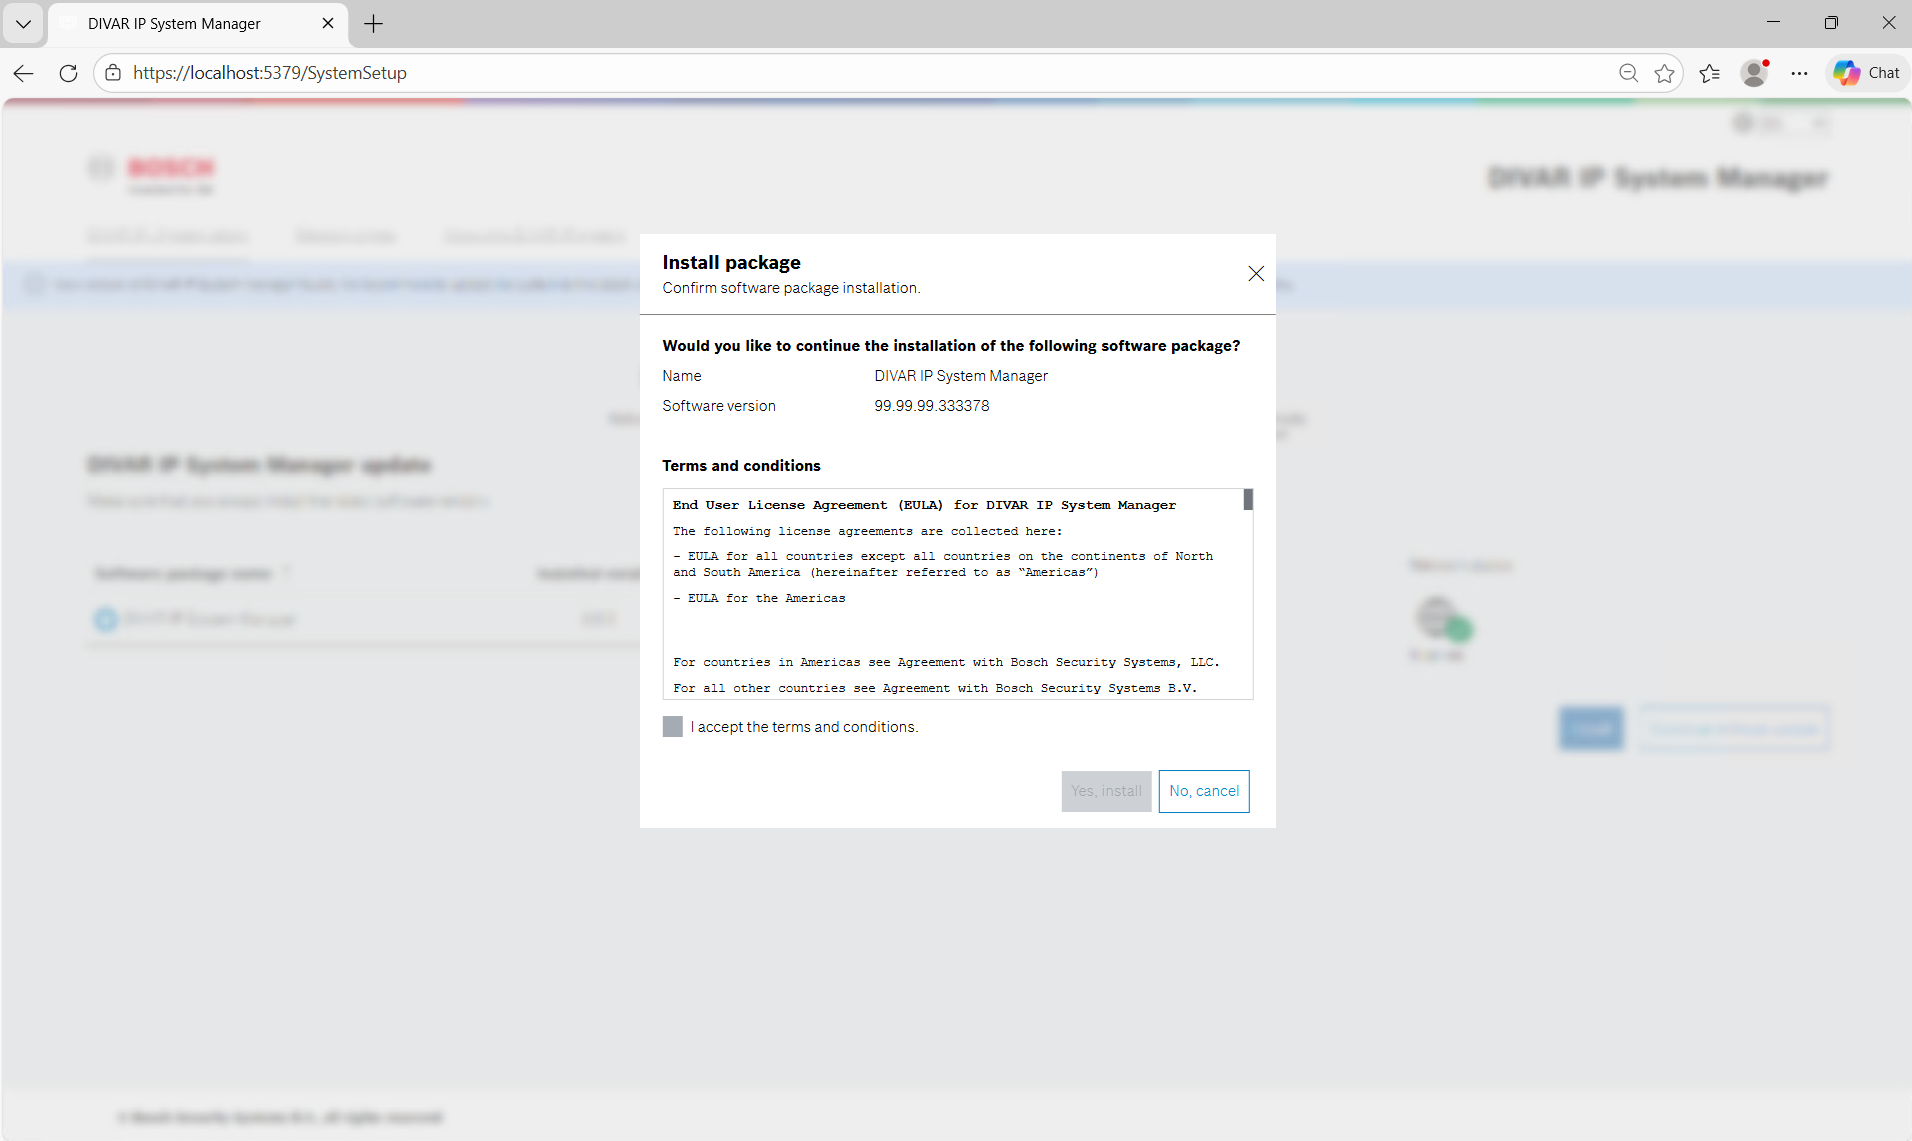
3.3. Buttons
Install
Opens a modal dialog containing:
-
EULA (license agreement)
-
Install and Cancel buttons
After confirmation:
-
Installation begins
-
Status updates dynamically
Continue Without Update: Allows skipping updates
Next: Visible only when no updates are available
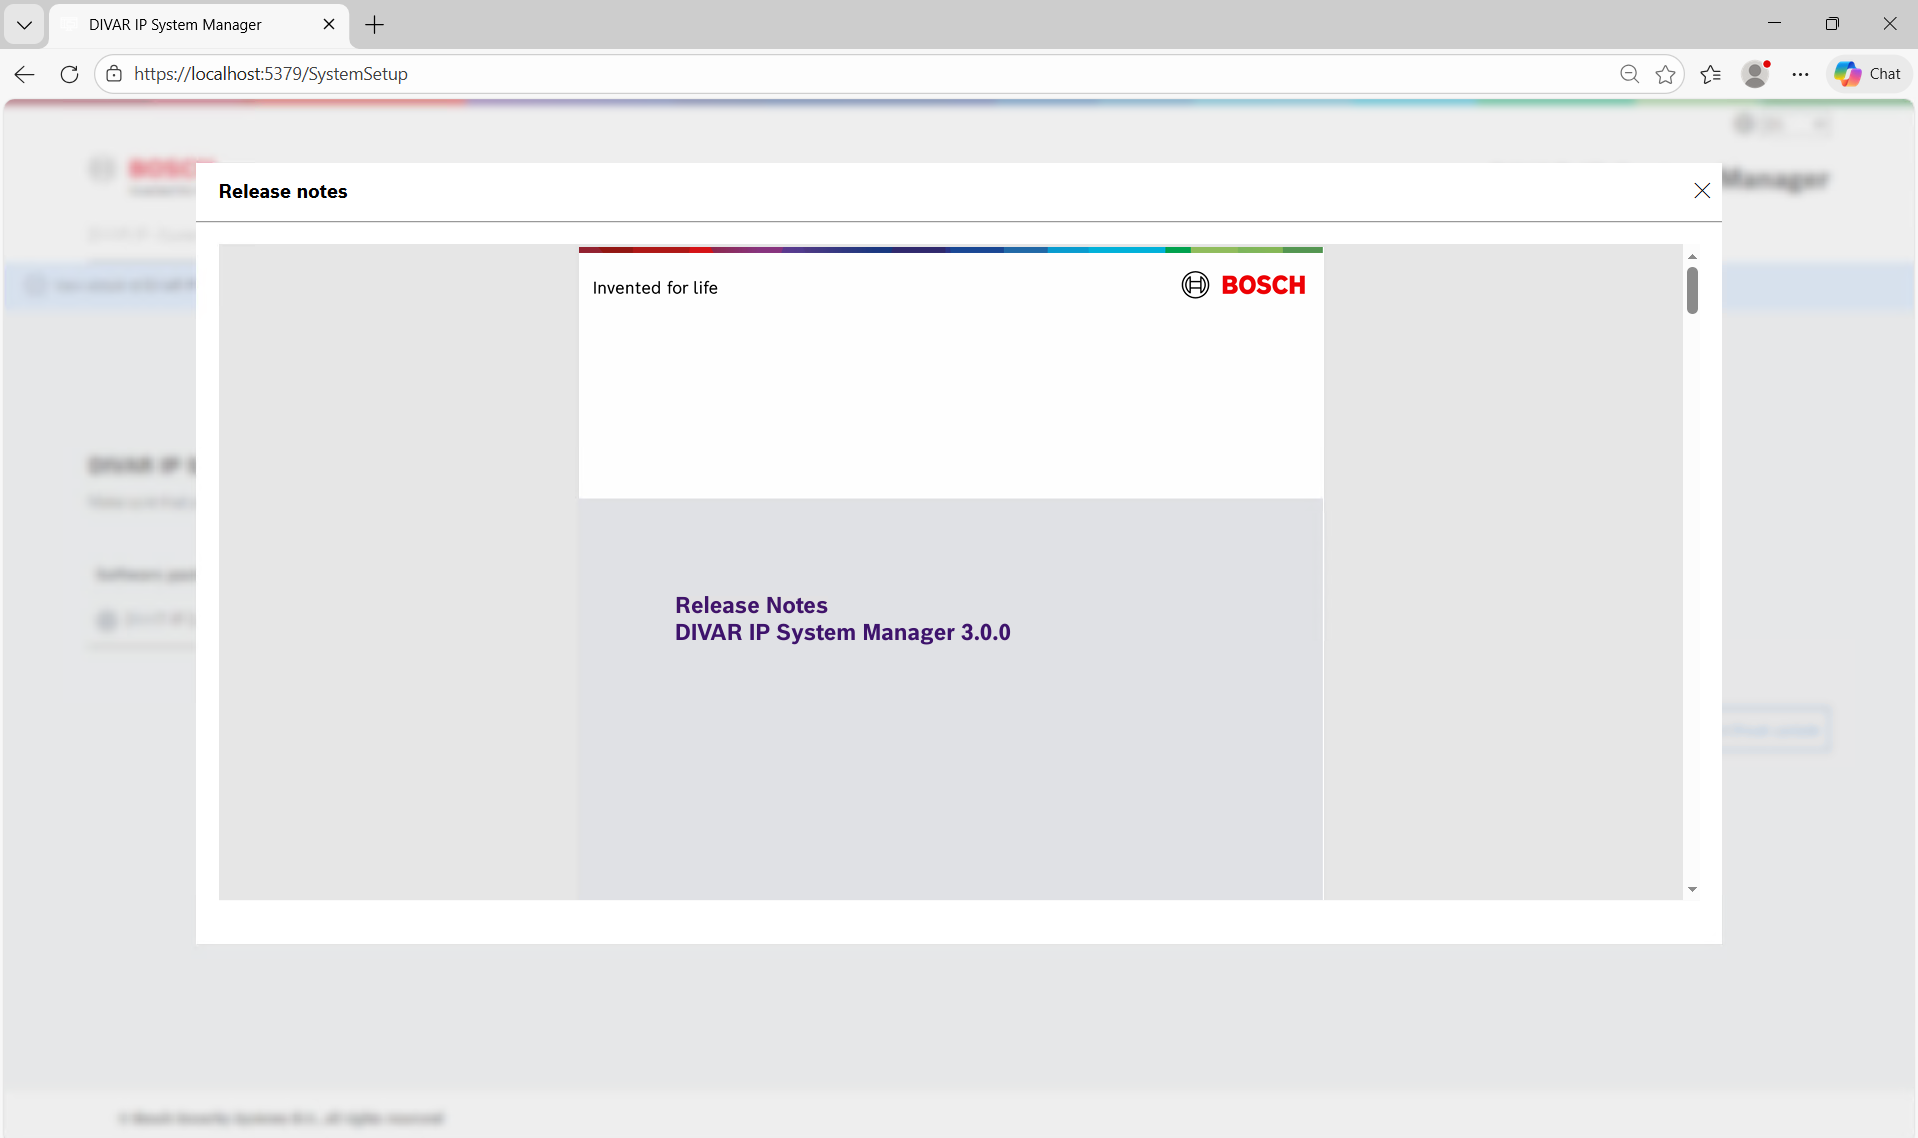
Release Notes Integration
If the package contains a file named: Release_Notes_*.pdf, a Release Notes icon appears.
Clicking the icon:
-
Opens the PDF inside System Manager
-
Uses an embedded viewer
-
Does not open an external browser
This works for:
-
Local packages
-
Online S3 packages
If the file is missing:
-
No icon is shown
Step 4 — Operation Mode Installation
Installs the desired operation mode.
Available modes:
-
BVMS
-
VRM
-
iSCSI
4.1. What the User Sees
A table listing operation modes with:
-
Name
-
Description
-
Version
-
Source
4.2. Internet Behavior
If internet is available:
-
System scans S3 repository
-
Displays recommended installation banner
If offline:
-
Suggests local installation
If S3 repository scan fails:
-
Shows error banner
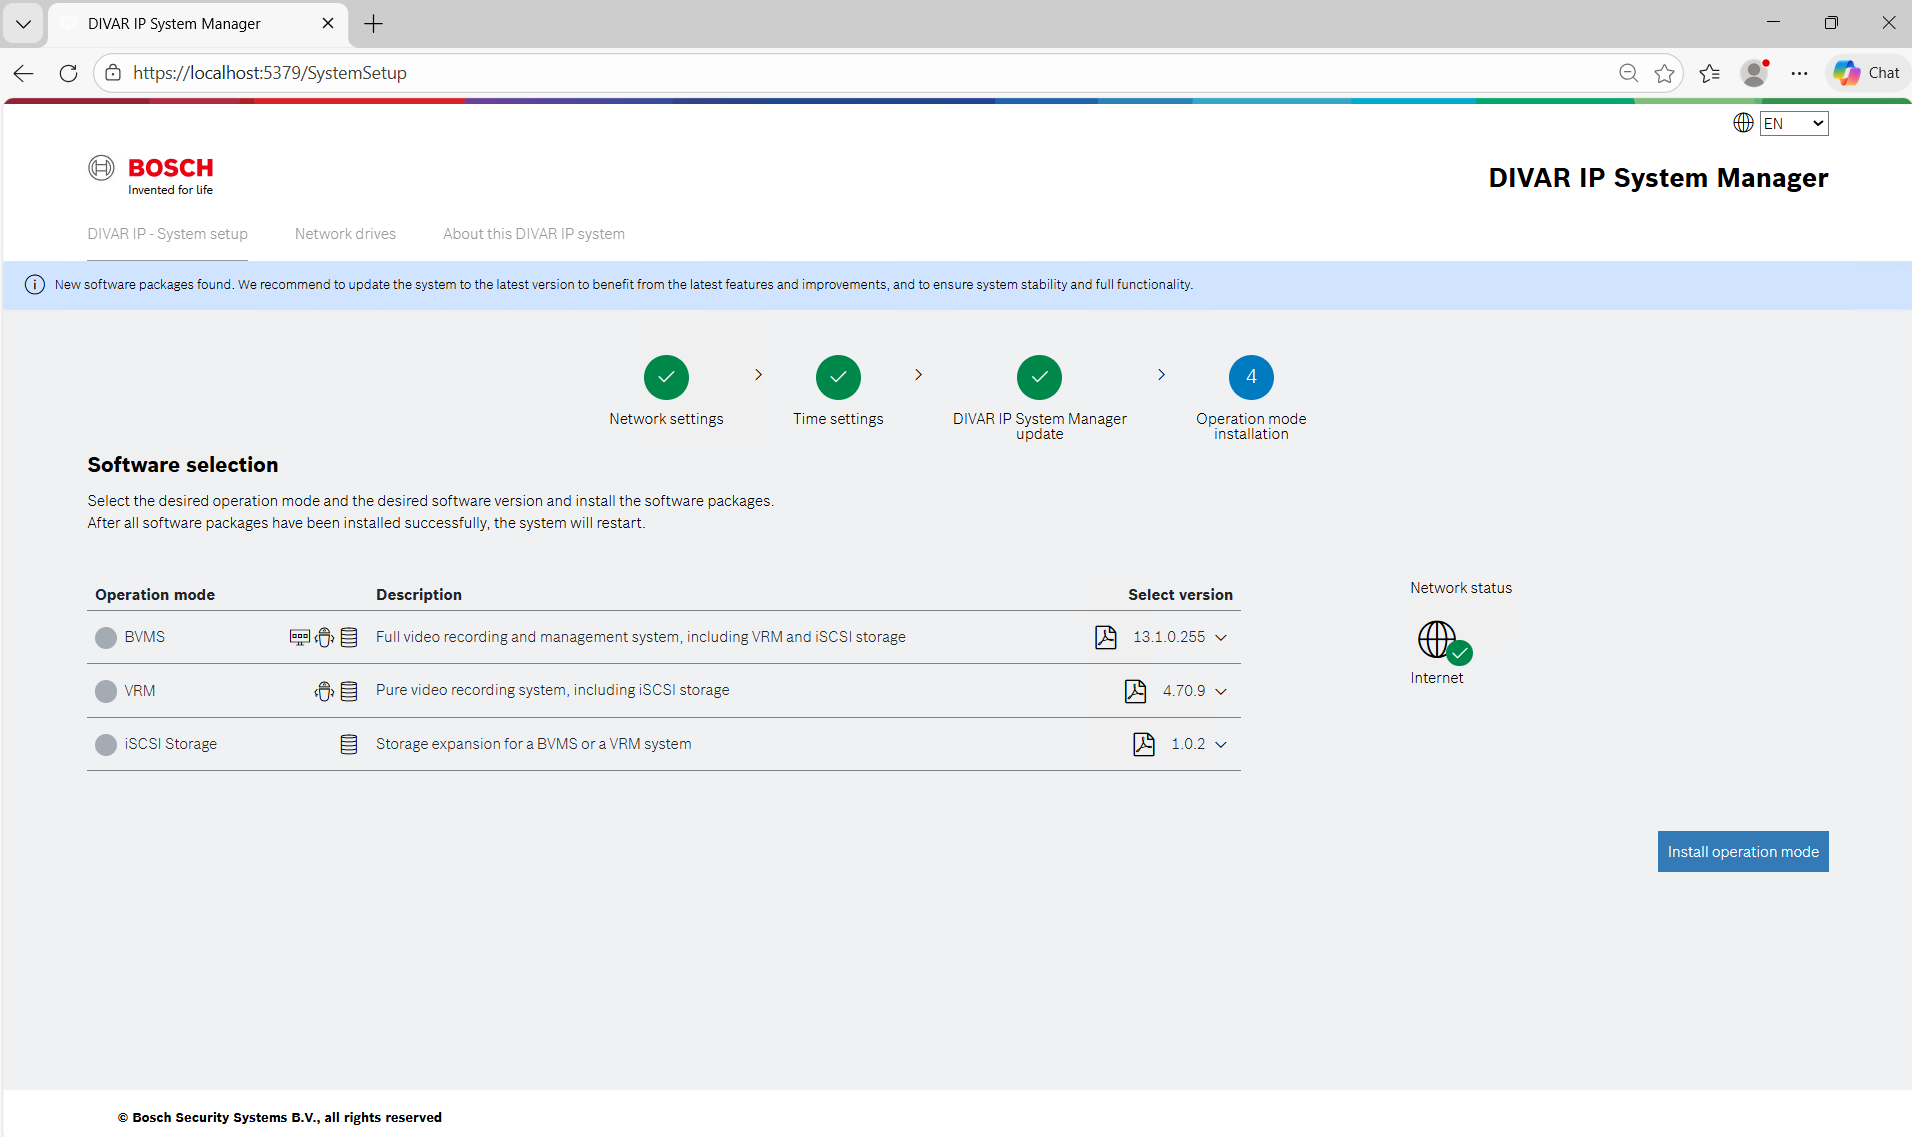
4.3. Installation Flow
User selects a mode and clicks: Install Operation Mode
A modal appears with:
-
EULA
-
Install and Cancel buttons
After confirmation:
-
Installation starts
-
System restarts automatically
Post-Installation Behavior
If BVMS installed:
-
Redirects to Kiosk Mode
If VRM or iSCSI installed:
-
Redirects to BVRAdmin login
The wizard is then considered complete.
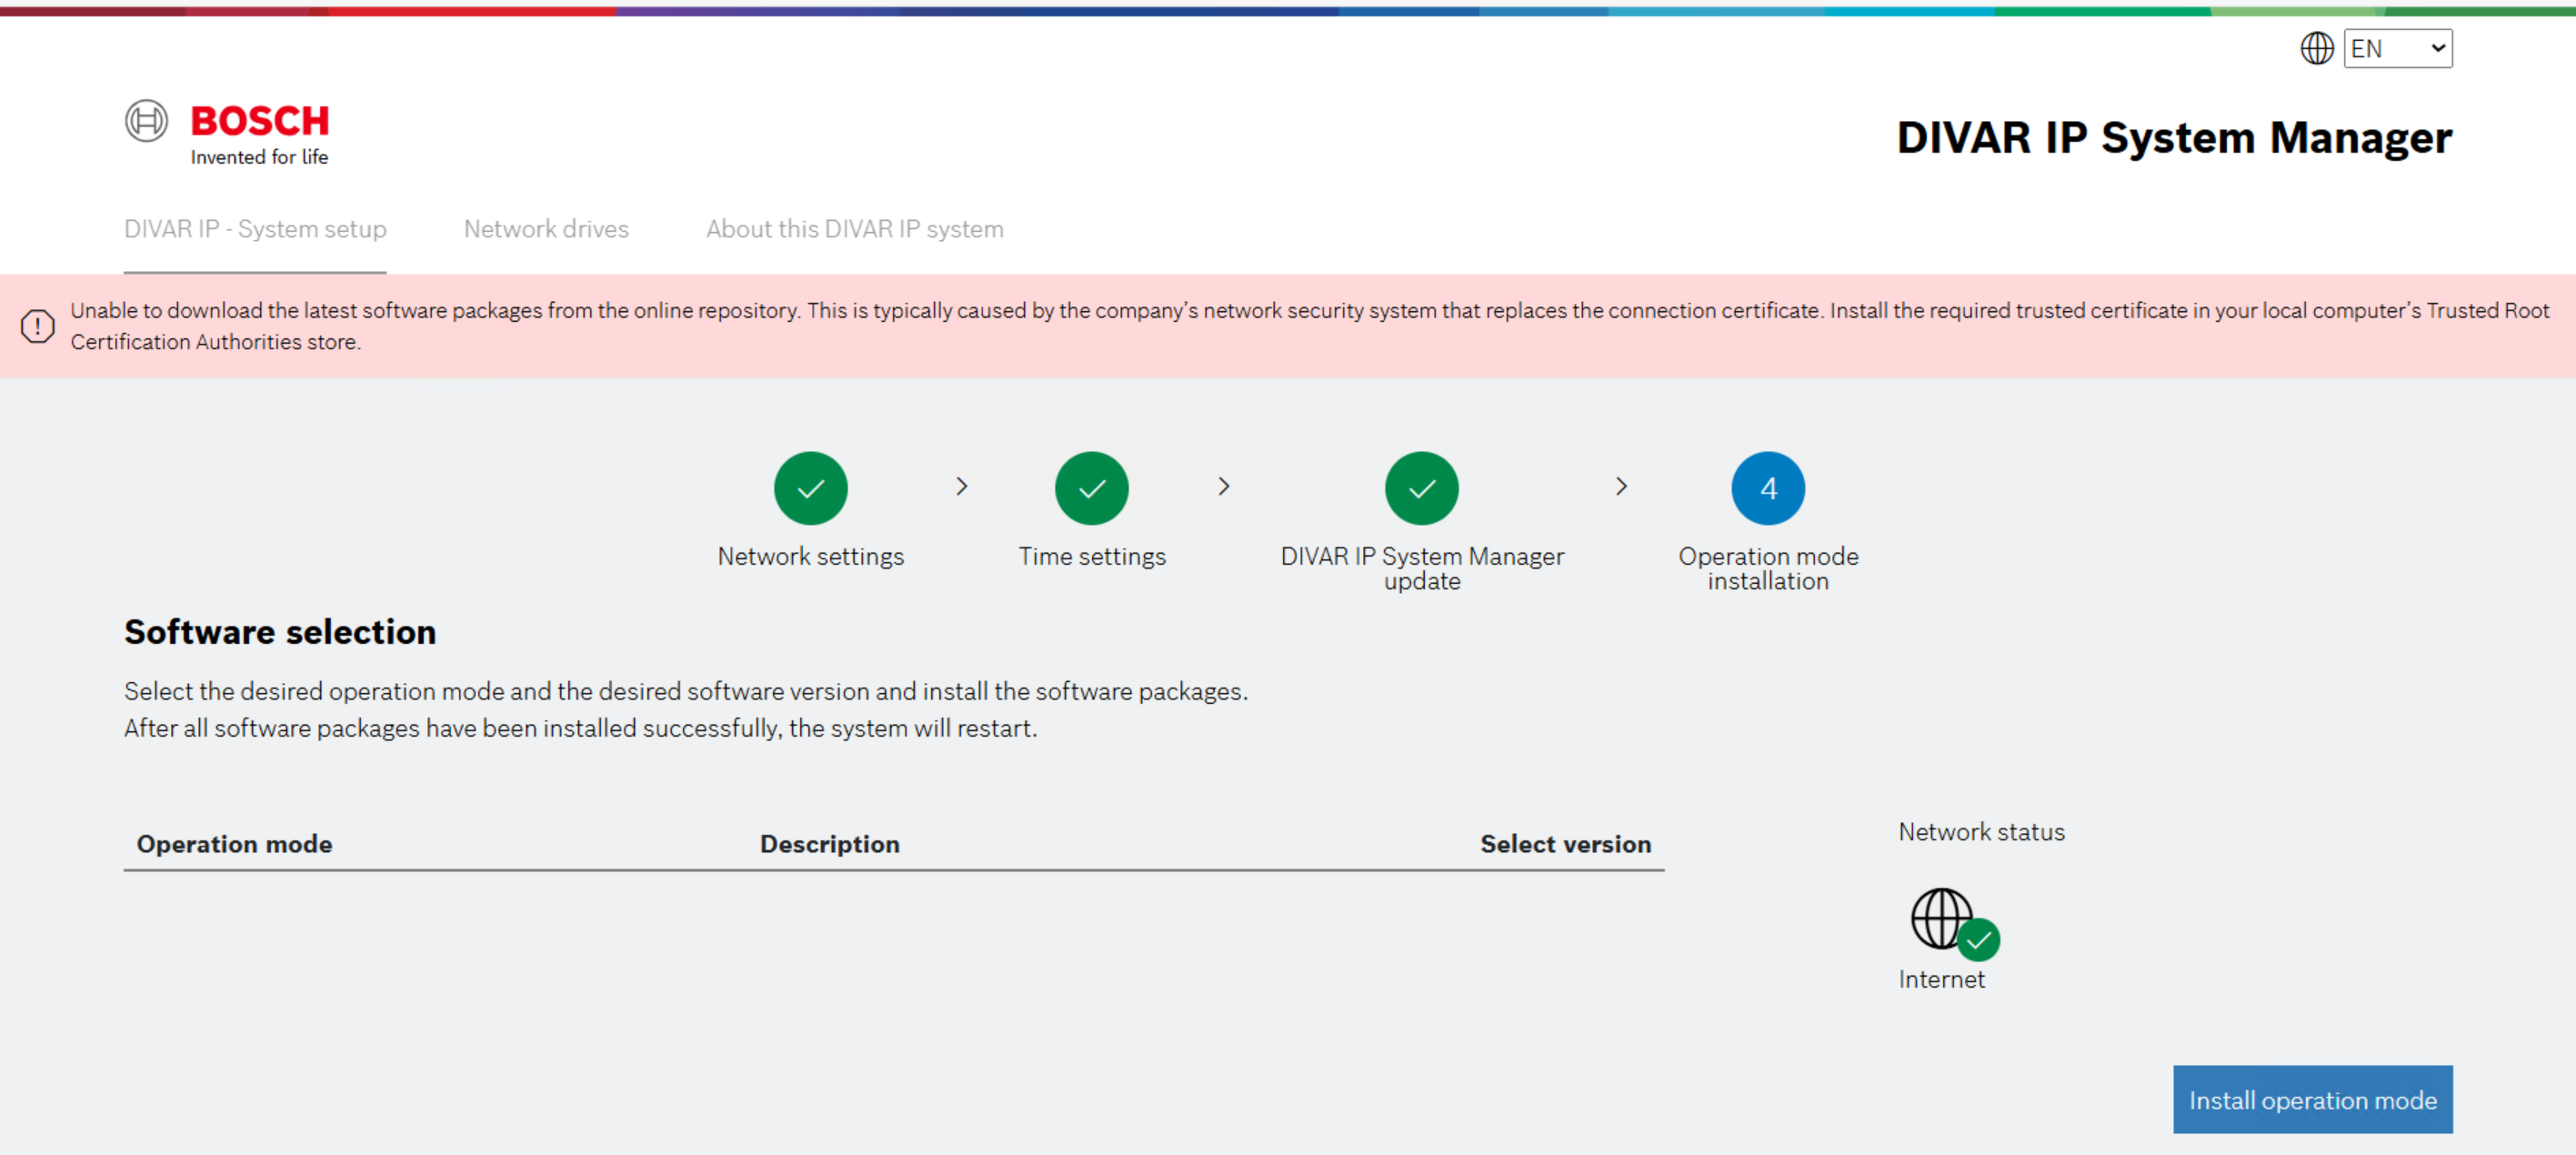
Certificate Validation Handling
If internet exists but secure connection fails:
A certificate error appears.
This usually indicates corporate SSL inspection.
Users should:
1. Contact IT
2. Install trusted certificate
3. Place it in:
Local Computer → Trusted Root Certification Authorities
4. Refresh the wizard
Error and Feedback System
The wizard uses banners to communicate status:
Blue banners: Informational guidance
Red banners: Errors requiring user action
Success banners: Confirm successful configuration
Error & Special Cases
Benefits of the New Setup Wizard
-
Simplified onboarding experience
-
Reduced configuration errors
-
Integrated update visibility
-
Built-in release documentation
-
Clear network diagnostics
-
Consistent installation workflow