
This article provides an overview of the steps required to configure License Plate Recognition (LPR) using the Configuration Client.
Step-by-step guide
Camera prerequisites
-
Supported camera models: CPP14.2 based IVA PRO license plate capable camera model, for example:
-
DINION 7100i IR
-
DINION 5100i IR
-
FLEXIDOME 8100i (IR)
-
FLEXIDOME 5100i (IR)
-
-
Firmware version: all firmware version >=9.40 are supported by BVMS 13.1 as all can deliver LPR and MMR data for BVMS further evaluation. However due to data security reasons, it is recommended to upgraded to the newest firmware (for example 9.80 issued in November 2025).
-
Required license: IVA PRO LPR or LPRX license activated on the camera. Just IVA PRO MMR (maker and model) is not sufficient as it does not deliver plate number data.
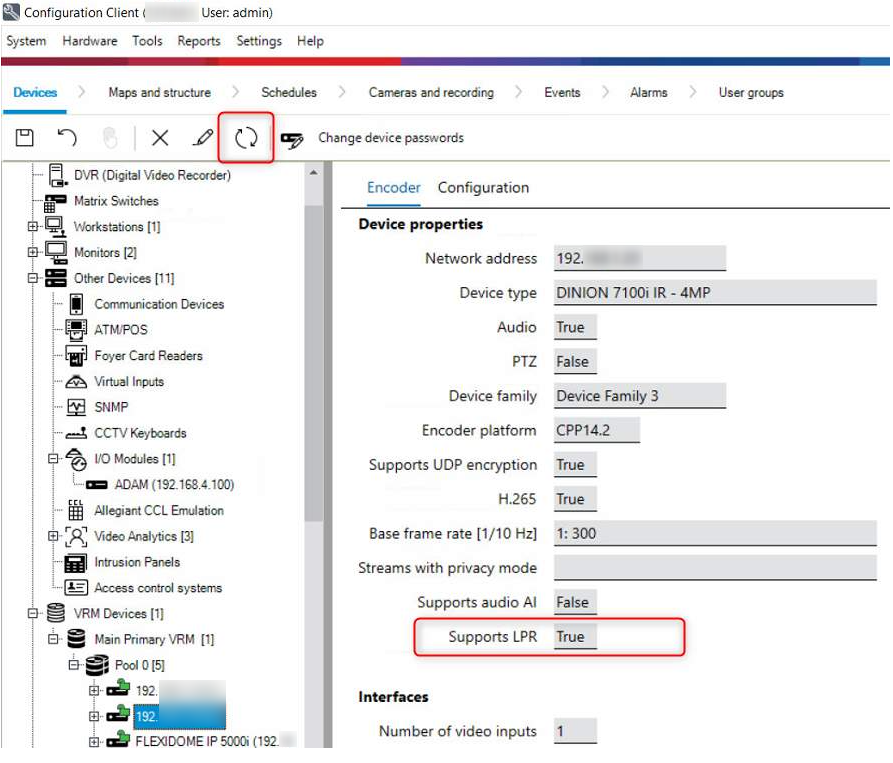
To verify whether the camera can deliver LPR data to BVMS:
-
Open the Configuration Client.
-
Select the camera and go to the Encoder tab.
-
Click Update Capabilities button.
-
Check the device property “Supports LPR”.
-
The value is True only when IVA PRO LPR or LPRX is activated on the camera.
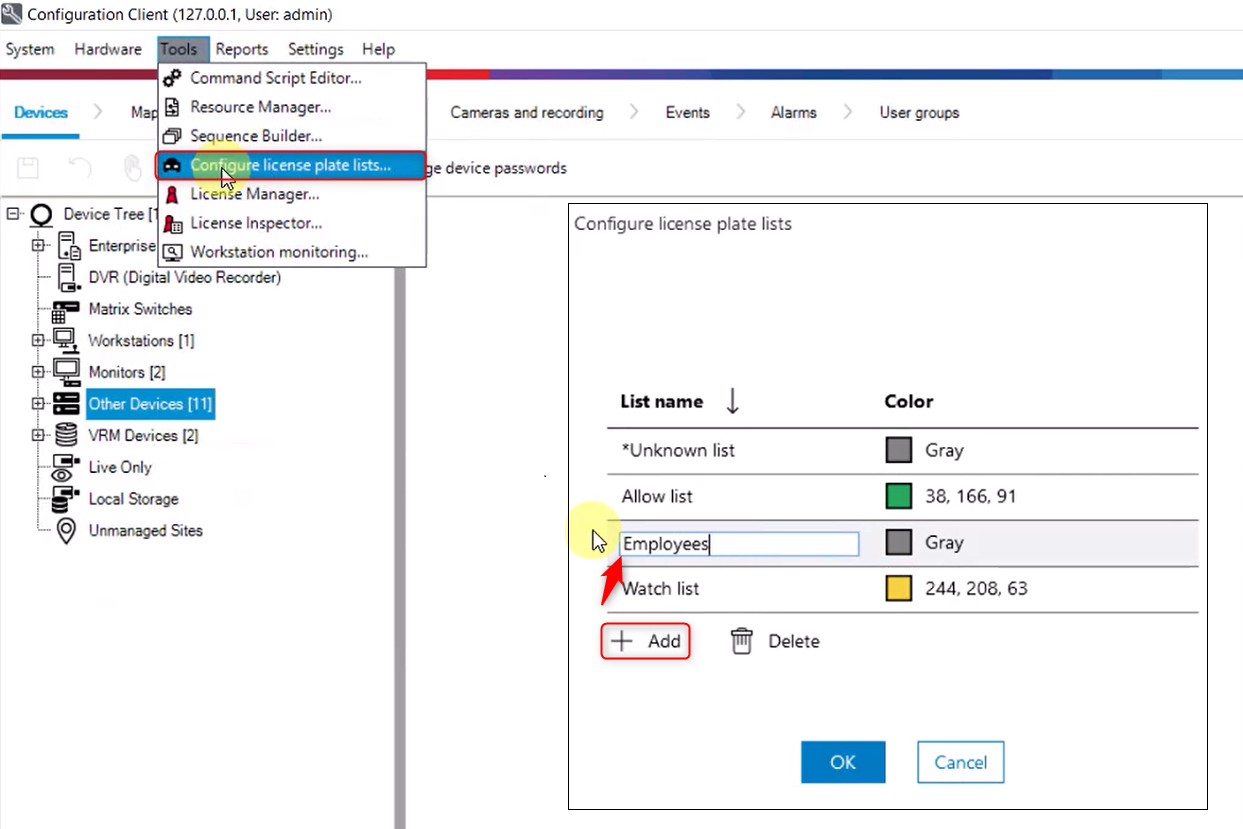
Configure license plate lists
-
Open Configuration Client, go to Tools and select Configure license plate lists.
-
In the Configure license plate lists window you can add and customize the lists.
Configure license plate verification criteria (matching logic)?
-
Open the Configuration Client, and navigate to Settings --> Options
-
In the Options window select License plate verification
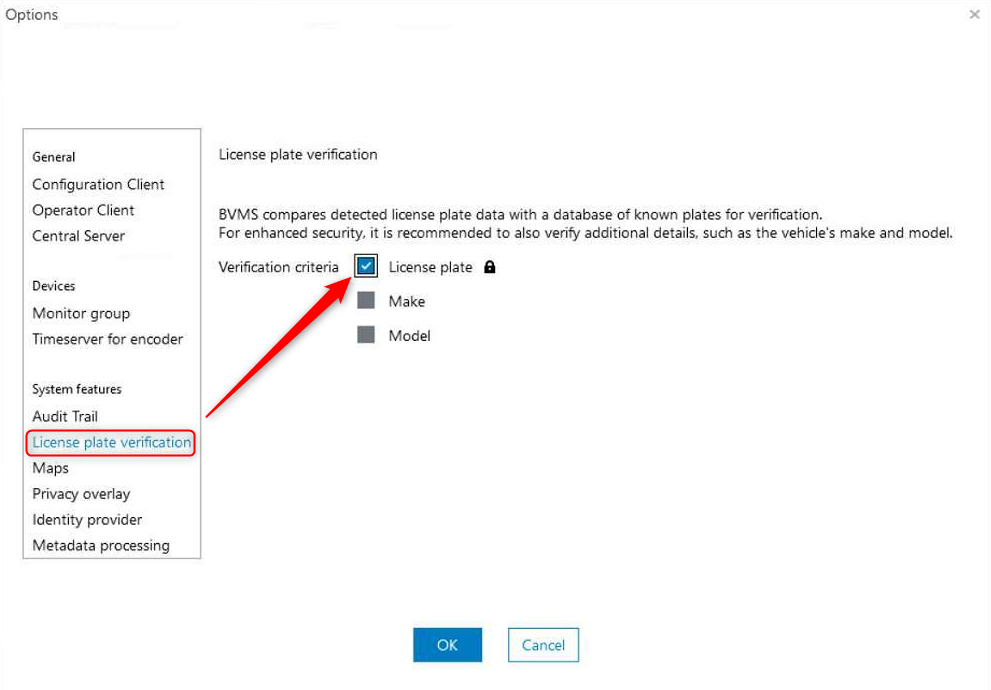
It is optional possible to verify on top of the plate the make and model of the car.
Note: This requires a related Make and Model IVA Pro license on the camera.
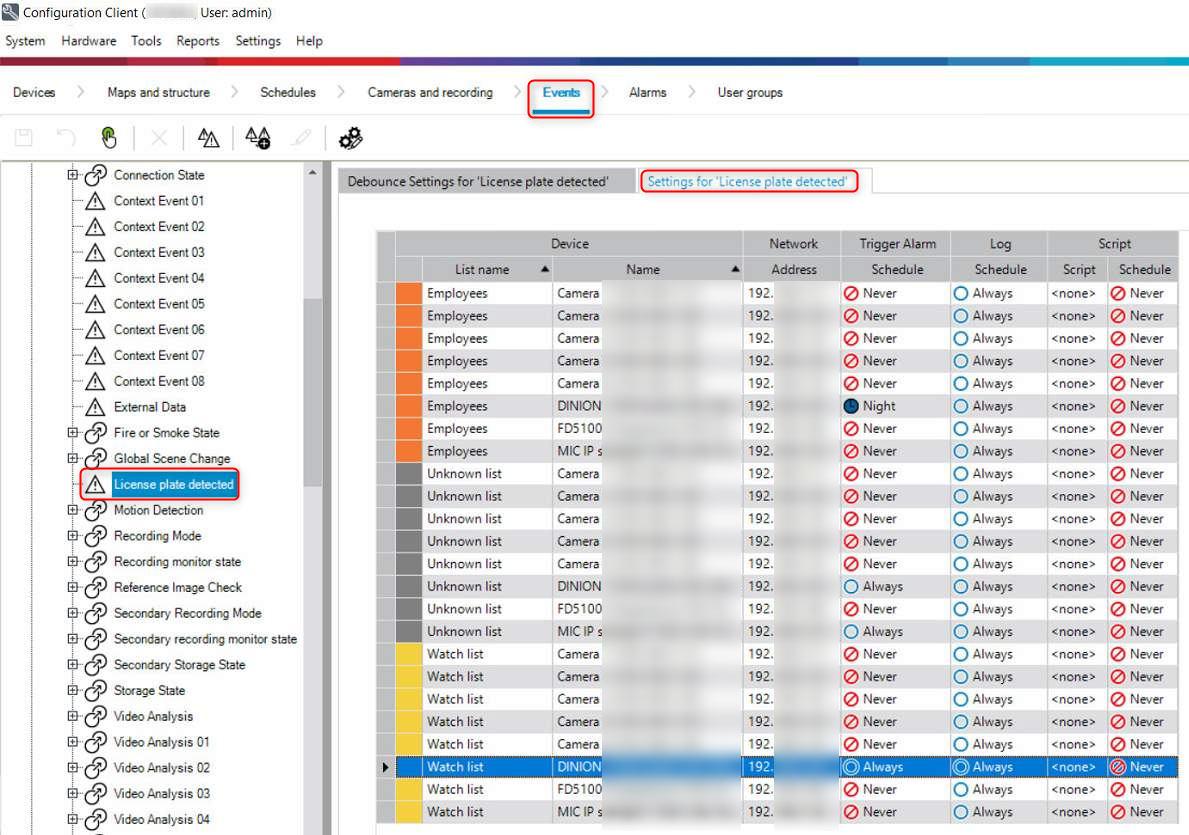
New Events and Alarms for LPR Management
For the License plate detected camera event:
-
Open the Configuration Client, navigate to Events and expand the Encoder section.
-
Then expand Camera section and scroll down to License plate detected
-
Select License plate detected
-
In the Settings for “License plate detected“ tab, configure the event behavior for each license plate list as desired.
For each previously created list the event behavior can be individually selected per LPR camera. By factory default all events are enabled to be written into the Logbook.
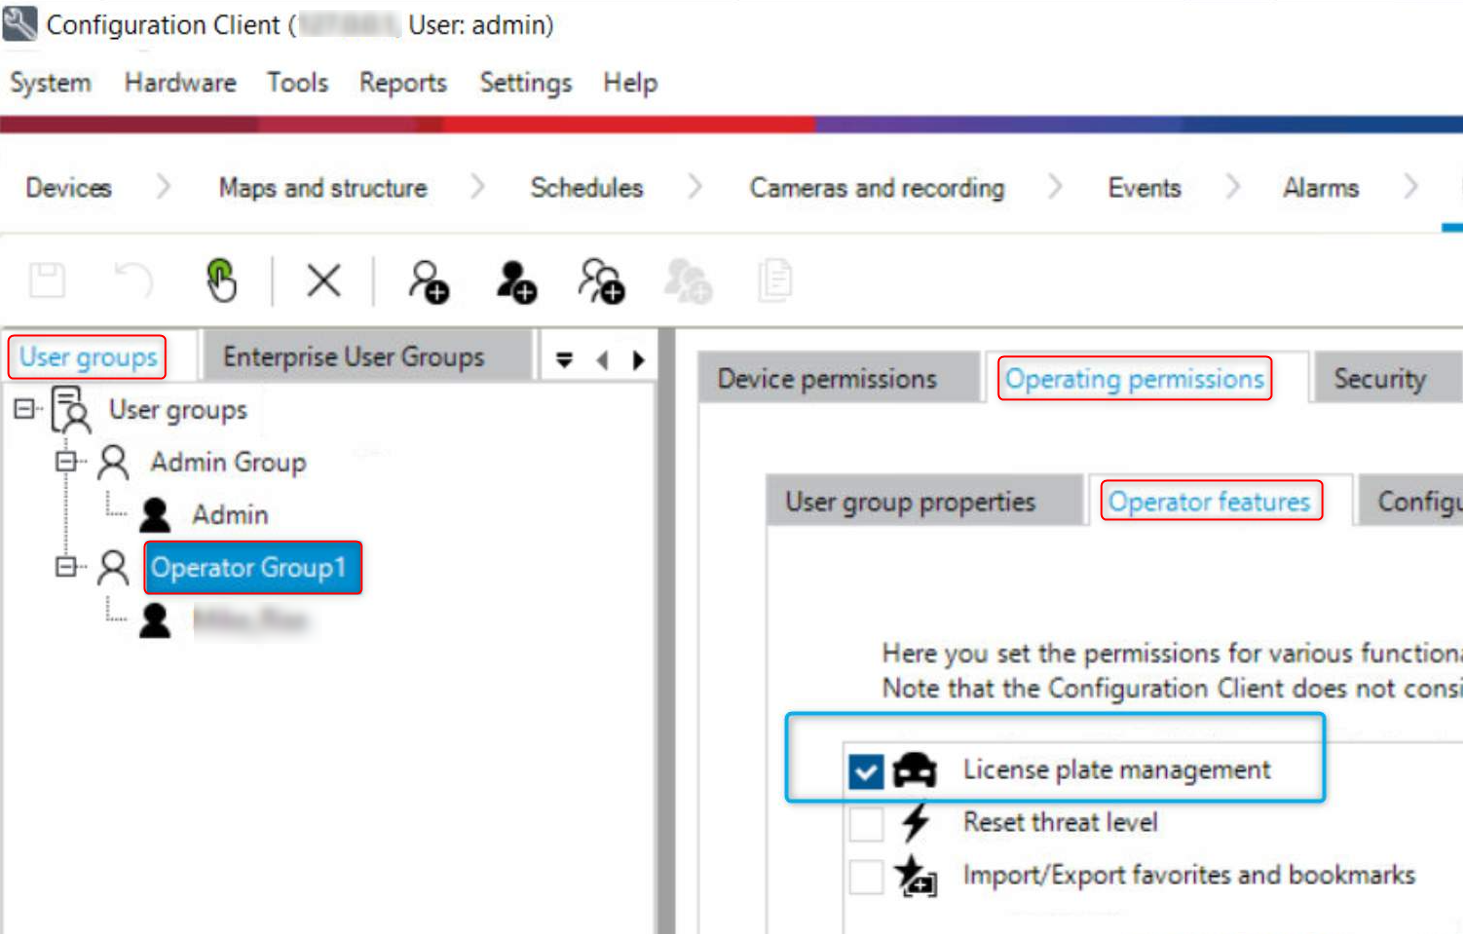
New permission on user group level
To set the new permission on user group level: License plate management:
-
Open the Configuration Client, navigate to User Groups and Select the Operator Group.
-
Go to Operating permissions, then select Operator Feature.
-
Scroll down to License plate management.
-
Check the License Plate Management box to enable the permission.
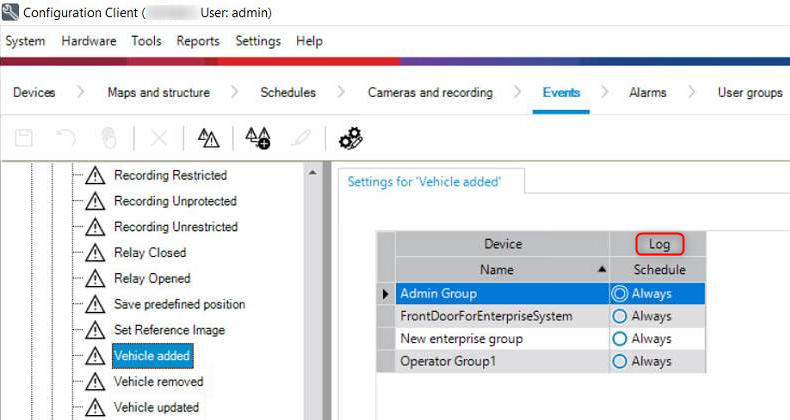
User actions in the Logbook and Configuration Changes visible in Audit trail
To configure how user actions are logged for an event, navigate to Events → System Devices → User Actions and select the required event.
Depending on the selected Log/Schedule option (Always, Never, Day, Night, etc.), the corresponding user action data will either be stored or omitted from the Operator Client Logbook.
The example below shows the “Vehicle added” event is configured to be logged Always for the selected user groups. In this case, all related actions are recorded in the Logbook and Audit Trail.
Also, adding, removing and updating license plates in the Operator Client actions are by default written to the BVMS logbook.
-
BVMS logbook example: New "Vehicle" events created when adding, removing or updating license plate data in the Operator Client.

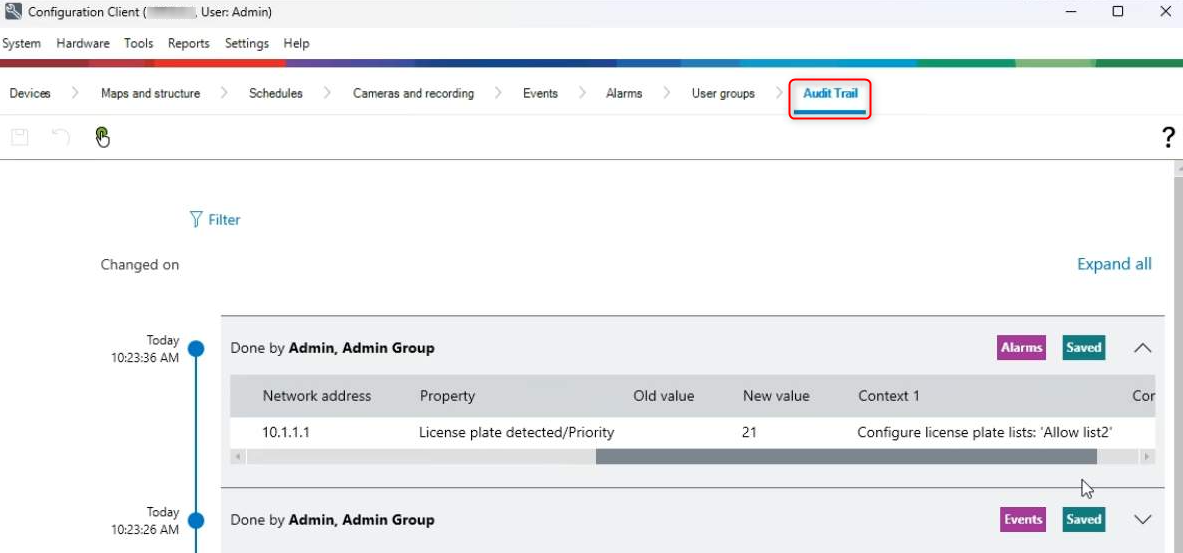
All changes in the Configuration Client related to the new LPR feature can be found in the Audit Trail database (when Audit Trail is enabled).
Nice to know: